Installing the wings on the fuselage – Great Planes Fokker Dr-1 60 ARF - GPMA1380 User Manual
Page 14
❏
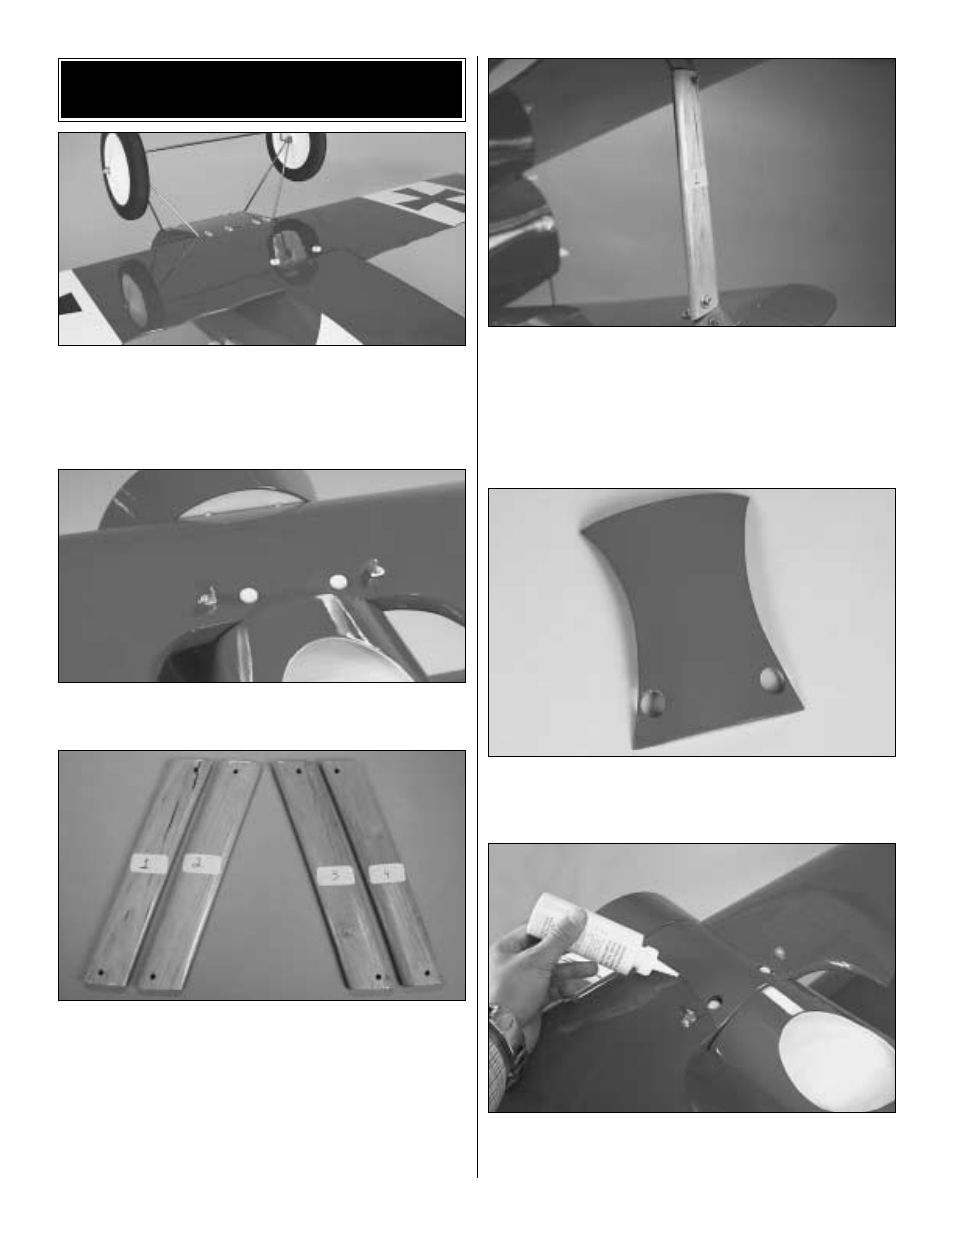
1. Install the bottom wing onto the fuselage using two 1/4-
20 x 2" [51mm] nylon bolts. You may need to slightly sand the
wing bolt holes on the bottom and mid wing so that the wing
bolt holes line up with the wing blind nuts. If you have to do so,
apply some thin CA to the holes to harden them up.
❏
2. Install the mid wing onto the fuselage using two
1/4-20 x 2" [51mm] nylon bolts.
❏
3. The struts now come numbered from the factory. You
do not need to number them. This is what determines where
each strut is installed. If you install your struts correctly, they
should line up easily. You may need to slightly sand the ends
of the struts so that they sit flush against the top or bottom
surfaces of the wings. Before you do so, you should check
for wing warps and correct them. Also, be careful not to
cross-thread the bracket’s threads with the strut bolts. The
struts should not deform the wings.
❏
4. Strut #1 is to be installed between the mid and bottom
wing on the right side of the airplane. Use two 4-40 x 3/8"
[9.5mm] socket head cap screws and two #4 washers to
install it as shown. The SHCS should go through the wood
strut and be threaded into the metal bracket. Install Strut #4
the same way between the mid and bottom wings on the left
side of the airplane.
❏
5. Locate the mid wing ABS cover. Trim the ABS to fit the
center section of the mid wing. Cut holes in the ABS to allow
access to the wing bolts.
❏
6. Position the ABS cover in place. Glue the ABS cover
to the mid wing using Formula 560 or a similar glue for
plastics that dries clear.
INSTALLING THE WINGS
ON THE FUSELAGE
14