Great Planes Extra 300S 1.60 ARF - GPMA1365 User Manual
Page 11
❏
5. Glue the landing gear cover in place with RTV silicone.
❏ ❏
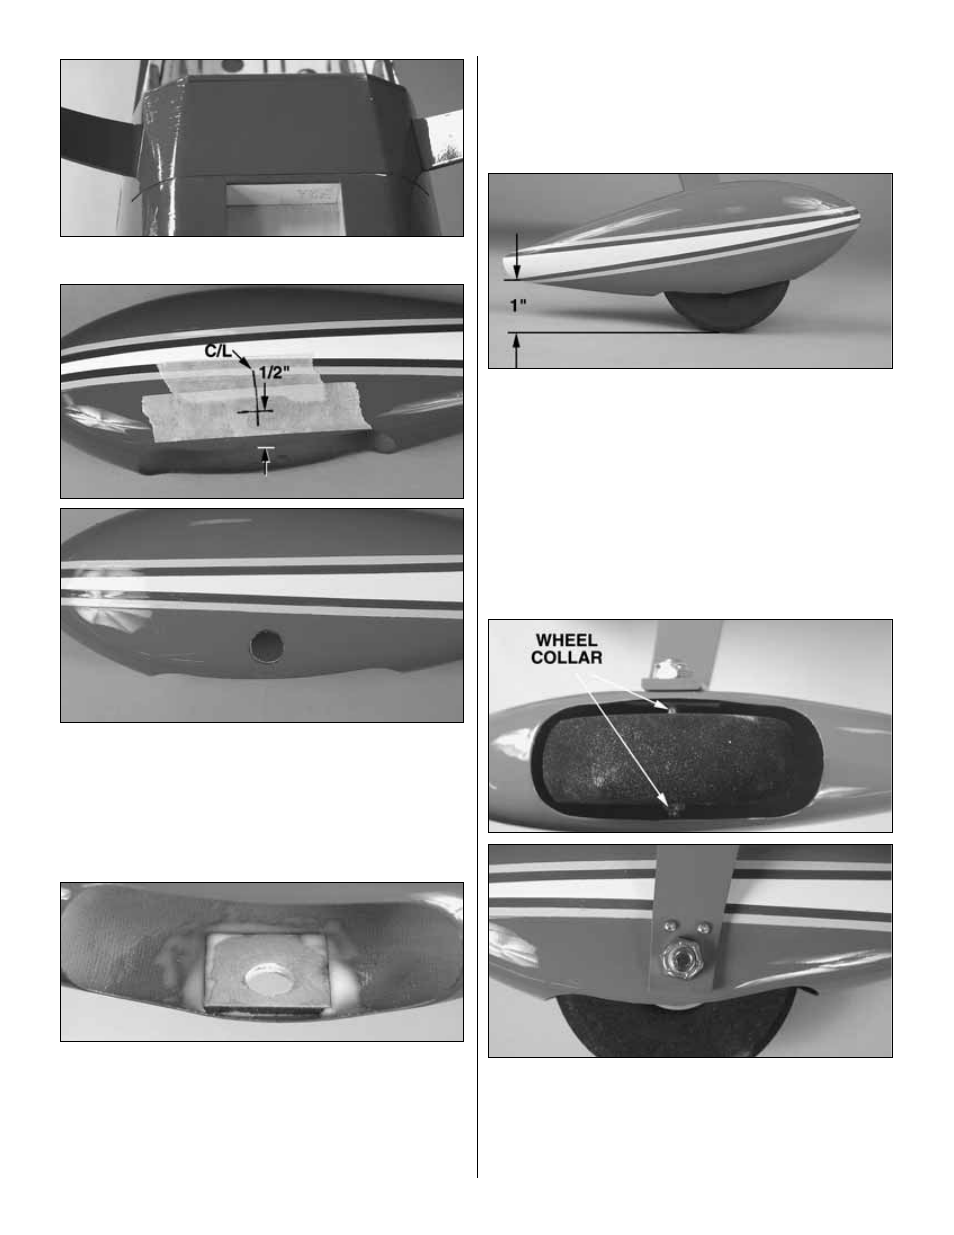
6. On one of the wheel pants place masking tape on
the side of the pant. Mark the center of the wheel opening
on the pant. On that centerline make a crossing line 1/2"
[13mm] from the bottom of the pant. Where the two lines
intersect make a 1/2" [13mm] hole in the side of the pant.
Do the same for the other wheel pant. Be sure to do this on
the opposite side making a right and left wheel pant.
❏ ❏
7. Where you have made the hole, sand the inside of the
wheel pant with 220-grit sandpaper. Then wipe the area clean
with rubbing alcohol. Glue one of the plywood wheel pant
mounting plates inside the pant with 6-minute epoxy mixed
with micro balloons. (The micro balloons will help thicken the
epoxy and prevent it from running excessively.) Clamp the
plate to the inside of the pant until the glue has cured.
❏ ❏
8. Install the axle and nut on each side of the
landing gear
❏ ❏
9. Using a high-speed motor tool and cut-off wheel, cut
the 2" [51mm] axle to a length of 1-7/8" [47mm].
❏ ❏
10. Temporarily slide the wheel pant and a wheel onto
the axle. Position the wheel pant so that the back of the pant
is 1" [25mm] from the top of your work bench. On the
aluminum landing gear there are two small holes. With the
wheel pant properly positioned mark the hole locations onto
the wheel pant.
❏ ❏
11. Remove the wheel and pant from the axle. Drill a
1/16" [1.6mm] hole though the marks you made on the
wheel pant. Install and then remove a #2 x 3/8" [9.5mm]
screw into the holes. Apply a drop of thin CA into the holes
and allow the glue to cure.
❏ ❏
12. Install a 6-32 x 1/4" [6mm] socket head cap screw into
two 5-32" [4mm] wheel collars. Install the wheel pant and the
wheel with a wheel collar on each side of the wheel, onto the
axle. Tighten the wheel pant to the aluminum landing gear by
installing a #2 x 3/8" [9.5mm] screw into the holes in the landing
gear and the holes you drilled in the wheel pant.
11