Great Planes ElectroStreak Sailplane Kit - GPMA0385 User Manual
Page 8
D 15. Trim and sand the balsa triangles even with the
front of the fuse sides.
D 16. Sand off the bottom triangles even with the bottom
edge of the fuse sides.
D 17. Glue the remaining two 1/2" x 24" balsa triangles
to the fuse sides along the top edge, beginning at the front
edge of F-4, and extending to the aft end of the fuselage.
NOTE: Sand the front end of the balsa triangles to an angle
so they line up with the front edge of F-4. NOTE: The
triangles extend into the stabilizer saddle area and will later
be sanded even with the stab saddle.
D 18. Trim and sand the balsa triangles even with the aft
end of the fuse sides.
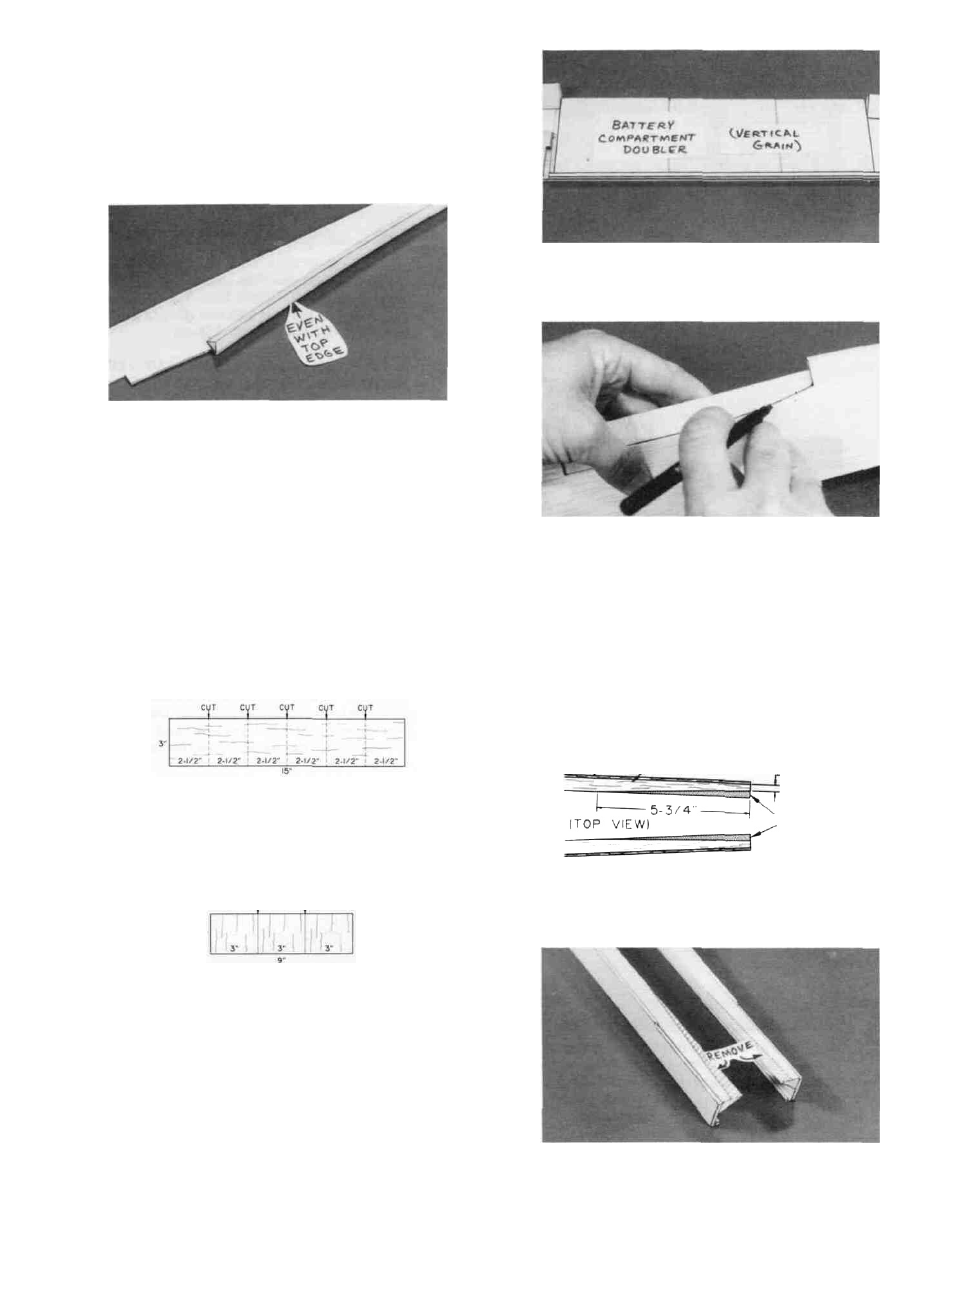
D 19. Find the two 1/16" x 3" x 15" balsa sheets. Select
the sheet that has the softest balsa, and use it in the next steps.
D 20. Using an Xacto knife and a straightedge, cut the
1/16" x 3" x 15" balsa sheet into 6 pieces, each having a length
of
2-l/2".
D 23. Trim the ends of the battery compartment doubler
to fit between the rear of F-3 and the front of F-4.
D 24. Mark the outline of the wing saddle on the battery
compartment doubler, then trim the doubler to this outline
using an Xacto knife.
D 25. Glue the doubler to the fuse side in the following
manner: apply thick CA to the doubler, press the doubler in
place, then apply thin CA around the edges.
D 26. Repeat steps 21-25 to make and install the other
battery compartment doubler.
D 21. Edge glue three of these pieces together to make
the battery compartment doubler.
GLUE GLUE
2-1/2-
D 22. Sand smooth, and sand one long edge straight,
using your T-bar.
-FUSE SIDE
—1/2" TRIANGLE
1/4"
REMOVE THIS
PORTION
D 27. At the aft ends of the fuse sides, sand the triangles
to a taper as shown in the sketch and photo. This will enable
the tail end to be pulled together and will provide a strong
base for the stabilizer and fin.
8