Great Planes ElectroStreak Sailplane Kit - GPMA0385 User Manual
Page 24
D 3. Beginning at the trailing edge, lay the glass tape in D
place on the wing. Gently press the cloth in place, working
out all the wrinkles. The "77" spray adhesive should hold the
cloth down to the surface, but will permit you to lift and
reposition the cloth if you make a mistake. Keep working
forward along the top of the wing, around the leading edge,
and along the bottom of the wing, ending at the trailing edge. D
It is not necessary to wrap the glass cloth around the trailing
edge.
D 4. Working outdoors or in a very well-ventilated
area apply thin CA glue to the glass cloth. Begin by running
a bead of glue down the center of the glass cloth strip, then
continue applying the glue in lines until all the cloth has been D
secured. Run the thin CA out 1/4" beyond the edges of the
glass cloth to help protect the balsa sheeting when sanding
later. WARNING: This operation produces a larger than
normal quantity of CA fumes, so adequate ventilation is
a must!
D 5. Inspect the surface of the glass cloth. If any areas
are not glued down, apply a couple more drops of CA glue
and press down with a piece of waxed paper until the glue
sets.
D 6. To make sure the glass cloth is fully "wetted out"
and bonded to the balsa, you may apply more thin CA, a few
drops at a time, and spread it out with a piece of waxed paper.
D 7. After the glue has set, trim the excess cloth at the
trailing edge with a sharp Xacto knife.
D 8. Carefully sand the edges of the glass cloth with a
T-bar sander with 80 or 100-grit sandpaper. Also, lightly
sand the surface of the glass cloth to remove any rough spots.
2. Find the 3/16" diameter x 2-3/8" hardwood
dowel. Chamfer the ends slightly with sandpaper. Trial fit
the dowel in the hole, sanding slightly if necessary for a good
fit. Do not glue the dowel In place until after the wing has
been covered.
3. Lay some heavy paper in the wing saddle (to
simulate the foam wing seating tape which will be installed
later. Then trial fit the wing in the saddle. Sand the saddle
if necessary until the wing is level. You can check this by
standing behind the airplane and observing the position of
the wing in relation to the stabilizer.
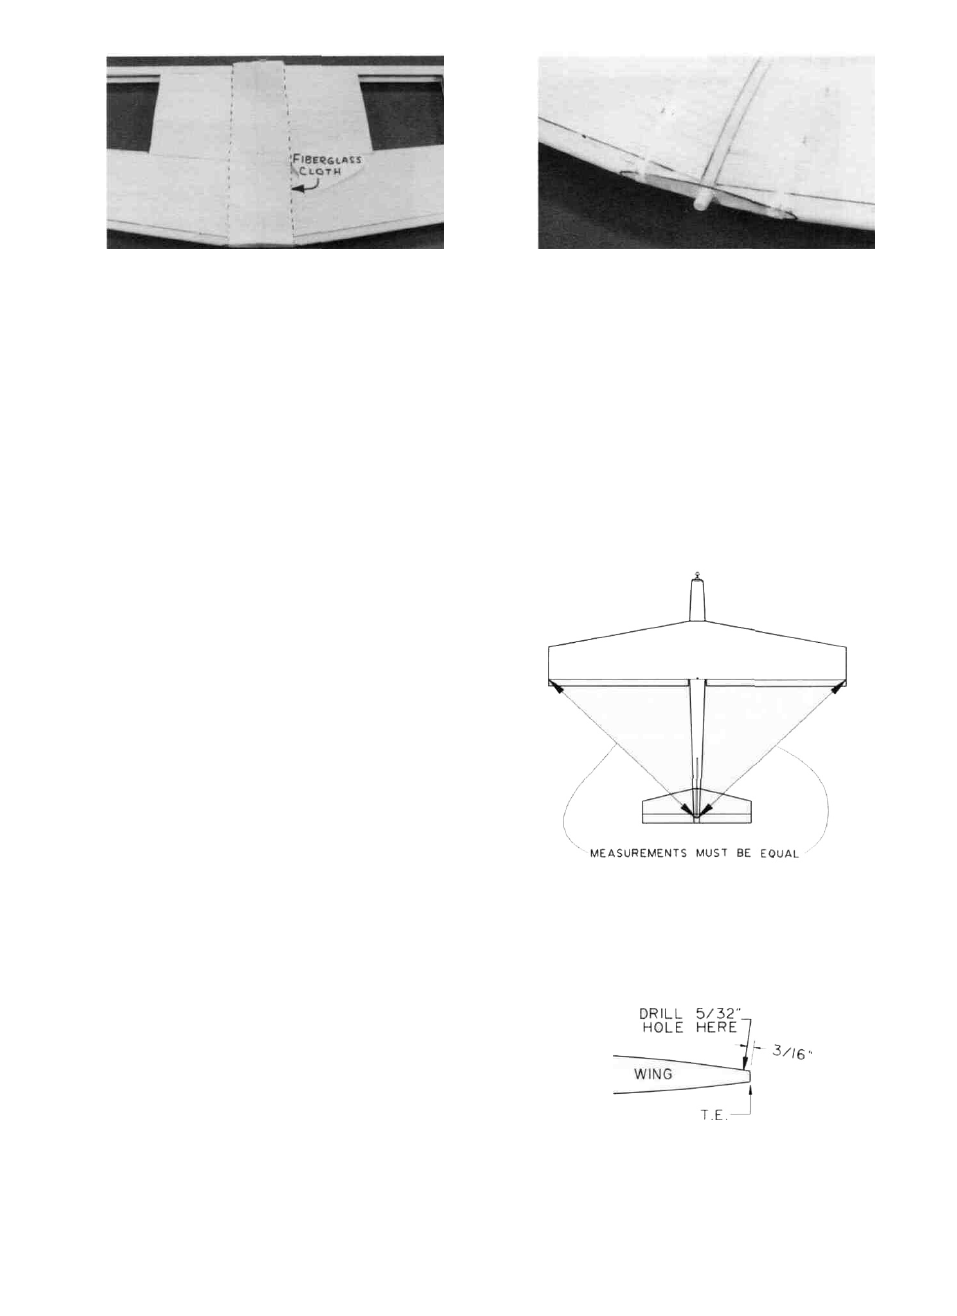
4. Measure from the rear comers of both wing tips to
the fin TE, and adjust the position of the wing until the
measurements are equal. Holding the wing in this position,
make a reference mark on the wing TE in line with your fuse
centerline mark at F-4.
D 5. On the top of the wing, mark the location of the
hold-down bolt hole, 3/16" forward of the TE.
MOUNT WING TO FUSELAGE
D 1. Using an Xacto knife, cut away the fiberglass from
the wing dowel hole.
24