Bottom of wing – Great Planes FlyLite EP Slow Flyer ARF - GPMA1107 User Manual
Page 17
17
BALANCE RANGE
Align with wing leading edge
Align with wing leading edge
2-7/8" [73mm] from wing leading edge
2-1/8" [54mm] from wing leading edge
BALANCE RANGE
2-7/8" [73mm] from wing leading edge
2-1/8" [54mm] from wing leading edge
BOTTOM OF WING
❏
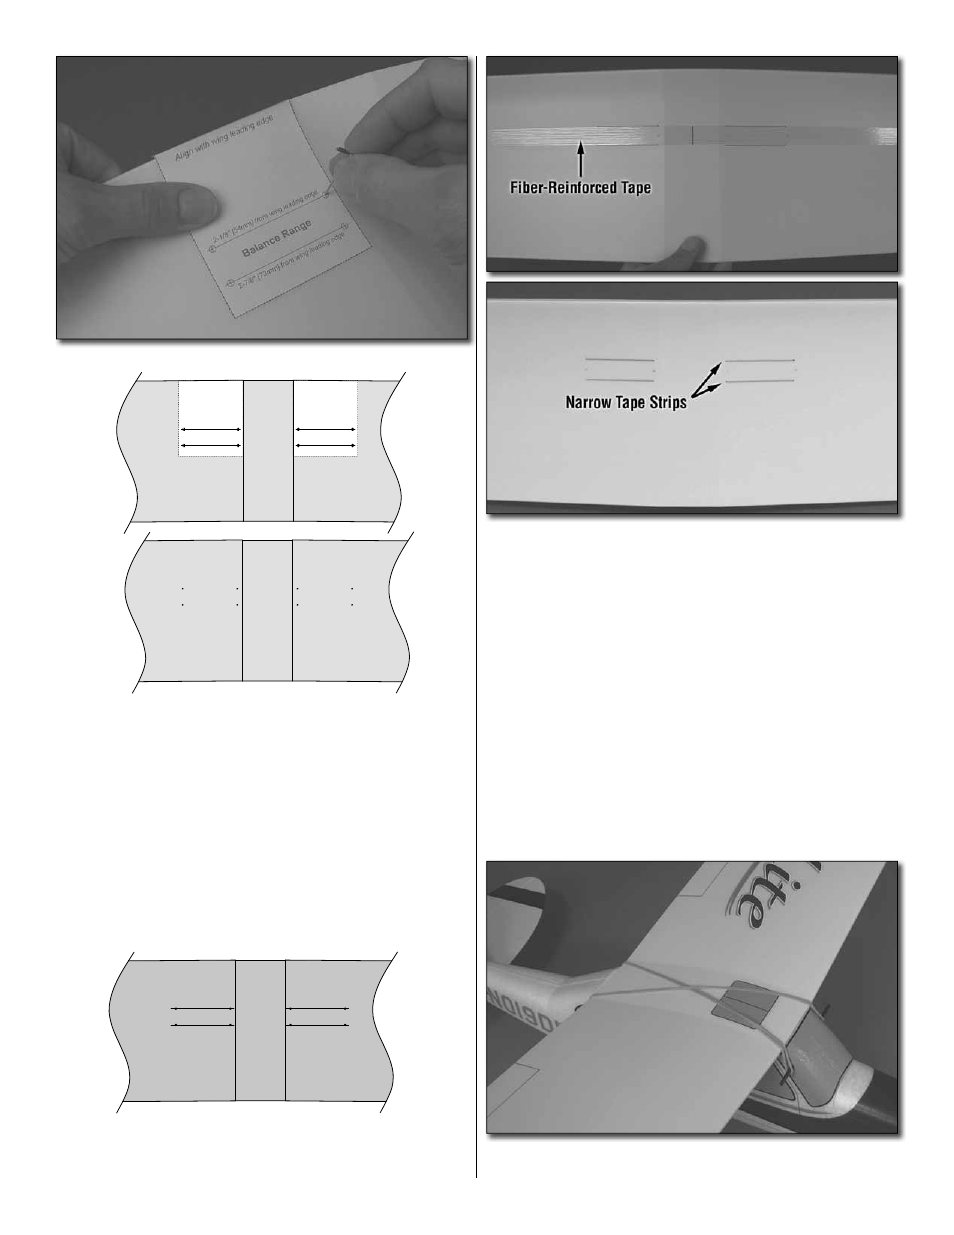
2. Cut the C.G. Marking Guide from the back of the
manual along the dashed lines. Then fold the guide along
the solid line at the front where shown. Place the guide on
the bottom of one half of the wing next to the bend over the
fuselage. Align the front of the template with the leading edge
of the wing. Use a fi ne-point ballpoint pen or a pin to poke
small dimples through the four cross marks into the wing.
Note: The C.G. range is 2-1/8" [54mm] to 2-7/8" [73mm]
from the leading edge of the wing and can also be marked
with a ruler if the templates get misplaced.
❏
3. Move the marking guide to the other half of the wing
and make another set of marks.
❏
4. Use a straightedge and a fi ne-point felt-tip pen to draw
the C.G. range lines on the bottom of the wing connecting
the sets of marks.
❏
5. If you still need to add the fi ber-reinforced tape to the
bottom of the wing for outdoor fl ying or aggressive indoor
fl ying, cut a 24" [610mm] strip of the included fi ber-reinforced
tape and add it to the bottom of the wing centered between
the lines marked in the previous step. If not adding the fi ber-
reinforced tape, instead apply narrow strips of pin striping
tape or masking tape over the lines so you will be able to feel
them with your fi ngers when balancing the plane later. Note:
If you are an experienced pilot and will be intentionally
abusing your FlyLite by fl ying it as aggressively as you can,
cut the remaining piece of reinforced tape in half. Apply these
strips to the bottom of the wing 1" [25mm] ahead of and 1"
[25mm] behind the fi rst strip.
Now your FlyLite should be ready-to-fl y with everything
in place including the servos, pushrods, receiver, ESC
and propeller.
❏
6. Install the battery (no need to connect it to the ESC) and
the battery hatch. Mount the wing with two rubber bands.