Get the model ready to fly prepare the wing – Great Planes FlyLite EP Slow Flyer ARF - GPMA1107 User Manual
Page 15
15
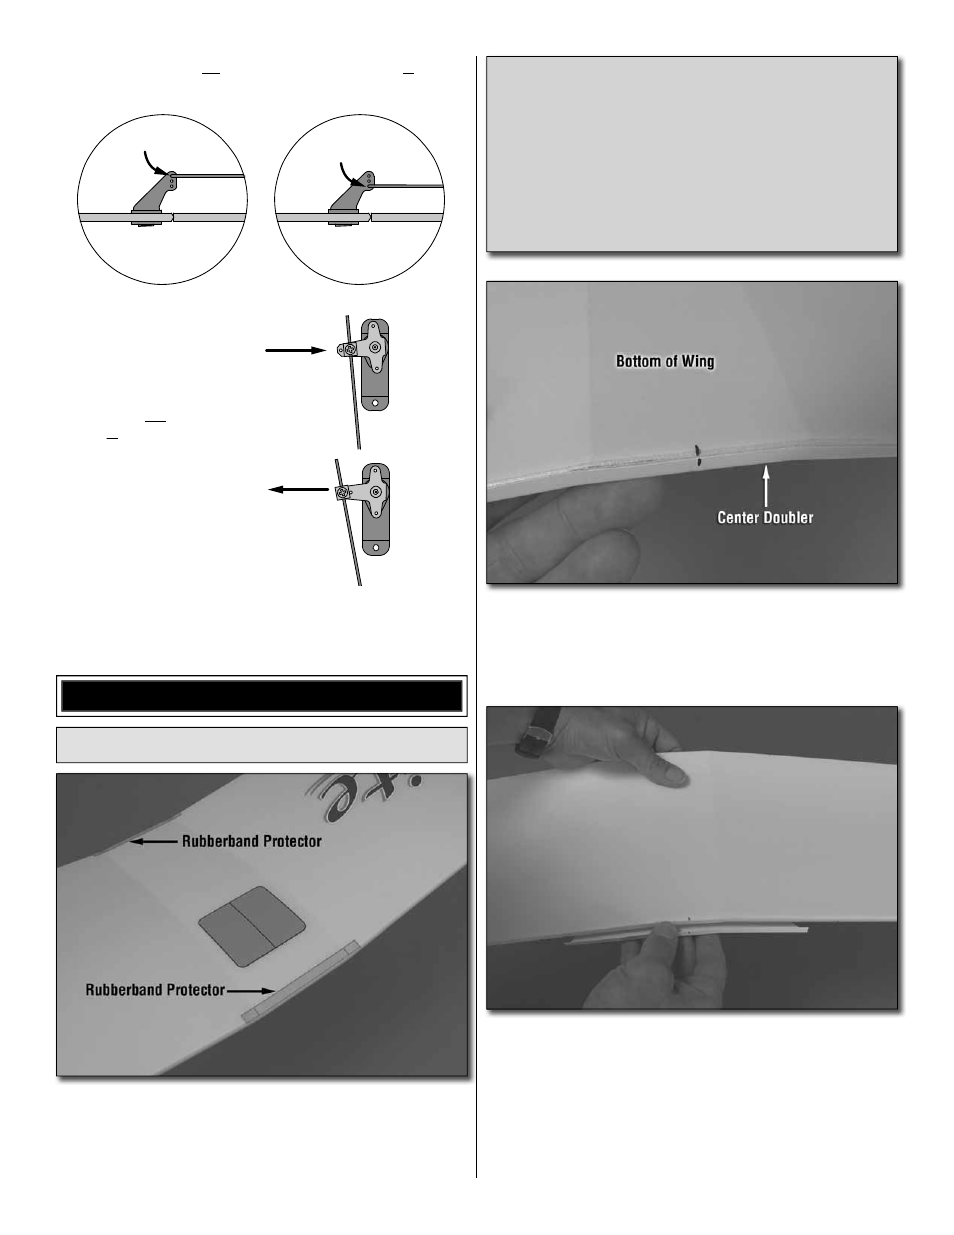
More throw
Less throw
Move the pushrod out on
the control surface to
reduce control throw.
Move the pushrod in on
the control surface to
increase control throw.
On the servo end, move the
pushrod out to increase throw
or in to decrease throw.
Less throw
More throw
❏
5. Check and if necessary, adjust the rudder throw the
same way so it is within 1/8" [3.2mm] of the specifi ed throw.
GET THE MODEL READY TO FLY
Prepare the Wing
❏
1. If fl ying the FlyLite indoors, remove the protective
backing from the adhesive on the rubber band protectors
and apply them to the top of the wing centered over the
leading and trailing edges. Proceed to “Balance the Model
(C.G.)” on the next page.
Optional: Add the Wing Center Doubler. If fl ying the
FlyLite outdoors, or if fl ying more aggressively in large
indoor sites where higher throttle settings may be used
more often, do not use the rubber band protectors. Instead,
the formed wing center doubler and fi ber-reinforced tape
must be added to the wing as they increase strength.
The center doubler is adhered to the top of the wing with
aggressive double-sided adhesive tape, so once installed
it is permanent. Follow these instructions to apply the
center wing doubler and fi ber-reinforced tape.
❏
2. Before removing the protective backing over the double-
sided tape on the bottom of the center doubler, test fi t it onto
the wing. Use a fi ne-point felt-tip pen to mark the center of
the doubler and the wing at the trailing edge. This will be a
reference mark for aligning the doubler in the next step.
❏
3. Peel off the protective covering from the tape on the
back of the center doubler. Then join only the back edge
of the doubler to the top of the wing by holding them upside
down and aligning the marks.