Final control set up, Center the control surfaces, Check the control direction – Great Planes FlyLite EP Slow Flyer ARF - GPMA1107 User Manual
Page 13
13
FINAL CONTROL SET UP
Your FlyLite is nearly complete, but fi rst there a few last-
minute procedures.
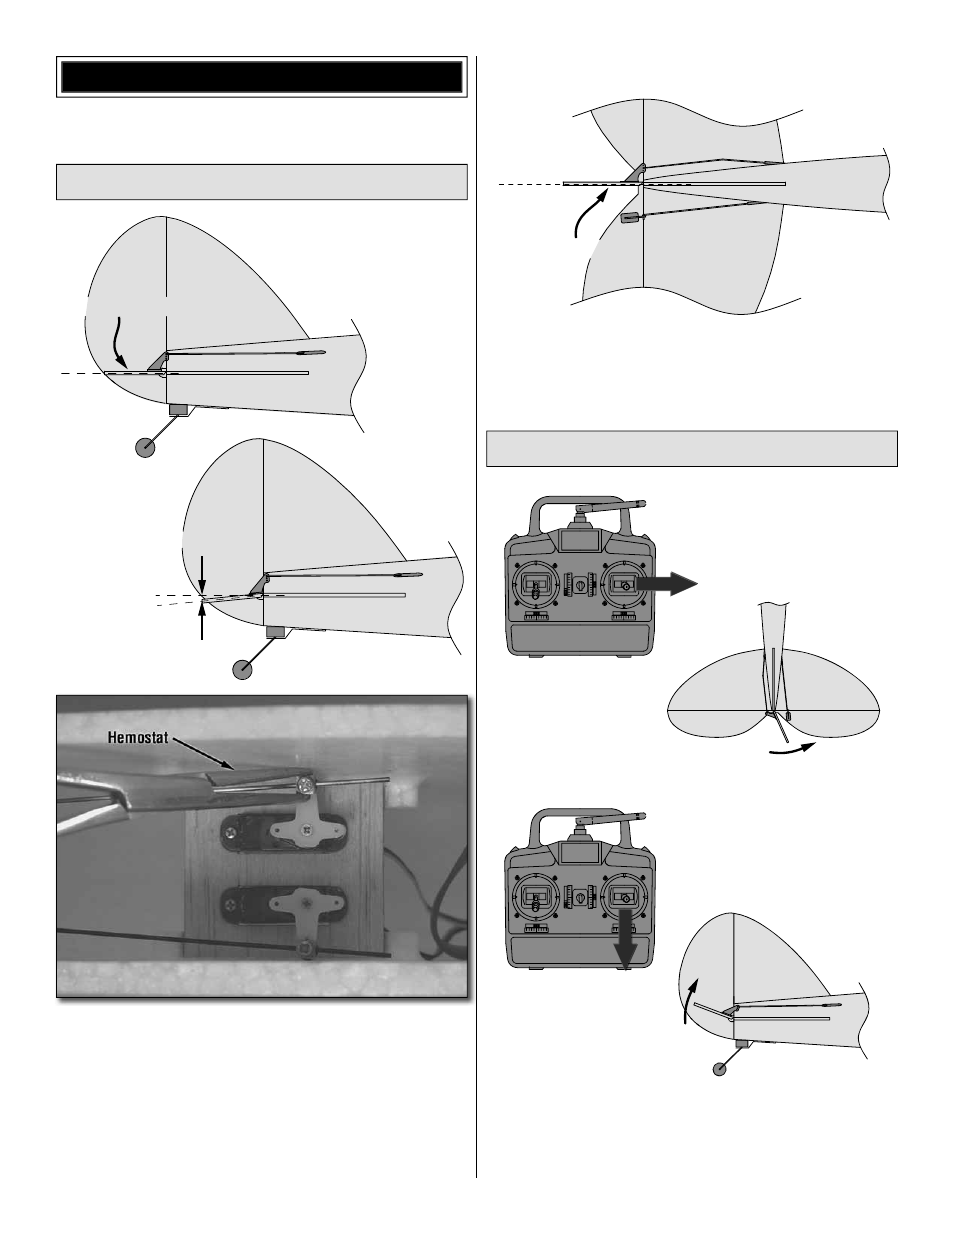
Center the Control Surfaces
INDOOR SETUP
Centered/Neutral
Down Trim
3/16"
[4.8mm]
OUTDOOR SETUP
❏
1. Turn on your transmitter and connect the battery to the
ESC in the plane. Being certain the trims on your transmitter
are still centered, center the elevator. Then use needle-nose
pliers or hemostats to hold the screw-lock connector while
tightening the screw to lock the pushrod down. Note: If
fl ying your FlyLite outdoors, rather than having the elevator
centered, it should have approximately 3/16" [5mm] of down
trim. This will allow your FlyLite to fl y level when fl ying at
faster speeds typically used outdoors.
Centered/Neutral
❏
2. Same as was done in the previous step for the elevator,
center the rudder and tighten the screw in the screw-lock
connector to lock the pushrod down.
Check the Control Direction
Move control stick right
Rudder moves right
Pull control stick back
Elevator moves up
❏
Operate the controls on the transmitter to make certain
the elevator and rudder respond in the correct direction. If
necessary, reverse the servo reversing in your transmitter to
get the controls to respond the right way.