Great Planes Bench Topper - GPMR8500 User Manual
Page 2
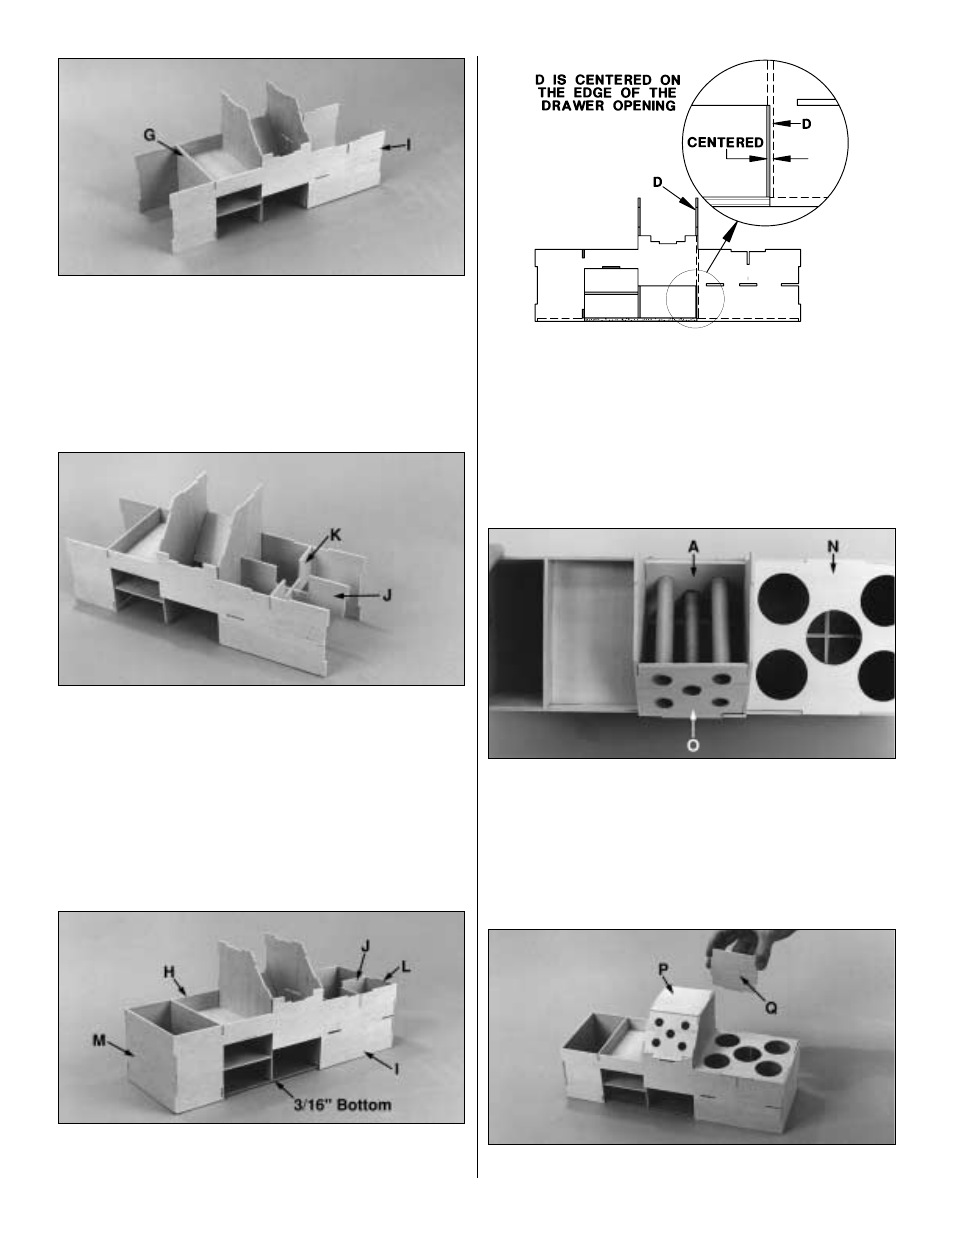
❏
Fit the front I to the assembly. Glue I only to G at this time.
❏
Fit J and K together, then install but do not glue them to
the assembly. Glue the left side L
(see the following photo),
to J, H and I and then the right side M to H and I.
❏
Fit the 3/16" bottom to the assembly, then glue it only to
H, I, L and M (back, front and sides).
❏
Adjust D so it is centered on the edge of the opening for
the large drawer. Glue D to I in this position. Glue all other
joints not previously glued.
Note: Some modelers have the need for additional storage
for tools like hex wrenches, screwdrivers, etc. Glue 2 or
more of the circular pop-outs of the epoxy storage area in
place. Then drill 1/8" or larger holes through part “N” to
allow the tools to be inserted.
❏
Test fit, then glue N in position. Accurately cut the paper
tubes in half. Fit but do not glue the paper tubes through the
holes in O so the “square end” (the end cut by the factory),
will be at the bottom and contact A. Adjust the paper tubes
so they are perpendicular to O and A and are parallel to
each other. Glue the paper tubes to O and A and then Glue
O into position.
❏
Glue P, then Q in position.