GME GR100 User Manual
Page 11
Page 11
GR100
Instruction Manual
MOUnTInG THe Gr100
the GR100 is designed to be mounted in several different ways to enable it to be
installed in the most convenient position . the GR100 is designed to meet IP55
standard (
Refer: www .gme .net .au/IPRatings/IPRatings .html
) . a location should be selected
which provides the best viewing angle for the display . For best results select a location
that is free from excessive vibration and continuous direct sunlight .
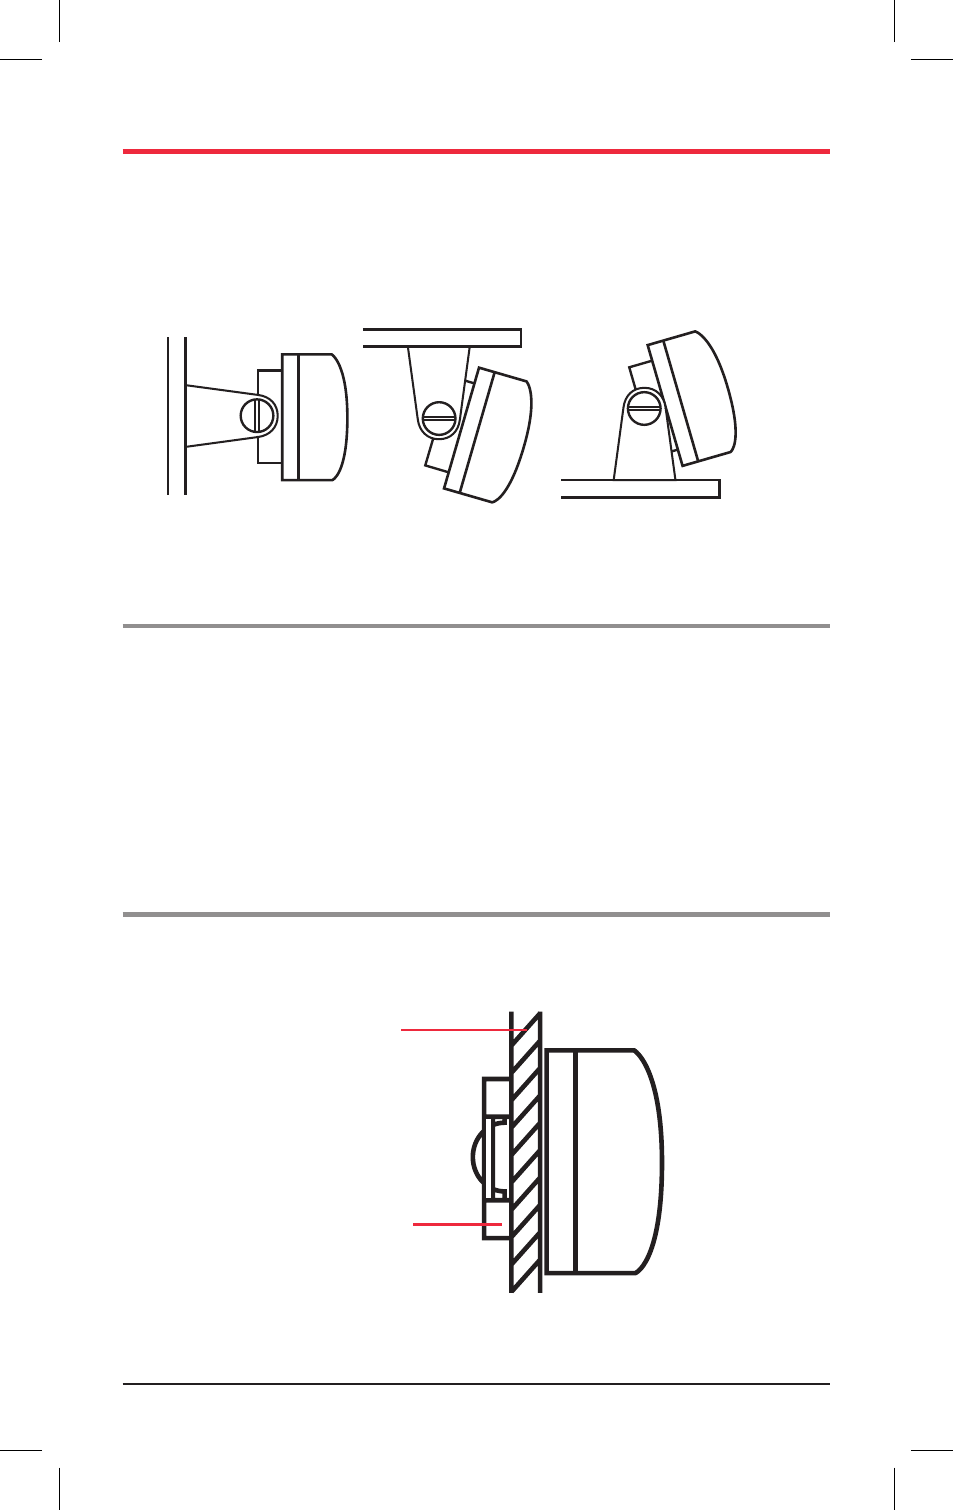
Upright or Overhead Mounting.
Position the mounting bracket onto the GR100 so that the mounting holes in the
bracket align with those on the side of the unit, and fit the gimbal knobs . temporarily
position the bracket in the desired location and roughly mark the bracket edges . Now
remove the unit from the bracket and reposition the bracket to mark the mounting
holes . screw or bolt the bracket into position . the mounting method will depend on
the surface to which the bracket is being attached . Refit the GR100 to the bracket and
adjust the unit to the correct position before tightening the gimbal knobs .
Complete the antenna lead and electrical wiring as described later .
Flush Mounting
If you require to flush mount your GR100 we recommend the MK100 flush mounting
kit designed especially for the purpose . Instructions and a mounting template are
included with the kit .
Panel Mount
Overhead Mount
upright Mount
Panel
Bracket
GR100