GME G142FD User Manual
Page 6
PA G E 6
I N S T R U C T I O N M A N UA L
G • F I S H – G 1 4 2 F D
1-4 Optional Accessories
Item
Part Number
Y-Cable
LE0332
B45 Transducer
Bronze Thru-Hull 600 W, 200/50 kHz
TD002
P79 Transducer
In-Hull 600 W, 200/50 kHz
TD001
GETTING STARTED
2-1 Mounting the Unit
G142FD is supplied with bracket and flush mount Kit. You can
choose a method of installation according to your preference.
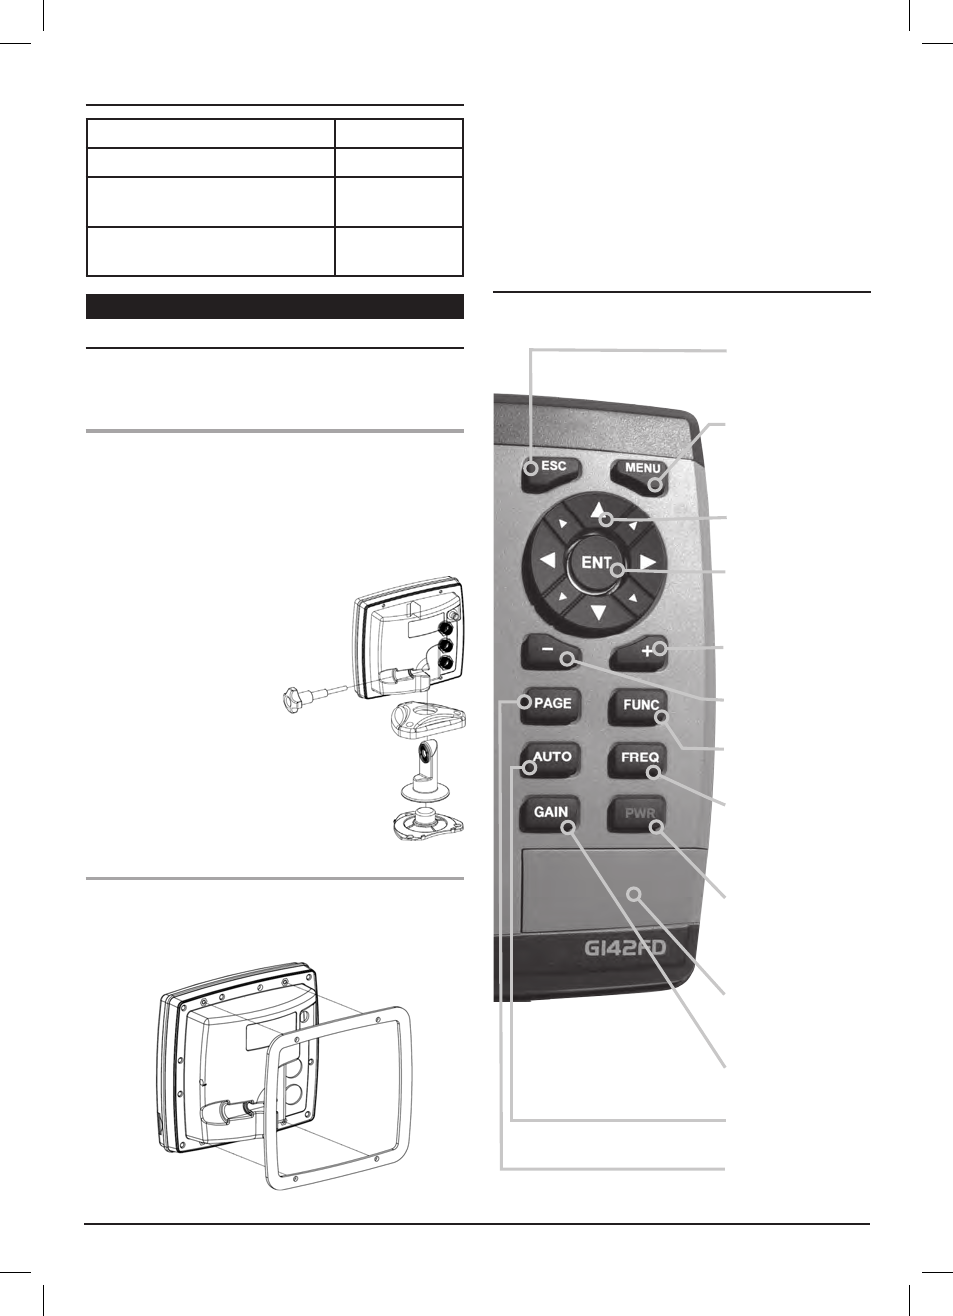
2-1-1 Bracket Mounting
Before installing ensure the area the bracket is mounted to is
strong enough to support the weight of the fishfinder. After the
location is found, attach the mounting base to the area using
the supplied hardware.
Mounting the display Unit:
1 Hold the display unit and find mounting
groove on back of display.
2 Gently push the display unit into the
bracket ensuring groove on back of
display slides into bracket.
3 Turn knob clockwise to lock.
Removing the display unit:
1 Turn the unit off.
2 Turn the knob to counter clockwise.
3 Pull the display unit out.
4 Carefully remove all cables.
2-1-2 Flush Mounting
1 Find a suitable location for flush mounting and tape flush
mounting template to location.
2 Drill a hole in the area of the cutout.
3 Cut out the area with a jig saw.
4 Drill four holes as marked for mounting studs.
5 Install the mounting studs on the fishfinder and insert them
into the mounting holes.
6 Attach the fishfinder to the mounting location by attaching
the supplied hardware to the mounting studs.
2-2 Keys
ESC Exit from menu
and return to
previous menu.
MENU Access to
settings menu - Shows
available options of
the current window.
CURSOR Use to
review sonar history.
ENT Selects the
desired option or to
confirm selection.
+ Increases water
depth range.
- Decrease water
depth range.
FUNC Screen
snapshot.
FREQ Selects a
frequency between
50 kHz or 200 kHz or
mixed.
POWER Turns power
on/off. Open display
brightness and night
mode.
SD Card Open the
cover to install an
SD card.
GAIN Displays the
gain menu.
AUTO Sets gain and
range to automatic.
PAGE Sets a screen
you want to display.