Wiring – GME TX3120S User Manual
Page 31
T X 3 1 2 0 S
I N S T R U C T I O N M A N UA L
PA G E 3 1
MICROPHONE CONNECTION
The TX3120S is supplied with a speaker
microphone which has a built-in speaker to
supplement the speaker inside the radio when
operating in noisy environments. The speaker
microphone has a 2 pin connector that plugs into
the dual socket on the radio’s rear panel.
Microphone Plug
NOTE:
The radio’s internal speaker can be
switched off if required (via the menu) so that the
sound is heard only from the speaker microphone.
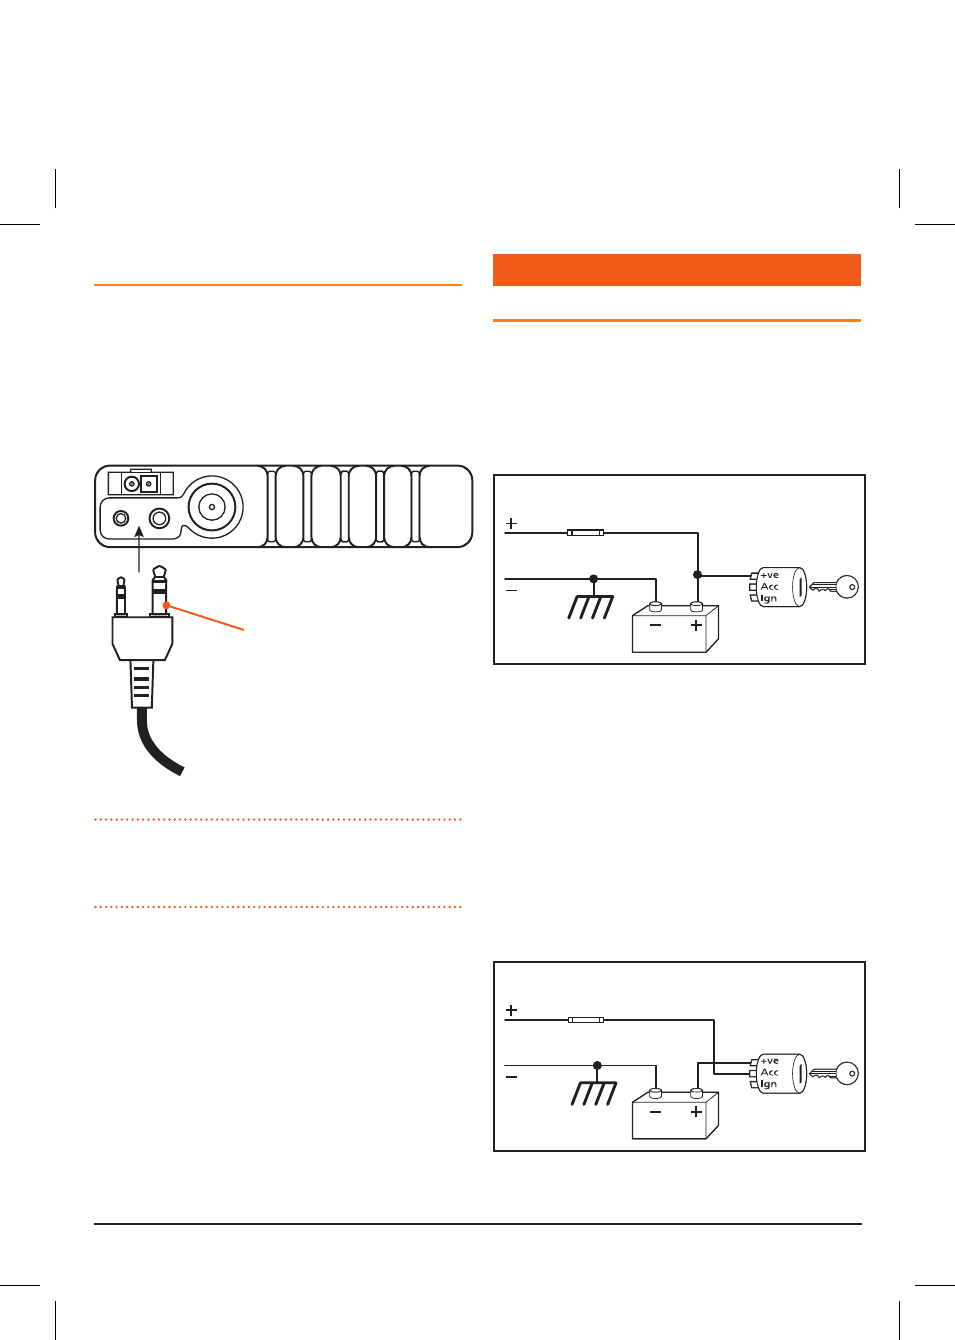
WIRING
DC POWER CONNECTION
The radio is designed for 13.8 volt DC, negative
earth installations only (i.e. where the negative
terminal of the battery is connected to the
chassis or frame of the vehicle). There are two
recommended methods of installation.
Radio remains ON when ignition switch is OFF
RED
BLACK
Chassis
Car battery
Ignition Switch
Radio turns ON and OFF with ignition switch
RED
BLACK
Chassis
Car battery
Ignition Switch
Connect the radio’s negative (black) lead to the
vehicle’s chassis, or if preferred, directly to the
battery’s negative terminal. The radio’s positive
(red) lead should be connected via the 2 amp fuse
to the battery’s positive terminal.
Alternatively, the positive lead could be connected
into the fuse box at a point that has +13.8 volts
continuously available (on the battery side of the
ignition switch) via the 2 amp fuse.
Radio remains ON when ignition switch is OFF
RED
BLACK
Chassis
Car battery
Ignition Switch
Radio turns ON and OFF with ignition switch
RED
BLACK
Chassis
Car battery
Ignition Switch