Mount the wing – Flyzone FLZA4010 User Manual
Page 9
9
Compare your up and down elevator throw to the
recommended elevator throw below. Measure and compare
the rudder and aileron throws as well.
Note: If you ever install different servos in the plane or use a different radio control
system, make sure you set it up so you will have the recommended throws.
These are the recommended control surface throws:
RUDDER
ELEVATOR
AILERONS
3/8"
[9.5mm]
9˚
Up
3/8"
[9.5mm]
9˚
Down
1-1/4"
[32mm]
30˚
Right
1-1/4"
[32mm]
30˚
Left
1/2"
[12.7mm]
17˚
Up
1/2"
[12.7mm]
17˚
Down
Increased Elevator Throw for
Expert Pilots (Optional)
Pilots who have mastered fl ying their Piper Super Cub with
the recommended control throws, or pilots who are already
experienced, may increase the elevator throw as shown
below for even more maneuverability.
❏
1. Loosen the screw in the screw-lock connector on the
elevator servo arm and remove the screw in the servo arm.
Remove the elevator servo arm from the elevator servo.
❏
2. Remove the retainer,
then switch the screw-lock
connector from the inner hole
to the outer hole. Replace the
retainer on the screw-lock
connector, then replace the
servo arm on the servo with
the screw. Center the elevator
the same way you did before
with the radio on and tighten
down the screw in the screw-
lock connector to lock the pushrod down.
This should be the
new elevator throw:
ELEVATOR
(EXPERT)
5/8"
[15.9mm]
14˚
Up
5/8"
[15.9mm]
14˚
Down
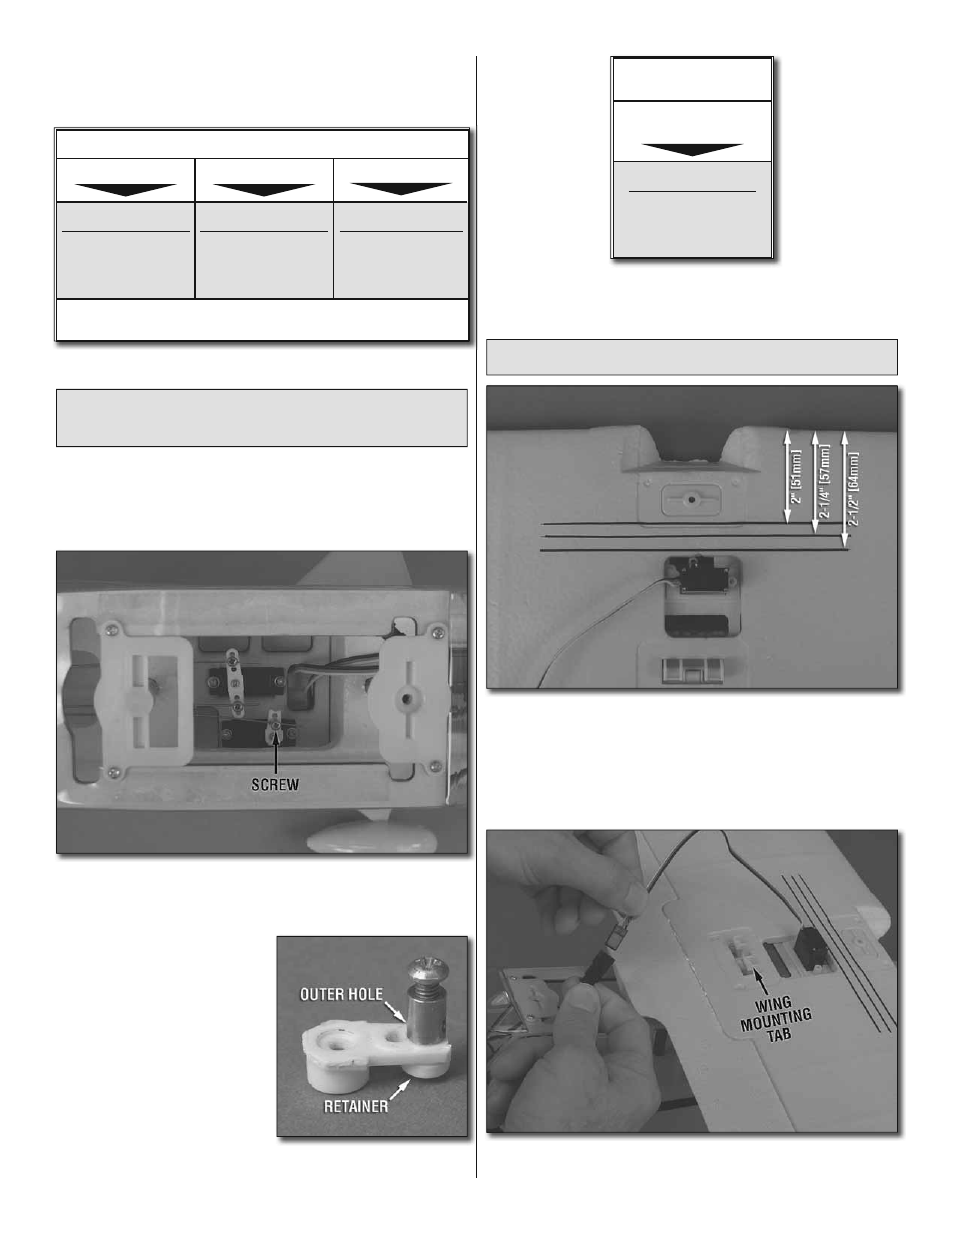
Mount the Wing
❏
1. For balancing the model later, use a fi ne-point felt-tip
pen to mark three balance lines across the bottom of the
wing 2” [51mm], 2-1/4” [57mm] and 2-1/2” [64mm] back from
the leading edge. The line in the middle is the recommended
starting balance point and the forward and aft lines mark the
forward and aft balance points.
❏
2. Connect the aileron servo wire to the aileron servo
extension coming from the receiver.