Channel radio set up (standard mode 2), Check the control throws – Flyzone FLZA4010 User Manual
Page 8
8
The procedure for turning on the motor brake is the same
with the exception that two beeps will sound when the brake
is being armed.
❏
5. Add a tiny drop of threadlocker to the 2.5mm x 5mm
Phillips screws and install them into the screw-lock connectors
on the elevator and rudder servos, but don’t tighten them down
yet. If you have diffi culty getting the screws in, it may be easier
to hold your screwdriver upright and hold the fuselage upside-
down. This way the screws won’t fall off the screwdriver.
❏
6. With the elevator and rudder centered, use hemostats
or needle-nose pliers to hold the screw-lock connectors
while tightening the screws to lock the pushrods down.
FULL
THROTTLE
RUDDER
MOVES
RIGHT
ELEVATOR
MOVES DOWN
RIGHT AILERON
MOVES UP
LEFT AILERON
MOVES DOWN
4-CHANNEL RADIO SET UP
(STANDARD MODE 2)
❏
7. Move the sticks on the transmitter and make sure all
the controls respond in the correct direction. If any of the
controls do not respond in the correct direction use the servo
reversing function in the transmitter to reverse any of the
controls necessary.
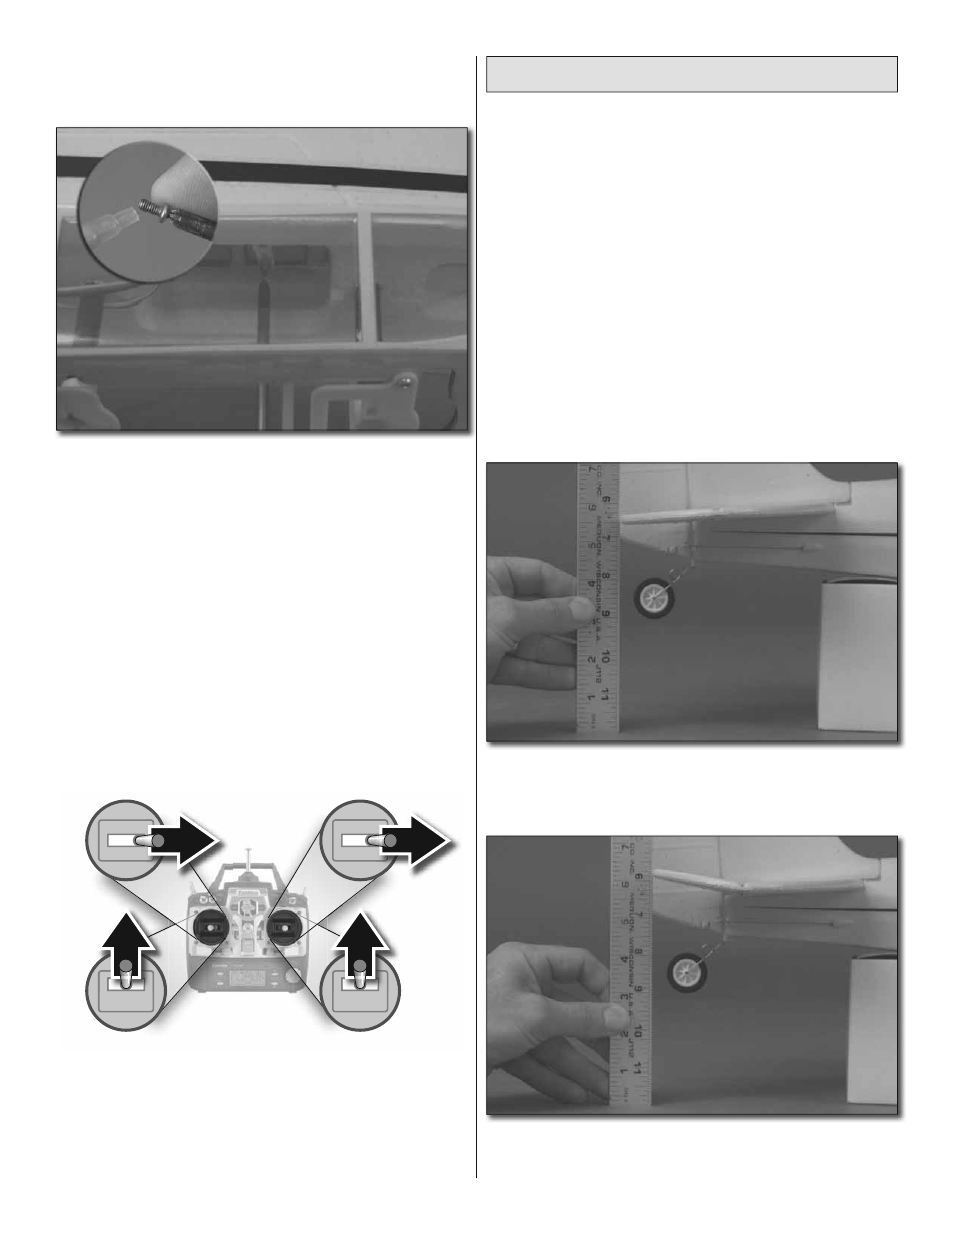
Check the Control Throws
One major factor that determines how any plane handles in
the air is the control surface throw, or how far each control
surface (aileron, elevator and rudder) moves up and down or
left and right. If the throw is too much, the plane will respond
too quickly. If the throw is too little, the plane will respond too
slowly. The control throws in your Cub have already been
determined by where the pushrods are connected to the
servo arms and control surfaces and how far the servo arms
rotate. But if you’re using a radio control system different than
the one recommended, the servo arms could rotate more or
less than anticipated, changing the throws. Therefore, it’s a
good idea to double-check the throws just to make sure they
are acceptable. Follow the procedure below to make sure
the control throws are properly set.
Measure the elevator throw fi rst:
❏
1. Use a small box or something similar to prop up the aft
end of the fuselage so the stab will be level (or nearly level).
❏
2. Still without the propeller mounted to the motor,
turn on your transmitter and connect the battery. Place a
ruler to the trailing edge of the elevator at the widest part
(from front-to-back).
❏
3. Use your transmitter to move the elevator up and measure
the distance it moved from center. This is your “up” control
throw. Measure the down elevator control throw the same way.