Flyzone FLZA4004 User Manual
Page 8
8
IMPORTANT: For the following procedure the propeller
must not be mounted to the motor. If you have skipped
ahead and already mounted the propeller, remove
the propeller before proceeding. Otherwise, you may
inadvertently start the motor and the spinning propeller
could cause damage or injury.
❏
6. With the transmitter on, connect a charged battery to the
battery wire coming from the fuselage. When the connection
is made you will hear two beeps coming from the ESC.
IMPORTANT: The beeping sound alerts you that the system
has power and the motor is “armed.” This means whenever the
throttle control stick is advanced the propeller will turn. So later,
when the propeller is mounted and you are ready to fl y, keep
clear of the propeller while handling the model and do not
inadvertently advance the throttle stick. If you do, the propeller
will turn and damage or injury could be caused.
❏
7. Add a drop of threadlocker to one of the included 3mm
set screws. Install the screw into the pushrod connector on
the elevator servo, but do not tighten it yet.
❏
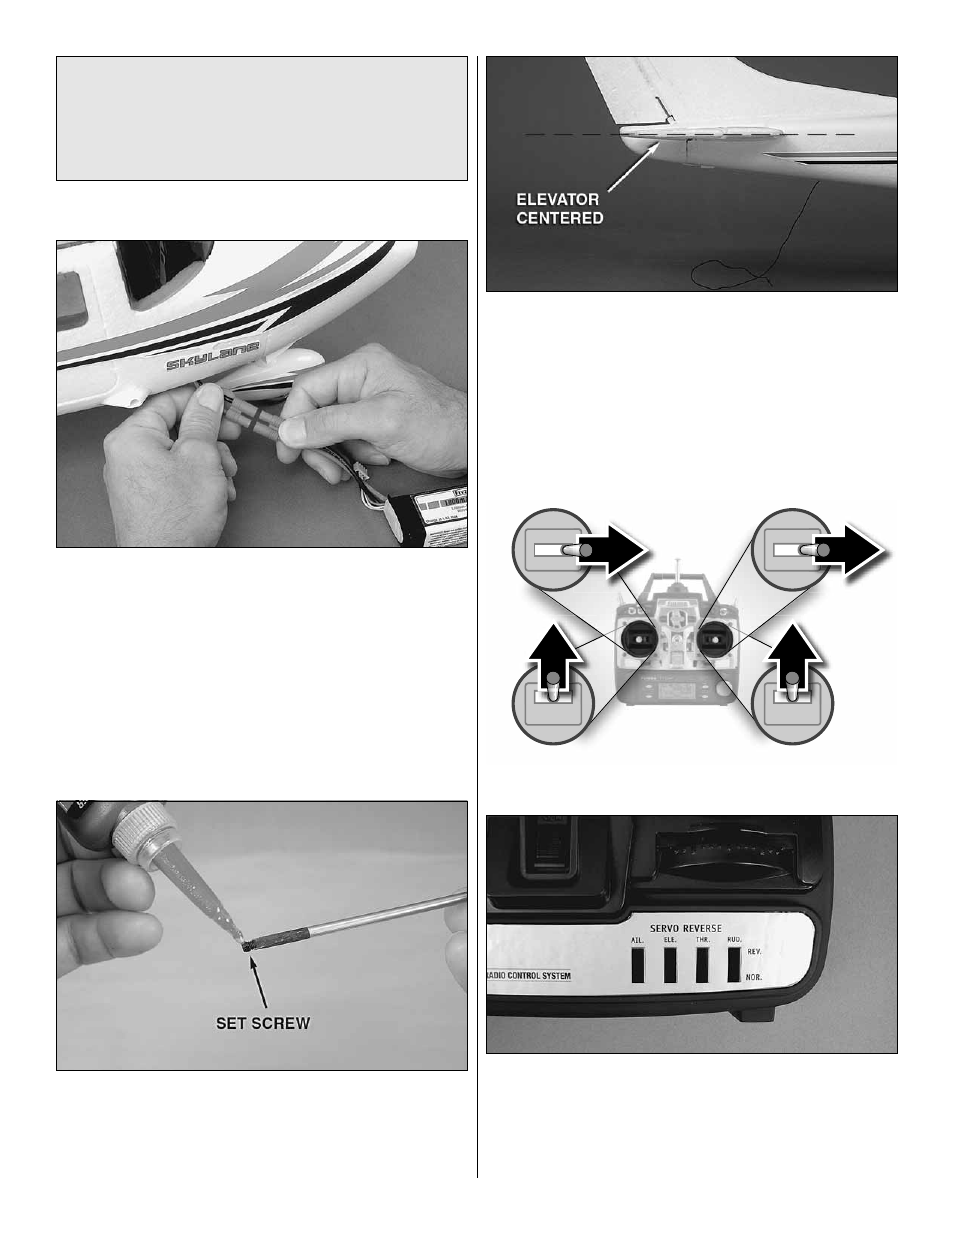
8. With the radio system operating and the trims centered,
center the elevator and tighten the screw in the connector to
lock the pushrod down.
Refer to the following illustration while setting up
the controls.
FULL
THROTTLE
RUDDER MOVES
RIGHT, NOSE
WHEEL TURNS
RIGHT
ELEVATOR
MOVES DOWN
RIGHT AILERON
MOVES UP
LEFT AILERON
MOVES DOWN
❏
9. Move the elevator stick on the transmitter up and
down to make sure the elevator responds smoothly and
in the correct direction. If the elevator responds the
wrong way, switch the elevator servo reversing switch on
the transmitter.