FloAire Direct Expansion Coil Modules User Manual
Page 7
7
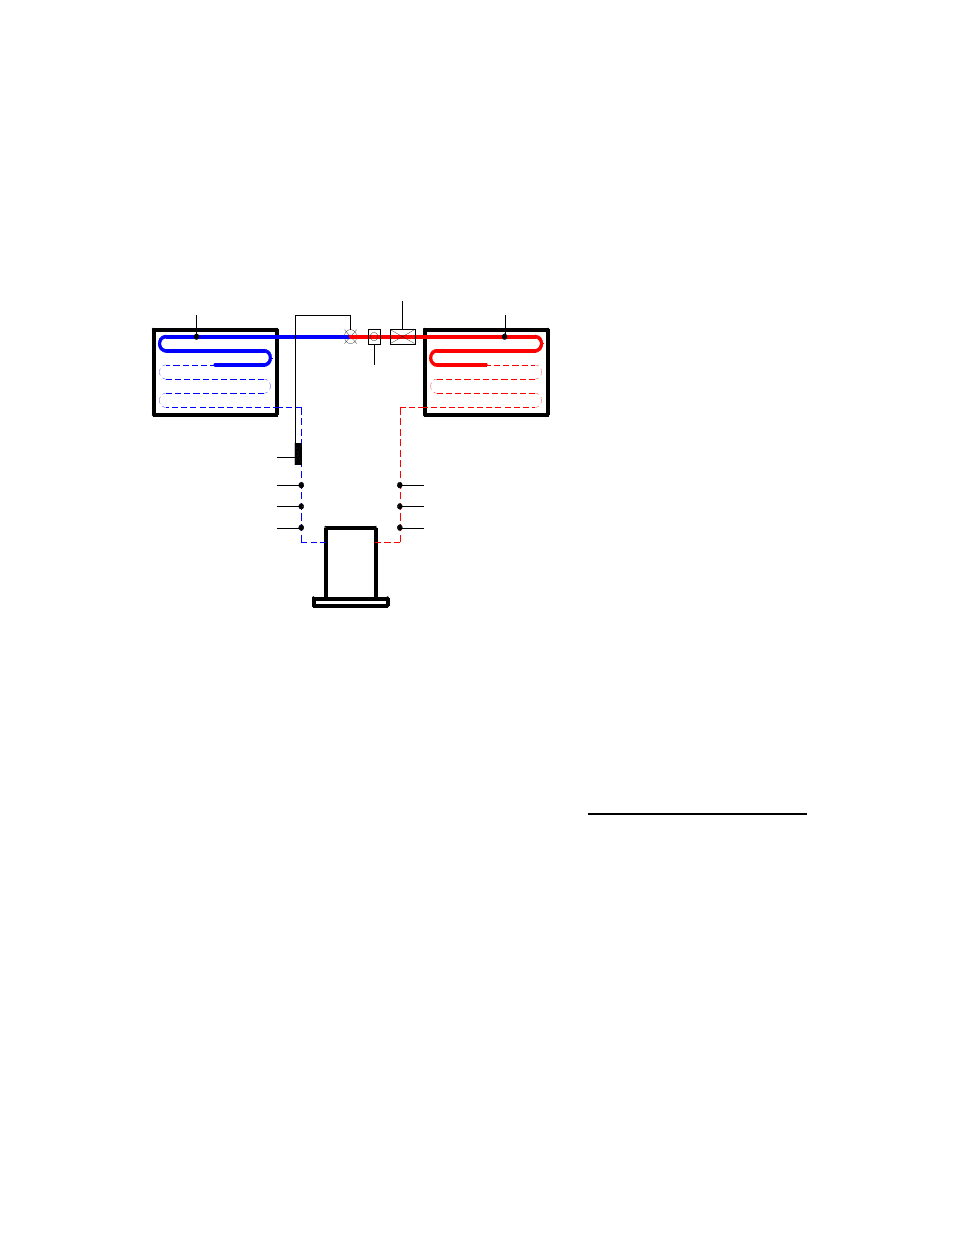
COMPRESSOR
EVAPORATOR
CONDENSER
THERMAL
EXPANSION
VALVE
HIGH-PRESSURE VAPOR
HIGH-PRESSURE LIQUID
LOW PRESSURE VAPOR
LOW PRESSURE LIQUID
VALVE SENSING BULB
EXPANSION
THERMAL
SUCTION PORT
HOT GAS PORT
DRIER FILTER
SIGHT GLASS
LOW TEMP / PSI SWITCH
HIGH TEMP / PSI SWITCH
BASIC REFRIGERANT PIPING
Depending on the distance between the condenser and the module, there may be other components
installed in the lines. Here is a short list of components found in the lines. A filter dryer, which removes
any moisture from the refrigerant, needs to be installed close to the compressor section. A sight glass
should be installed close to the thermal expansion valve. This will help in diagnosing any problems with
the air conditioning (A/C) setup. A solenoid is required when the liquid line exceeds 75 Ft. This will
prevent the build up liquid refrigerant from entering the compressor while the unit is off. If the suction line
exceeds 75 Ft, an accumulator will need to be installed to prevent any liquid refrigerant from entering into
the compressor.
1. Plumb Liquid and
Suction Lines.
A. Run
the
lines. Keep
the lines as
short and as
straight
as
possible.
Also,
keep
the
lines
away
from
any
sharp
edge. The
lines
may
vibrate some
during
normal
use
and this will
keep
the
lines
from
breaching.
I. There are two different types of thermal expansion valves. Internally equalized
valves will have 2 connections, one for liquid to the valve and one to the
distributor of the coil. The externally equalized will have an additional fitting for
the capped line from the coil.
II. If the coil has a hot gas bypass, install this now with the instructions included in
the kit.
B. Braze the joints. These joints will be under great pressure, so proper joint construction is
imperative. All joints need to be made using Silver-Phosphorus or Copper-Phosphorus
brazing filler, available from a local welding store. DO NOT USE SOFT SOLDER, this
material does not produce a strong enough joint. It is also recommended to flow dry
nitrogen through the lines to prevent joint oxidation while brazing.
I. Clean both mating surfaces with Emory cloth.
II. Fit both pieces together. If there are multiple joints within a short distance, clean
and fit them together as well.
III. There are some parts in the lines that cannot be overheated. Parts like the
thermal expansion valves, solenoid valves, sight glasses, and accumulators
cannot exceed 200
°
F. Place a wet rag around these parts to cool them while
you braze the joints, and avoid pointing the torch flame directly on these devices.
IV. Heat using a TurboTorch® or equivalent torch using MAPP gas or Acetylene.
Move the torch back and forth on the pipes. This will distribute the heat more
evenly around the part. When the parts glow a dull red, pull the torch away
slightly. Be careful not to over heat the pipe. Smaller pipes, if overheated, will
begin to melt and burn.
V. Add brazing wire until the entire joint is covered. On larger diameters of pipe,
you may need to move your torch around the diameter of the pipe.