Majestic fireplaces, Uvc / uvs vent-free heaters, Hearth extension – CFM UVC43 User Manual
Page 6: Planning, Mounting the heater, Framing, Insulating for cold climates, Mantels
6
Majestic Fireplaces
®
UVC / UVS Vent-Free Heaters
20000135
Hearth Extension
A hearth extension in front of heater is recommended
but not required.
Planning
Planning the installation is an important first step: it will
save time and money later in the actual installation. In
planning the installation, consider:
1. Where the heater will be located.
2. All components needed to complete the
project.
Mounting the Heater
The heater should only be mounted on the following
surfaces:
• A flat combustible (burnable) surface.
• A raised wooden platform.
• A concrete block or other solid object placed be-
neath each of the four corners of the heater.
To mount the heater:
1. Choose unit location.
2. Place unit in position and secure to floor with 1¹⁄₂"
screws, or nails. The holes to secure the unit to the
floor are located just behind the bottom louvre on the
left and right hand side of the unit.
3. Frame in heater with a header across the top. It is
important to allow for finished face when setting the
depth of the frame.
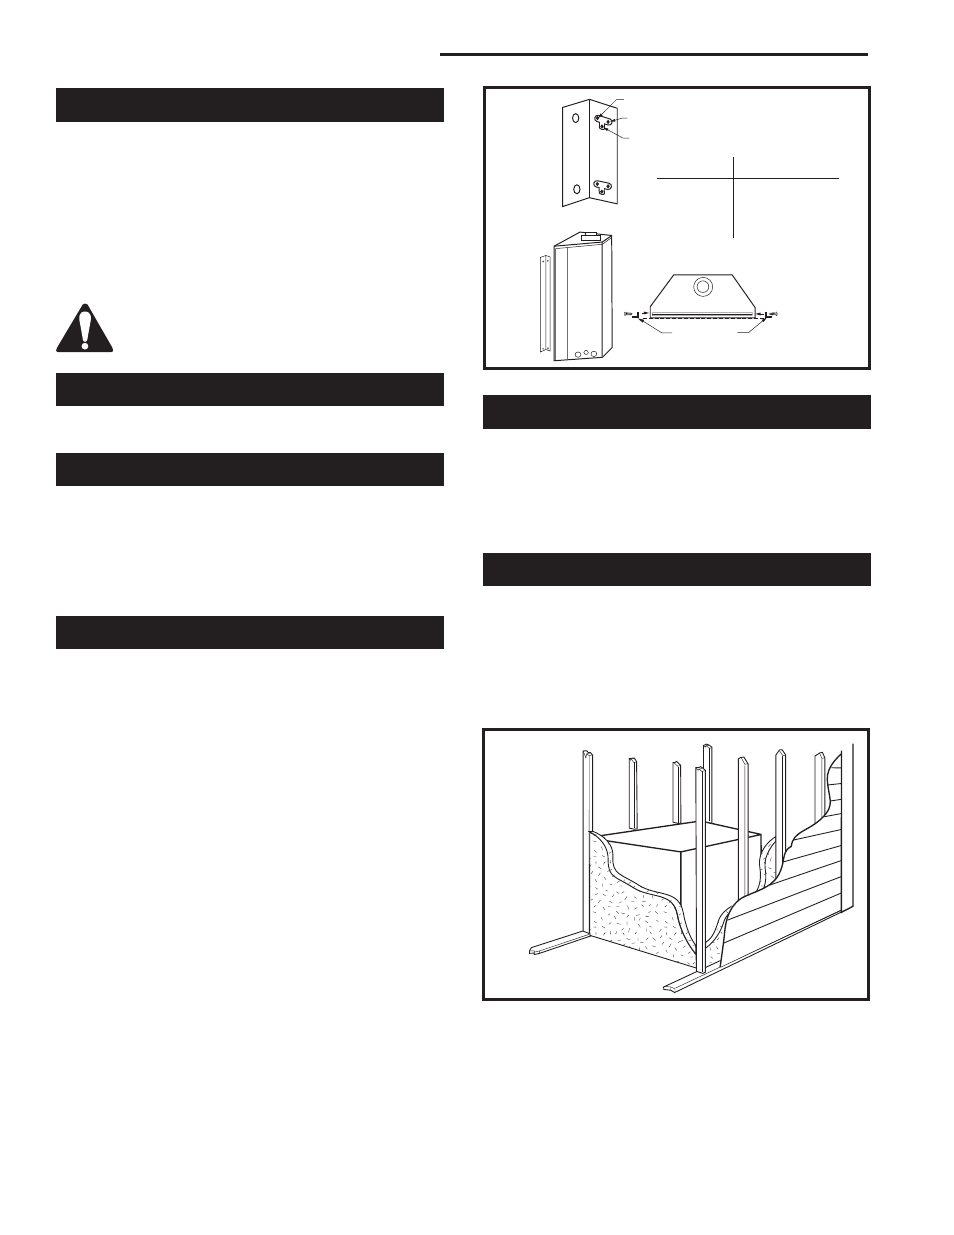
4. Attach heater to frame using adjustable frame drywall
strips (located behind access door for shipping). Preset
depth to suit facing material (adjustable to 1/2" , 5/8" or
3/4" depths). (Fig. 4)
5. Use existing screws in side of unit to attach drywall
strip. Measure from face of heater to face of drywall
strip to determine final depth. (Fig. 4)
FP1023
side nailing flange
1/27/00 djt
A
B
C
Adjustable Drywall Strip
(Nailing Flange)
Scew
Drywall
Position
Depths
A
1/2" (13 mm)
B
5/8" (16 mm)
C
3/4" (19 mm)
Adjustable
1/2", 5/8" & 3/4"
Spacing
FP1023
Fig. 4 Adjustable drywall strip (nailing flange).
Framing
Framing can take place before or after the heater is set
in place. The framing should be positioned to accom-
modate the wall covering and facing material. Framing
material should be 2x4 or heavier. Framing headers
may rest on top of heater. (Refer to Page 4, Figures 1
and 2 for heater and framing dimensions.)
Insulating for Cold Climates
When a heater is installed in a chase or an outside wall,
the enclosure should be insulated like any other wall
of the home. Insulation should be installed under the
heater and on the inside of the exterior walls. (Fig. 5)
NOTE: Insulating for cold climates is strictly a recom-
mendation and not a requirement.
GF456
UVC
2/19/97
Insulation
Insulation
methods
shown are
optional for
cold climate,
not a require-
ment for unit
operation.
FP456
Fig. 5 Insulating for cold climates.
Mantels
Depending on the width of the mantel it may be in-
stalled higher or lower from the combustion chamber
opening. This also applies to the distance between the
mantel leg (if installed) and the fireplace. Refer to Fig-
ures 3a and 3b for correct mounting heights and widths
for combustible mantels and mantel legs.
Noncombustible mantels and legs may be installed at
any height above the appliance opening.
When using paint or lacquer to finish the
mantel, such paint or lacquer must be heat
resistant to prevent discoloration.