Dynaflite DYFA2014 User Manual
Page 6
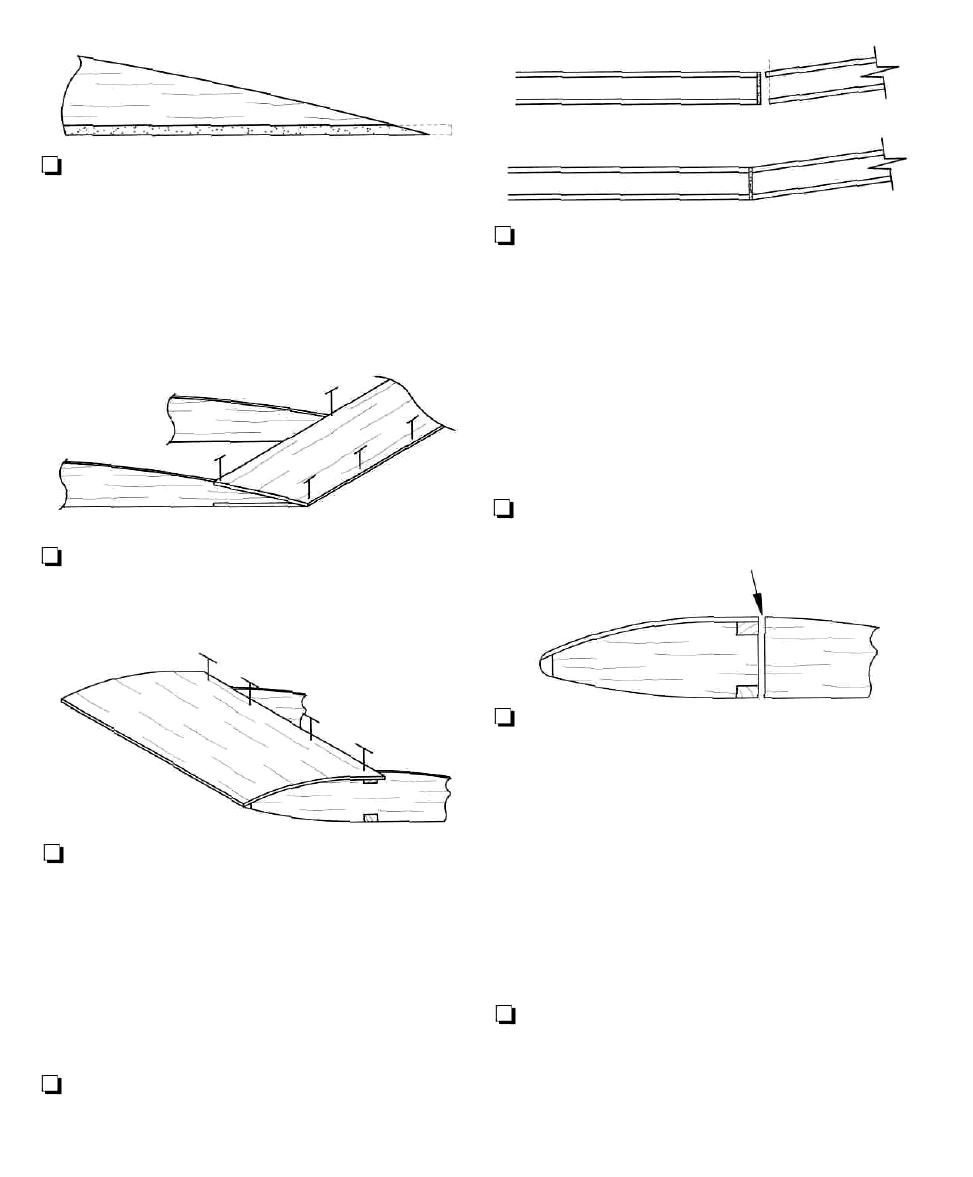
Q 11. Carve and sand the trailing edge sheeting to
accept the upper trailing edge sheeting.
Q 12. Lay the wing back down on the work surface.
Apply thick CA to the area where the top TE is about
to be installed.
Q 13. Install the top TE. Use pins to secure the parts
until the glue dries.
Q 14. With the wing still pinned down, install the
top LE sheet. Cut the .040" x 3" balsa sheeting to the
approximate length. If you haven't put on LE
sheeting with CA before, use the following method:
Apply thick CA to the top spar, ribs and leading
edge. Place the LE sheet into place, and start pinning
down... LET DRY!
Ul 15. Once dry, trim off excess wood at W1, W2
and the LE.
Q 16. Prepare the wing for the Polyhedral.
Beginners Note: To avoid difficulties, read this step
through BEFORE cutting and sanding! Refer to the
dimensions on the plans. With each center panel flat
on the work surface, lift the tips so that the bottoms
of rib W6 are 2-3/4" off the table. With the tips still
blocked up, carefully sand the roots of each tip
panel so they are flush with W2. The final fit should
be tight with no gaps. Take your time while sanding,
removing small amounts at a time.
U 17. Referring to the plans, sand the center and
tip panels to shape as shown.
CUT RIB AS SHOWN
Q 18. Working with the left wing, cut through and
remove 1/16" of rib W2 just behind the spar. This
will make a slot for the polyhedral brace to fit into.
Test fit the die-cut 1/16" ply polyhedral brace in
place as shown on the plans. The polyhedral brace
should contact the top and bottom spars along it's
entire length and the front edge of W2 should touch
the back of the polyhedral brace. If the polyhedral
brace fits, remove the brace and glue the wing tip to
the center panel with CA. If the polyhedral brace
does not fit, slightly adjust its angle with your
sanding block.
Q 19. Using 6-minute epoxy, glue the polyhedral
brace into place. Clothespins work well as clamps
while the epoxy cures. When the epoxy has cured,
glue rib W2 to the polyhedral brace with medium
CA. Repeat steps 18 and 19 for the right wing.
6