Build the wing – Dynaflite DYFA2014 User Manual
Page 5
BUILD THE WING
U 1. Start the wing by placing the wing portion of
the plans on the building board. Cover the plans
with wax paper or plastic wrap. This is to prevent
the wing from becoming glued to the plans.
Q 2. Pin the bottom .040" x 15/16" sheet trailing
edge over the drawings.
NOTE: .040" is the thinnest of the sheeting.
Q 3. Pin the 1/8" x 3/16" hardwood bottomspars
over the drawings.
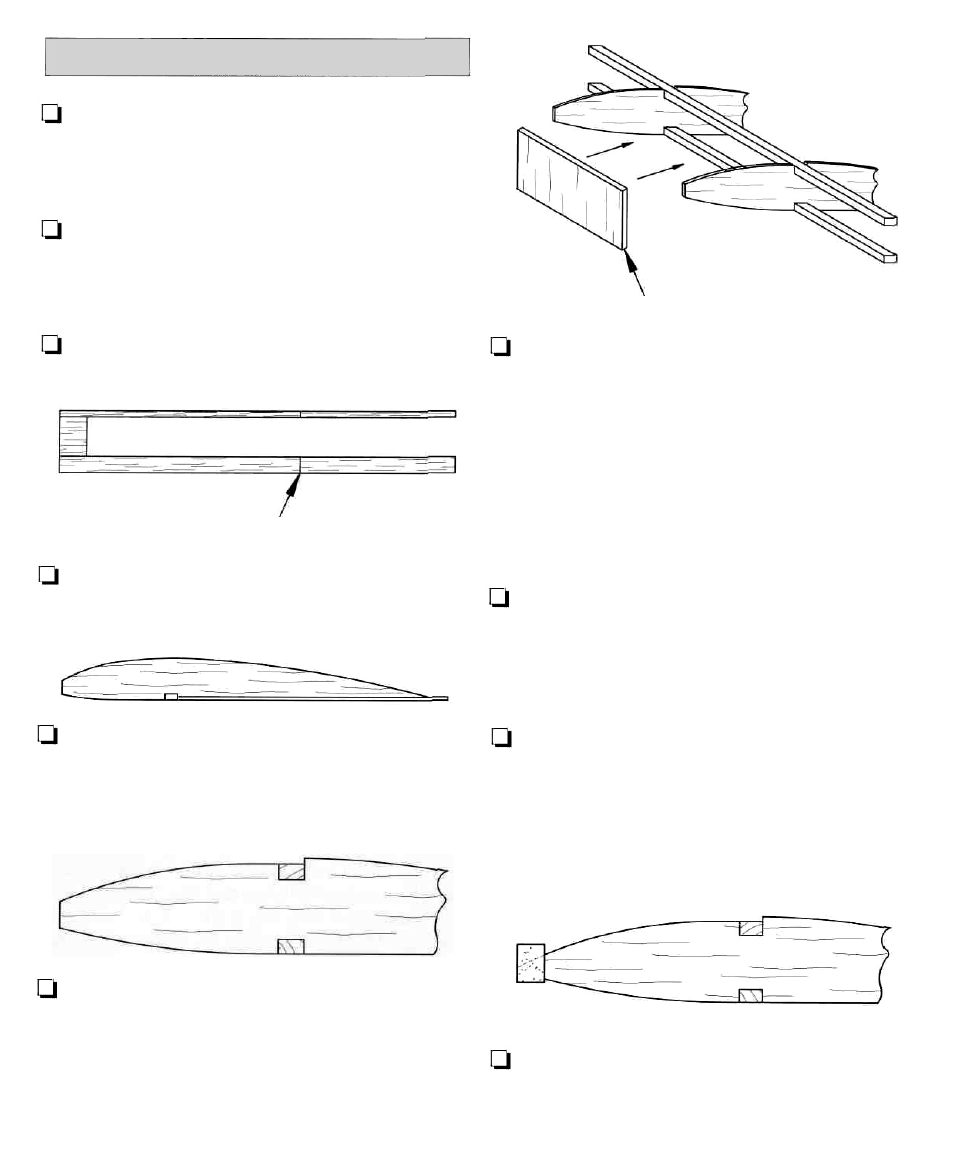
VERTICAL GRAIN SHEAR WEB
U 7. Cut the shear webs from the 1/16" x 3" balsa
sheet. Glue the shear webs into place between the
ribs. Be sure the grain runs vertically.
NOTE: Do Not install the shear webs where the
polyhedral braces will be installed later.
MAIN PANEL / TIP SEPARATION
Q 4. Glue the .040" bottom sheet between the spar
and the trailing edge sheet. Refer to the sketch above.
Q 8. Sand the shear webs so they are flush with the
top of the spar.
Q 5. Glue the ribs in place from the center to the tip as
shown on the plans. We will cut the ribs later for the
polyhedral braces. The ribs should fit as shown above.
Q 9. Glue the 3/16" x 1/4" leading edges to the
front of the ribs.
Q 6. Test fit the top 1 /8" x 3/16" spar into place. If
it doesn't fit properly, enlarge the notches in the ribs
so the spar fits completely in the notch. This is
important so the .040" LE sheet will blend with the
rear portion of the rib. Glue the spar in place with
thin CA.
U 10. Carve and sand the leading edge top to
blend into the ribs. You will probably need to take
the wing off the building board.
5