D.A.S. Audio Aero 12 User Manual
Page 12
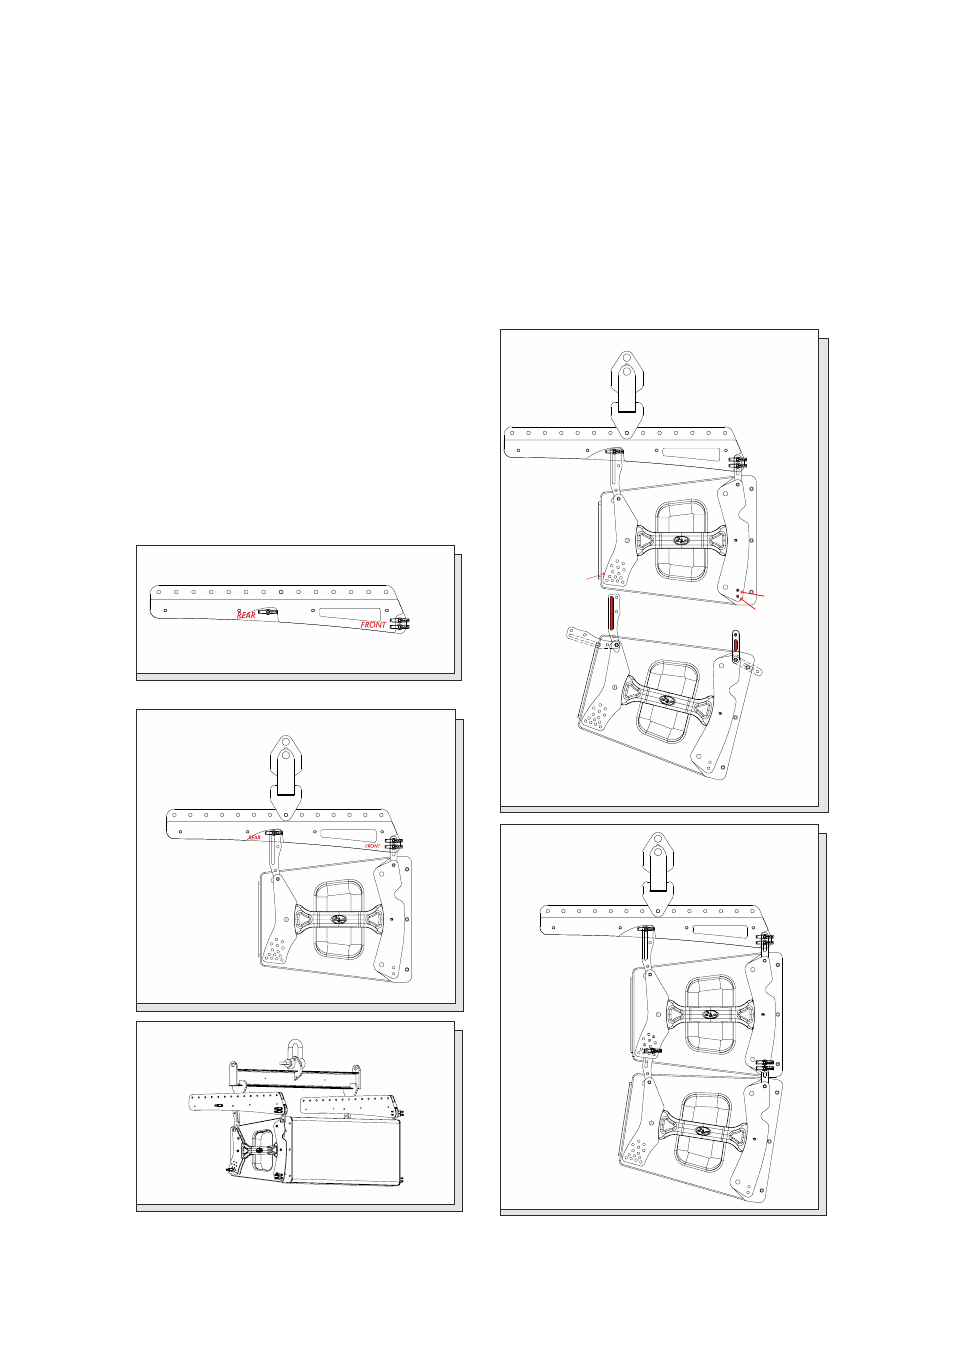
Selected angle
Point A
Point B
Manual del Usuario
/ aero 12 / User’s Manual
n 1
n 2
12
Follow the next steps to setup the
aero 12
line array system:
1.- Take out the rear guide of both sides of
the cabinet.
2.- Take out the front guide of both sides of
the cabinet.
3.- Put, over the guides, the left and right
pannels of the
AX Aero12 S2 accessory.
4.- Put the pin through the slotted hole of the
front guide of the cabinet and the FRONT
possition n1 of the
AX-Aero12S2.
5.- Put the pin through the hole of the rear
guide of the cabinet and the REAR possition of
the
AX-Aero12S2.
6.- Put the pin through the hole of the front
guide of the cabinet and the FRONT possition
n2 of the
AX-Aero12S2.
7.- Put the central bar of the
AX-Aero12S2 in
the fly point provides for the application by the
EaseFocus software.
8.- Take out the rear and front guides of the
next
aero12 cabinet.
9.- Put together the upper side of the 2º
aero 12 and the lower side of the 1º cabinet.
10.- Put the pin through the slotted hole of the
front guide of the cabinet (Point A).
11.- Put the pin through the hole of the rear
guide in the designed angle provides by the
EaseFocus prediction software.
12.- Put the pin through the hole of the front
guide of the cabinet (Point B).