Clear, Evice, Etup – CLEAR Spot 4G Apollo Users Guide User Manual
Page 10: Izard, Manage your clear spot (continued)
9
IP Address: View the Internet Protocol (IP) Address used to locate and access your Clear Spot
network.
Device Uptime: Shows the length of time (for the current period) the CLEAR Spot has been
connected to the CLEAR 4G network.
Software Version: Shows the software version of the CLEAR Spot. The software version cannot
be changed.
Hardware Version: Shows the hardware version of the CLEAR Spot.
The Navigation Bar (with links to the different tabs and links to logout, to reconnect, to reboot), the
number of connected users, signal strength, battery meter, the contextual Help link and the link to
Clearwire Support appear on every page of the CLEAR Spot Home Page.
Manage your CLEAR Spot (continued)
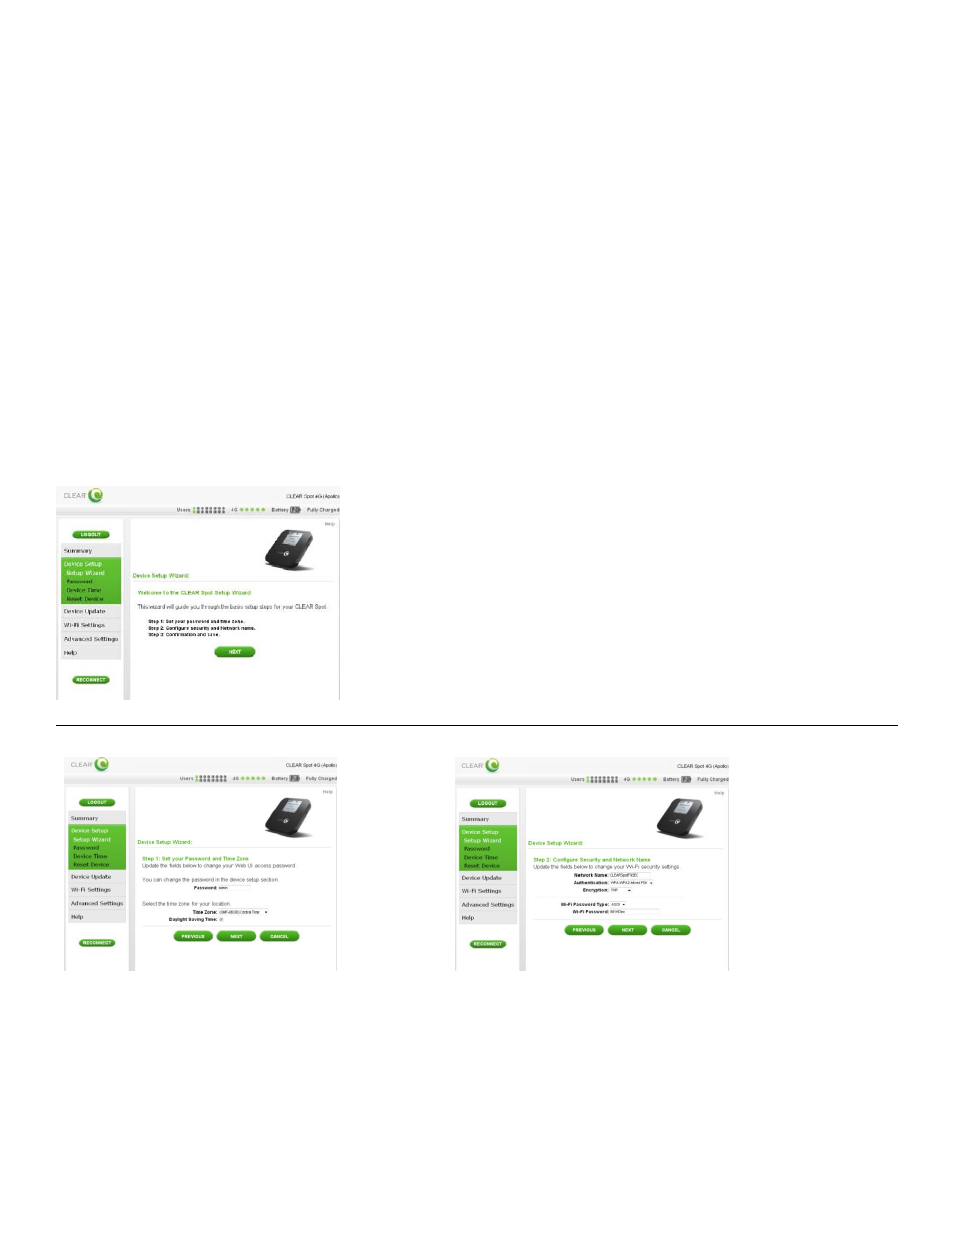
CLEAR Spot Home Page / Device Setup / Setup Wizard
The Setup Wizard guides you through the basic CLEAR Spot set up steps. Change the admin
password, select the time zone, choose the CLEAR Spot wi-fi network name, choose the security
type and more.
Once you’ve gone through the Setup Wizard, click “Next” and you’ll see a screen where you can
preview the new settings before saving the settings. If you need to make any changes, click
“PREVIOUS”. If the information is correct, click “SAVE” to save the new settings. If you don’t want
to make any changes, click “CANCEL”.
You will be prompted to authenticate your device by turning your CLEAR Spot off and then on again
in order for new settings to apply.
Step 1: Includes changing the admin password, which is
defaulted to “admin”.
Note: You also can change the
password on the Device Setup > Password tab at any time.
Step 1 also includes setting the time zone for your preferred
location and enabling or disabling Daylight Savings Time.
Step 2: Is where you can personalize the
CLEAR Spot wi-fi network name (SSID) and
choose the security setting.