Toshiba IK-528A User Manual
Page 9
Attention! The text in this document has been recognized automatically. To view the original document, you can use the "Original mode".
00
SHUTTER
5-1. Menu-Driven set-up
The setting menus of hierarchy are shown below and with on-screen character
displays.
0| AUTO
H
1/60
H
1/100 hflT25^ 1/500
H
1/1K h|
L| 1/2K
H
1/5K H
i
/10KH
i
/100K|
ol OFF K ON H WIDE |
Ol INT
H
LL I
OPOFTH BLC1 h-f BLC2
H
BLC3 I
oroFnHBOosTi
AGC
SYNC
I MENU]—I
BLC
DYRANGE
EXIT
CANCEL
DEFAULT
5-2. Setting switches and the functions
On the side panel of the camera there are three push button switches as
shown below :
Switch name
Main function
SELECT
Setting mode call on / off, setting entry
Y
Setting item selection (down)
A
Setting item selection (up)
5-3. Setting mode call and basics
Press the SELECT switch down about 2 seconds then
menu will appear on the display.
/
SHUTTER
AUTO
AGC
ON
SYNC
LL
BLC
OFF
DYRANGE OFF
EXIT CANCEL DEFAULT
V
J
5-3-1. Shutter (Exposure time)
Set the slide switch (on rear panel) to AES /
(MES) position. Move the cursor to the position
as shown in Fig. Using the SELECT switches,
choose the shutter speed from AUTO through
1/100K
SHUTTER
AGC
ON
SYNC
LL
BLC
OFF
DYRANGE OFF
EXIT CANCEL DEFAULT
AUTO (AES)
1/60, 1/100, 1/250, 1/500, 1/1K, 1/2K, 1/5K, 1/10K, 1/100K(MES)
When the rear panel switch is turned to VIDEO or DC, the exposure time
is fixed 1/60 sec, and shutter mode turn to IRIS.
5-3-2. AGC
Move the cursor to the position shown in Fig.
Using SELECT switches, to select ON, WIDE,
OFF
A. ON (Standard position, max gain = 18dB)
B. WIDE (High-Sensitivity position, max gain
= 32dB)
C. OFF
/
\
SHUTTER
AUTO
AGC
ESBI
SYNC
LL
BLC
OFF
DYRANGE OFF
EXIT CANCEL DEFAULT
V
/
SHUTTER AUTO
AGC
ON
SYNC
BLC
OFF
DYRANGE OFF
EXIT CANCEL DEFAULT
5-3-3. SYNC
Move the cursor to the position shown in Fig.
Using the SELECT switches, to select INT or LL
in the SYNC item.
A. INT : The camera is in the internal SYNC
mode.
B. LL : The camera is in the Line-Lock Mode.
Setting 0 to 300 degree by adjusting
the V phase of rear panel.
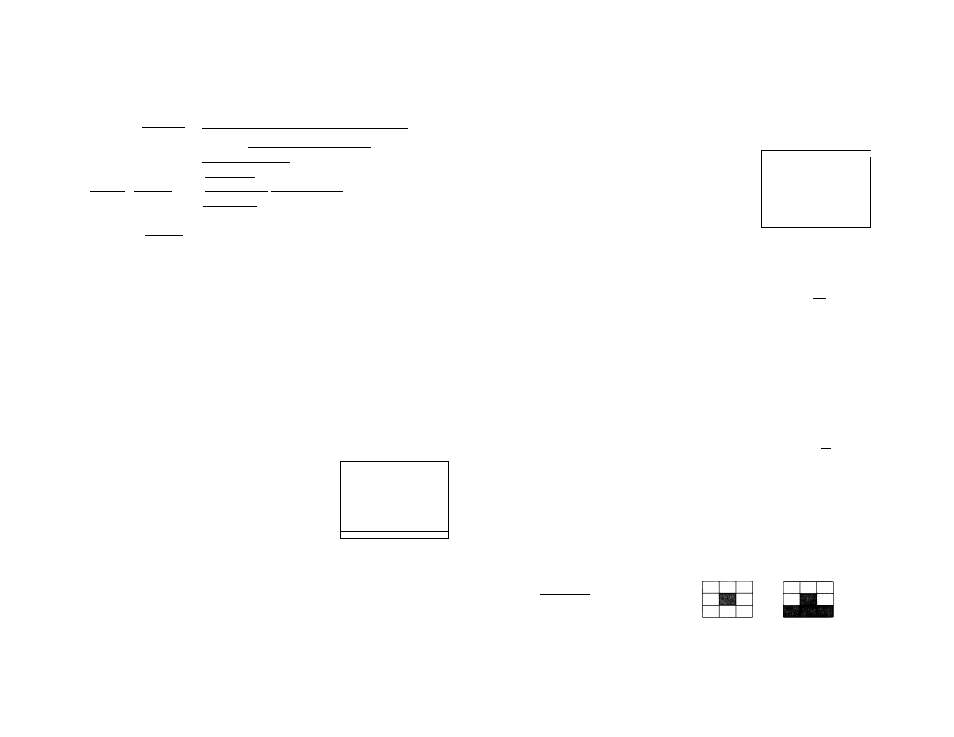
5-3-4. BLC (BACK LIGHT COMPENSATION)
Move the cursor to the position shown in Fig.
Using the SELECT switches, select the OFF,
BLC1, BLC2, BLC3.When the automatic
electronic iris and the auto iris lens used the
exposure adjustment is automatically performed
so that a best picture is obtained at next monitor
zone. There are 4 ways BLC function for different application. The window
area of BLC show as below:
SHUTTER AUTO
AGC
ON
SYNC
LL
BLC
DYRANGE OFF
EXIT CANCEL DEFAULT
OFF
Video monitor
i
f
11
WTjjÈ
BLC1
Video monitor
BLC2
Video monitor
BLC3
Video monitor
BLC area will appear on the monitor screen as the BLC function
is sellected.