Setting warmer (warm & ready™) drawer, To remove warmer drawer, To replace warmer (warm & ready™) drawer – Kenmore 790.7889 User Manual
Page 30
Attention! The text in this document has been recognized automatically. To view the original document, you can use the "Original mode".
Setting Warmer (Warm & Ready™) Drawer
•
Warmer Drawer Indicator Light
•
Removing & Replacing Warmer Drawer
Warmer (Warm & Ready™) Drawer Indicator Light
(some models)
The indicator light is located above the Warmer Drawer thermostat control. It turns on when the control is set, and stays on
until the control is turned OFF. The warmer drawer is inoperable during the Self-Clean cycle. The indicator lightwill not
come on during the Self-Clean cycle.
To Remove and Replace Warmer (Warm & Ready™) Drawer
(some models)
Left-hand rail and release
Warmer -
drawer &
handle
Right-hand rail and release
Fig. 1
I
J
Fig. 2
ik WARNING
Electrical Shock Hazard can occur and result in
serious injury or death. Disconnect appliance from electric
power before cleaning and servicing the warmer drawer.
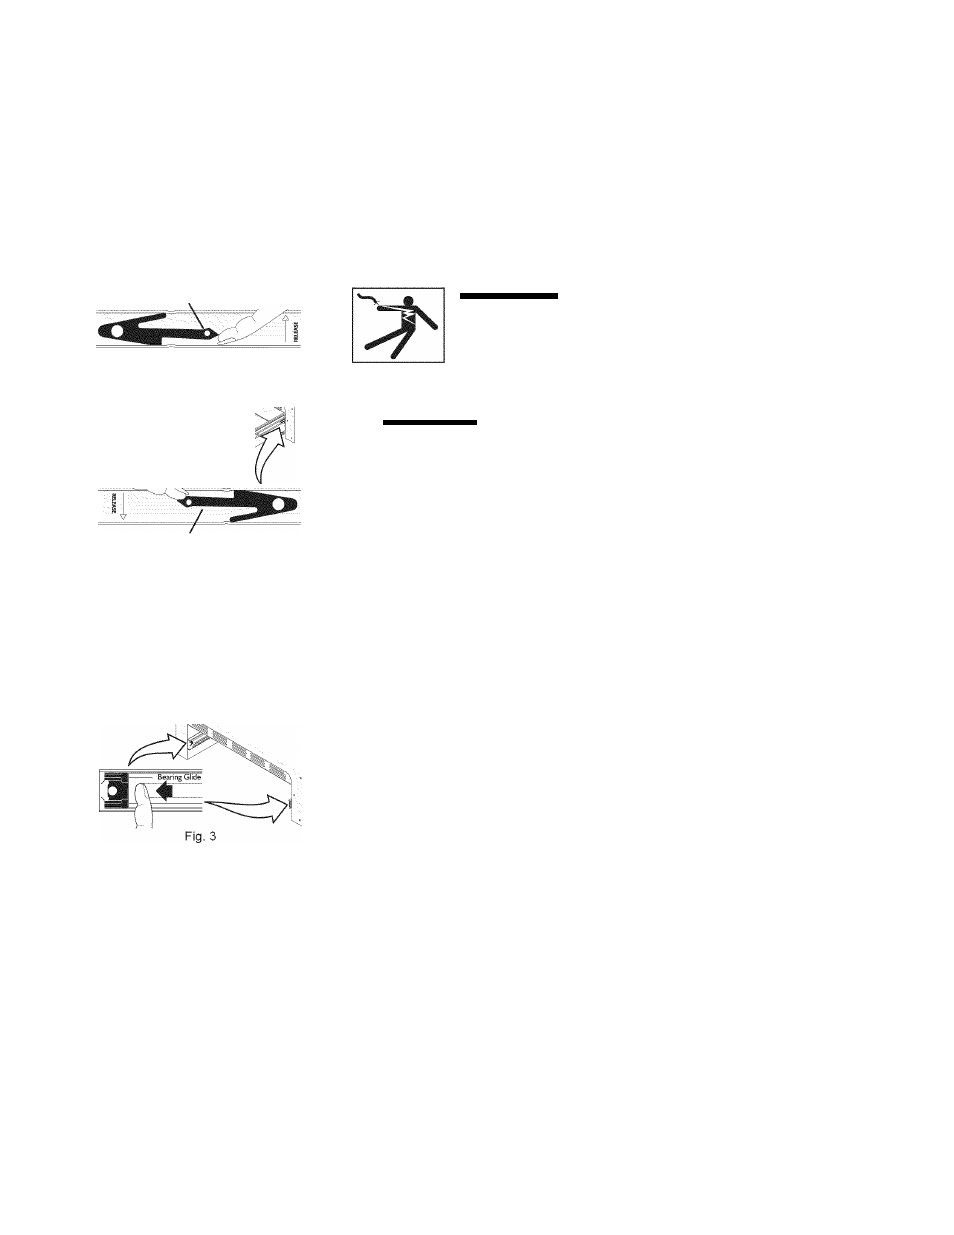
To Remove Warmer Drawer:
ik CAUTION
iTurn power off before removing the warmer drawer.
2. Open the drawer to the fully opened position.
3. Locate glide lever on each side of drawer, pull up on the left glide lever and
push down on the right glide lever (See Fig.1).
5. Pull the drawer away from the range.
To Replace Warmer (Warm & Ready™) Drawer:
1. Pull the bearing glides to the front of the chassis glide (See Fig. 2).
2. Align the glide on each side of the drawer with the glide slots on the range.
3. Push the drawer into the range until levers “click” (approximately 2”). Pull
the drawer open again to seat bearing glides into position. If you do not
hear the levers “click” or the bearing glides do not feel seated
remove the drawer and repeat steps 1 thru 3. This will minimize
possible damage to the bearing glides.
NOTE: The Warmer Drawer will NOT operate while in the Self-Clean and “Oven
Lockout” modes
30