Inside the warier, Inside the dryer, Outside – FRIGIDAIRE Washer/Dryer User Manual
Page 12: Clesuaing, Butb
Attention! The text in this document has been recognized automatically. To view the original document, you can use the "Original mode".
C
butb
Clesuaing
deanlint screenaf ter every lead.
 CAUTION
I Use caxe with laundry
products. They can dairage f inish on
the laundry center.
A WARNING
jTbiedxeriskof
fireorseriousinjurytoperscnsorpixperty,
ccnply
withthetasicwamingBlistedinEiportailtSafetylilStructicrs,
pages2-4,
and
those listfidfcelow.
•
Beforecleaningthewasherordryer
interior,
vH^ilugtlieelectricalpower
CBnitoavoidelectricHl shcckhazards.
•
Do not use any type spray cleanser when cleaning dryer interior. Hazardous
fuires or electrical shock oould occur.
Inside the Warier
•
Remove itains from the washer as soon as the cycle ends. Excess wrinkl ing,
color transfer, and odors rmy develop in itans left in the washer.
•
Dry thewasher tep, the area around the lid opening, andthe underside of the
lid. These areas should always he dry hefoie the lid is closed.
•
Before cleaning the washer interior,
ur^ug the electrical powear cord
to
avoidelectrical shodfchezards.
•
WheneKtremelysoiled
items
haveheenwashed,
adirtyresidueimyreiminon
the tub. Ranove this bywiping the tub withanenabrasive household cleanser.
Rinse thoroughly with water.
•
The agitator or tubimybecOTe stained from fabric dye. Clean these jarts with
ancnabrasivehouseholdcleanser. This prevents dye transfer to future loads.
Inside the Dryer
•
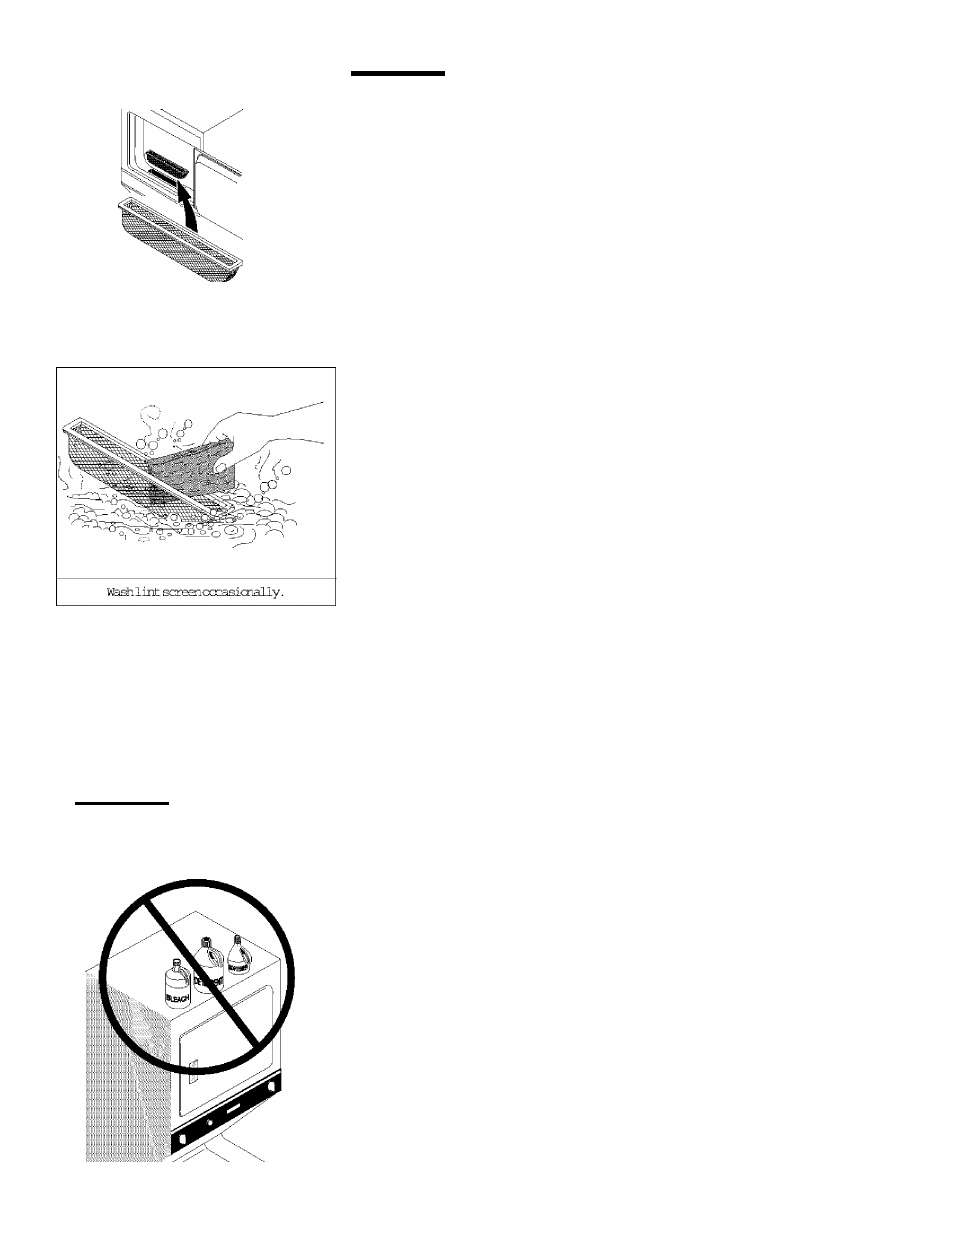
deanthedryerlintscreenaftereveryloai.
Lintbuild-upinttescreairestricts
airflOT, vtechrauses longer dryirg'tines. The screen is Icxstedatthebottcm
of thedcorcpsiing. Ranovebypullirgstraic^tip. Ranove the lint and replace
thEscreai.
•
Occasional ly a waxy build-ipi may form on the lint screen from using dryer-
adeted fabric softener sheets. Tb remove thishuild-ip, washthe lint screen in
warm, soapy water. Dry thoroughly and replace. Do not operate the dryer
without the lint screen inplace.
•
If the dryer drumbecoies stained f romnoncolorf ast fabrics, clean the drum
with a damp cloth and a mild liquid household cleanser. Remove cleanser
residue bef am drying the next lead.
•
Every 18 nmths anauthorized servicer shouldcleantte dryer cabinet interior
and exhaust duct. These areas cancollect lint and dust overtime, itoexcessive
stTcunt c£ lintbuild-ipcculdresult in inefficient drying andpo^ible fire hazard.
Outside
•
when laundering is completed, wipe cabinet with a damp cloth. Turn water
faucets off toprevait pressure build-up in the bases.
•
As needed, clean the cabinet with mild soap and water. Never use harsh,
grittyatfibcasiveclaatisera.
if
tepor
lidhecemes
stained,
cleanwithdiluted
chlorine bleach [l/2cip (120ml) inlquart (.95L) water] . Rinse several tines
wLthclear water.
•
RarDve glue residue from tape or labels withamixture of warm water and mild
detergsit. Or, touch residue with the sticky side of the tape or label.
•
Beforelaovliig bha lenjndxy center, place a strip of cardboard or thin
f iberboard under the front level ing legs to prevmt floor damage.
1 2