Positioning racks and pans (coht.), Extra oven rack position (roasting rack), For best air circuiat10n – Whirlpool FGS335E User Manual
Page 9: Best air circuiat10n, Semnctneaock, Ositioning, Racks, Pans, Coht
Attention! The text in this document has been recognized automatically. To view the original document, you can use the "Original mode".
USING YOUR RANGE
P
ositioning
racks
and
pans
(
coht
.)
Extra oven rack position (roasting rack)
Use this rack position when roasting food too large
to be placed on the first
rack position.
For proper roasting,
follow these guide
lines:
• The rack must be level.
• Use an adequate
amount of liquid in the
pan (meat juices or
water) so your food
does not get overdone.
Extra oven rack position
• To pull the rack over the door you must tilt the
rack up at the front. If the rack is loaded with
food, tilting the rack could cause the food to spill.
To avoid spilling, do not try to pull out the rack
when removing large amounts of food.
Usin^ insulated bakeware, ovenproof
glassware, and dark metal pans
• When baking with insulated cookie sheets or
baking pans, place them in the bottom third of
the oven. You may need to increase the recom
mended baking times, so test for doneness before
removing from the oven.
• When using ovenproof glassware or dark bake
ware, reduce the oven temperature by 25°F but
use the same baking time. Because these pans
absorb heat, producing darker bottom browning
and crispier crusts, place the rack in the center of
the oven. When baking pies and bread, you can
use the temperature suggested in the recipe.
F
or
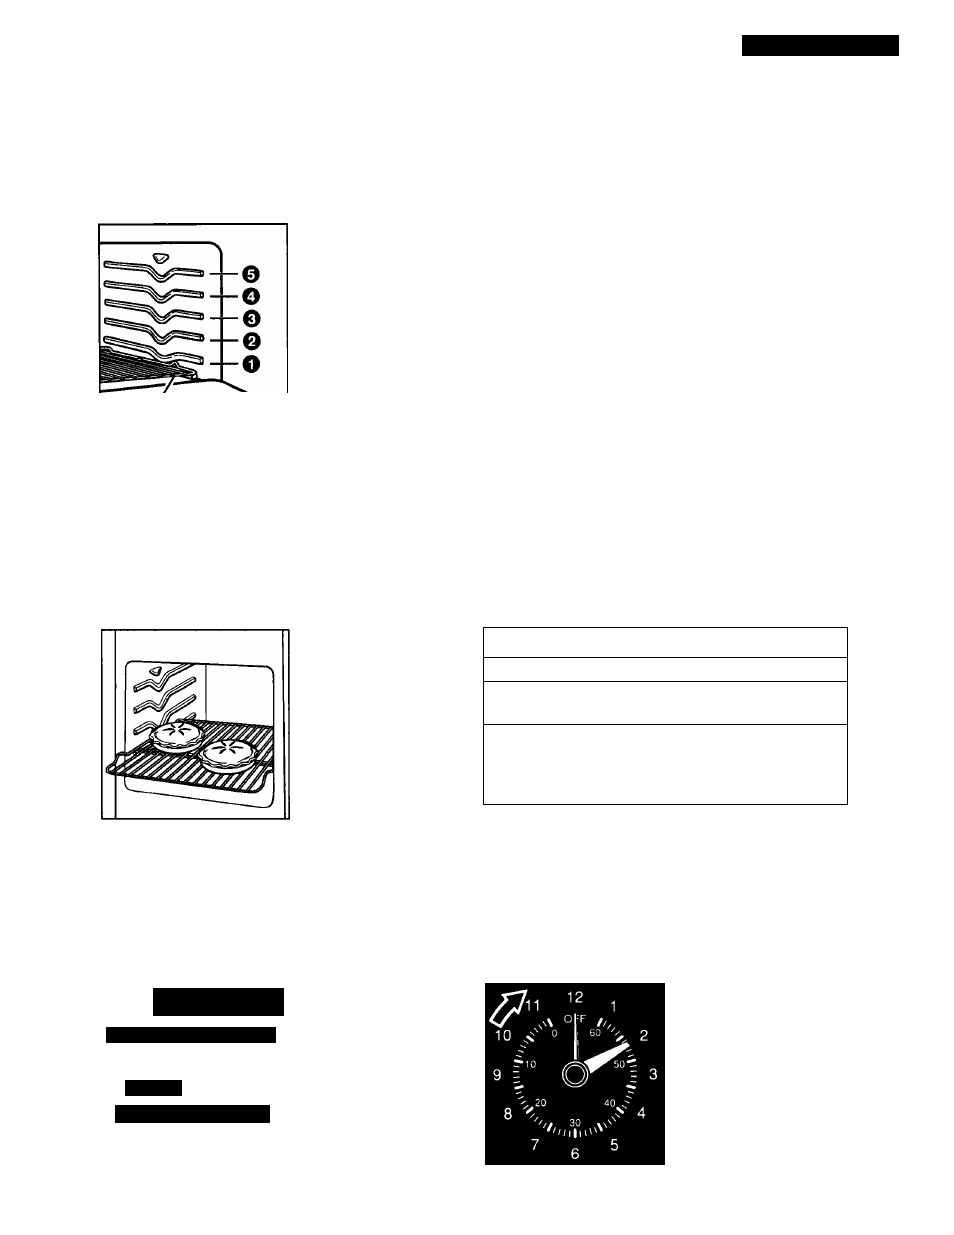
BEST AIR CIRCUIAT10N
Hot air must circulate around the pans in the oven
for even heat to reach
all parts of the oven.
This results in better
baking.
• Place the pans so
that one is not directly
over the other.
• For best results,
allow 1 Vz-2 inches of
space around each pan
and between pans and
oven walls.
• Use only 1 cookie sheet in the oven at a time.
Where to place pans:
WHEN YOU HAVE
PLACE
1 pan
In center of the oven rack.
2 pans
Side by side or slightly
staggered.
3 or 4 pans
In opposite corners on
each oven rack. Stagger
pans so no pan is directly
over another.
SEmNCTNEaocK
1. Push in the minute timer knob and turn it clock
wise until the clock
I
10 «í'
0
I
60
2
shows the correct
time of day.
2. Let the minute timer knob pop out. Turn it clock
wise until the minute
timer hand points to
OFF.
NOTE: The clock
setting will change if
you push in the knob
when turning.
8
.s'*" 4