Attaching the ice maker to a water supply (cont.), Connecting to refrigerator, Style #1 valve – Whirlpool ED20TWXDN02 User Manual
Page 11: Clamp, Mounting screw, Water iniet fitting, Style #2 valve, Ttaching, Maker, Water
Attention! The text in this document has been recognized automatically. To view the original document, you can use the "Original mode".
INSTALLING YOUR REFRIGERATOR
A
ttaching
the
ice
maker
to
a
water
supply
(
cont
.)
Connecting to refrigerator
NOTE: The first step for connecting the water line to
your refrigerator is different depending on the type
of water valve provided with your refrigerator. See
the diagrams at right to determine the style of valve
you have. (On kit models, assemble water valve to
refrigerator per kit instructions.)
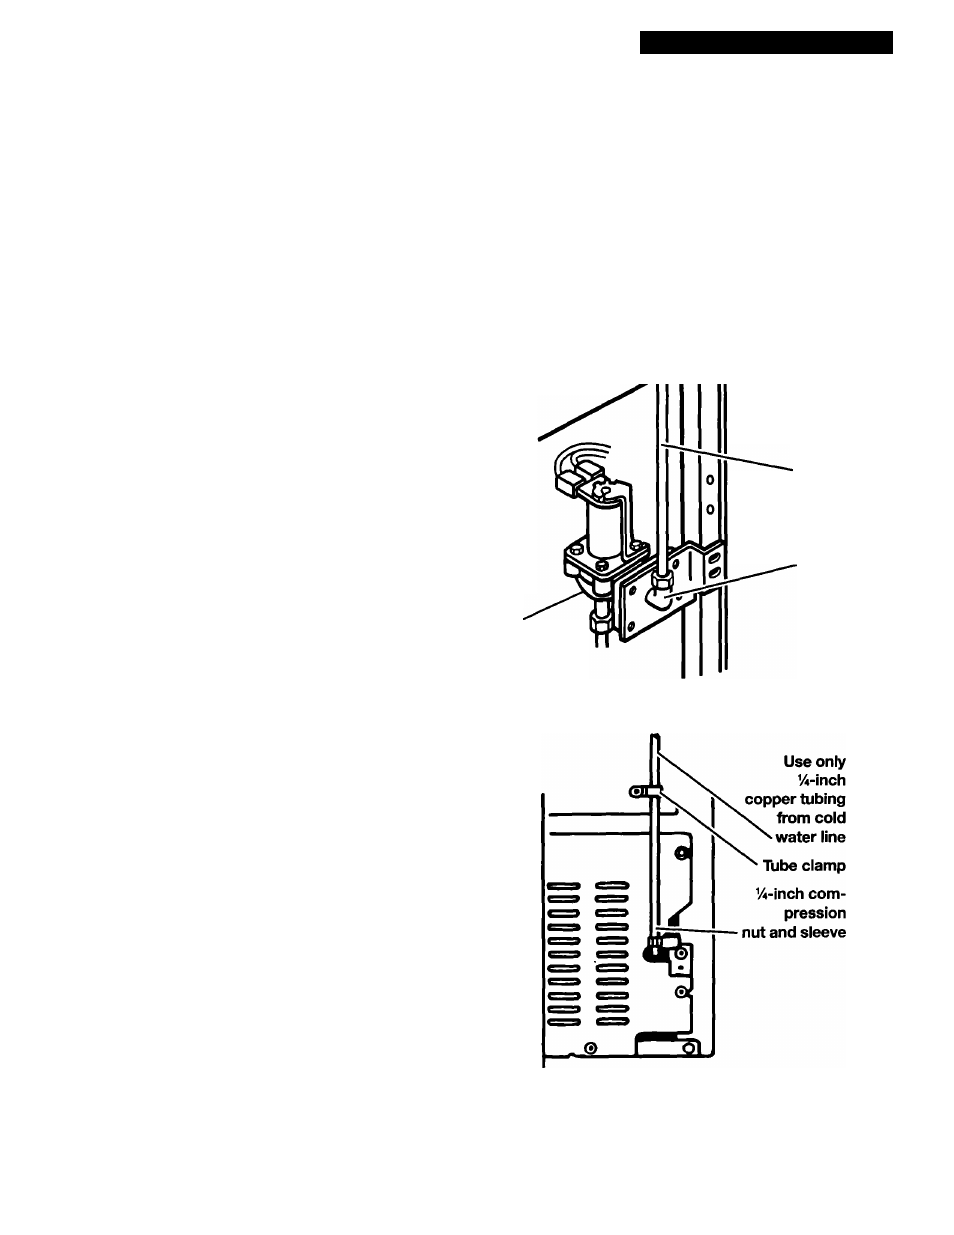
1. For style #1, disconnect the tube clamp on the
back of the product and insert the copper tubing
through the clamp, as shown at the right. Re
move the tape label from the valve inlet and
insert copper tubing until it bottoms out (approxi
mately %-inch). Tighten nut by hand as much as
possible; then turn the nut an additional turn
using a wrench. Do not overtighten. Re-attach
the tube clamp and tube to the back of the
cabinet. Skip to step 2.
For style #2, disconnect the tube clamp on the
back of the product and insert copper tubing
through the clamp as shown at the right. Attach
the copper tube to the valve inlet using a com
pression nut and sleeve as shown. Tighten the
compression nut. Do not overtighten. Reattach
the tube clamp and tube to the back of the
cabinet. Move to step 2.
2.
Turn shut-off valve ON. CHECK FOR LEAKS.
TIGHTEN ANY CONNECTIONS (INCLUDING
CONNECTIONS AT THE VALVE) OR NUTS
THAT LEAK.
3.
The ice maker is equipped with a built-in water
strainer. If local water conditions require periodic
cleaning or a well is your source of water supply,
a second water strainer should be installed in
the %-inch water line. Obtain a water strainer
from your nearest appliance dealer. Install at
either tube connection.
4.
After installation, connect the refrigerator to the
electrical supply and push it back into place.
5. Check to make sure the refrigerator is level. (See
“Leveling” on page 8.)
Style #1 valve
/«lomn
^
clamp
Water
valve
Mounting
screw
Copper
tubing
Water iniet
fitting
Style #2 valve
11