Carl Goldberg GBGA1043 User Manual
Page 10
10
8.
Reinstall the wheel and wheel pant and retain
with the other 4mm wheel collar. Align the
wheel pant on the gear leg with the hole you
drilled for the blind nut. Install the 4-40 x 1/2”
socket head screw.
Don’t forget to use locktite to make sure it does
not come loose.
Repeat for other wheel pant.
Tail wheel Mounting
1. * Collect the following parts:
(1) tail wheel bracket
(1) tail wheel
(1) 1/8” wheel collars
(2) tail wheel springs
(2) 3mm x 1/2” sheet metal screws\
(2) bracket collars
(2) nylon horn brackets-
(2) 3mm x 1-1/2” threaded rod
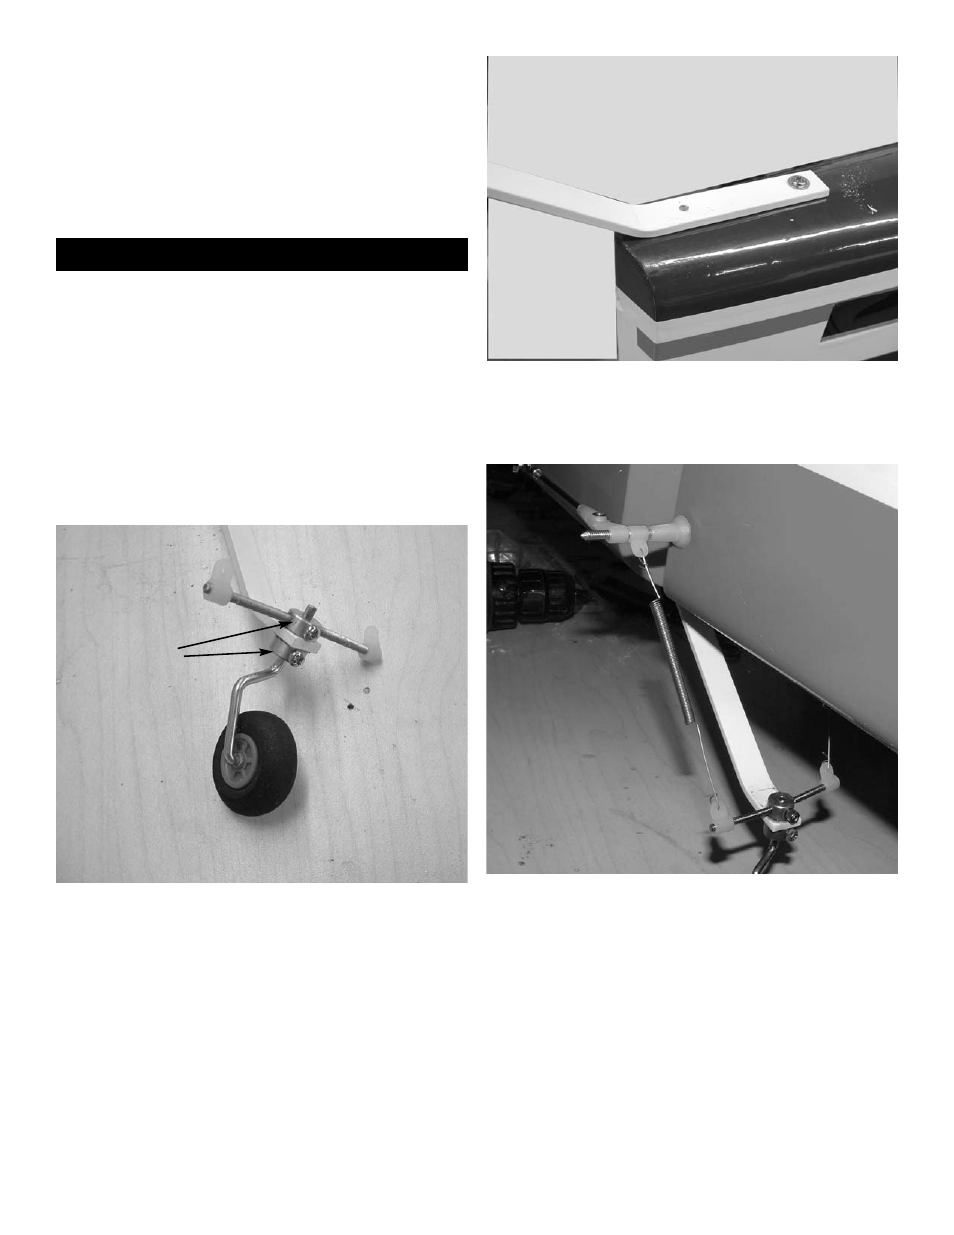
2.
Build up the tail wheel assembly by putting the
tail wheel on the axel and retaining with the
1/8” wheel collar. Install the bracket collar
(without holes on each side) on the shaft.
Insert the shaft through the mounting bracket
and install the bracket collar. Screw the thread-
ed rods into the bracket on each side. Make
sure the tiller arms are square to the tail wheel
and tighten the screw. Use locktite on the
screw.
Install the nylon horn brackets on each end of
the threaded rod.
Bracket collars
3.
Install the tail wheel bracket on the fuselage by
drilling a .050 hole at each locations and
mounting with the two 3mm x 1/2” screws.
4.
Install the tail wheel springs between the rud-
der horn bracket and tail wheel horn bracket.