Carl Goldberg GBGA1067 User Manual
Page 5
5
AILERON SERVO INSTALLATION
Note: The following pictures may not exactly match
the hardware you are using. Always check the radio
manufacturer's instructions when installing radio
equipment.
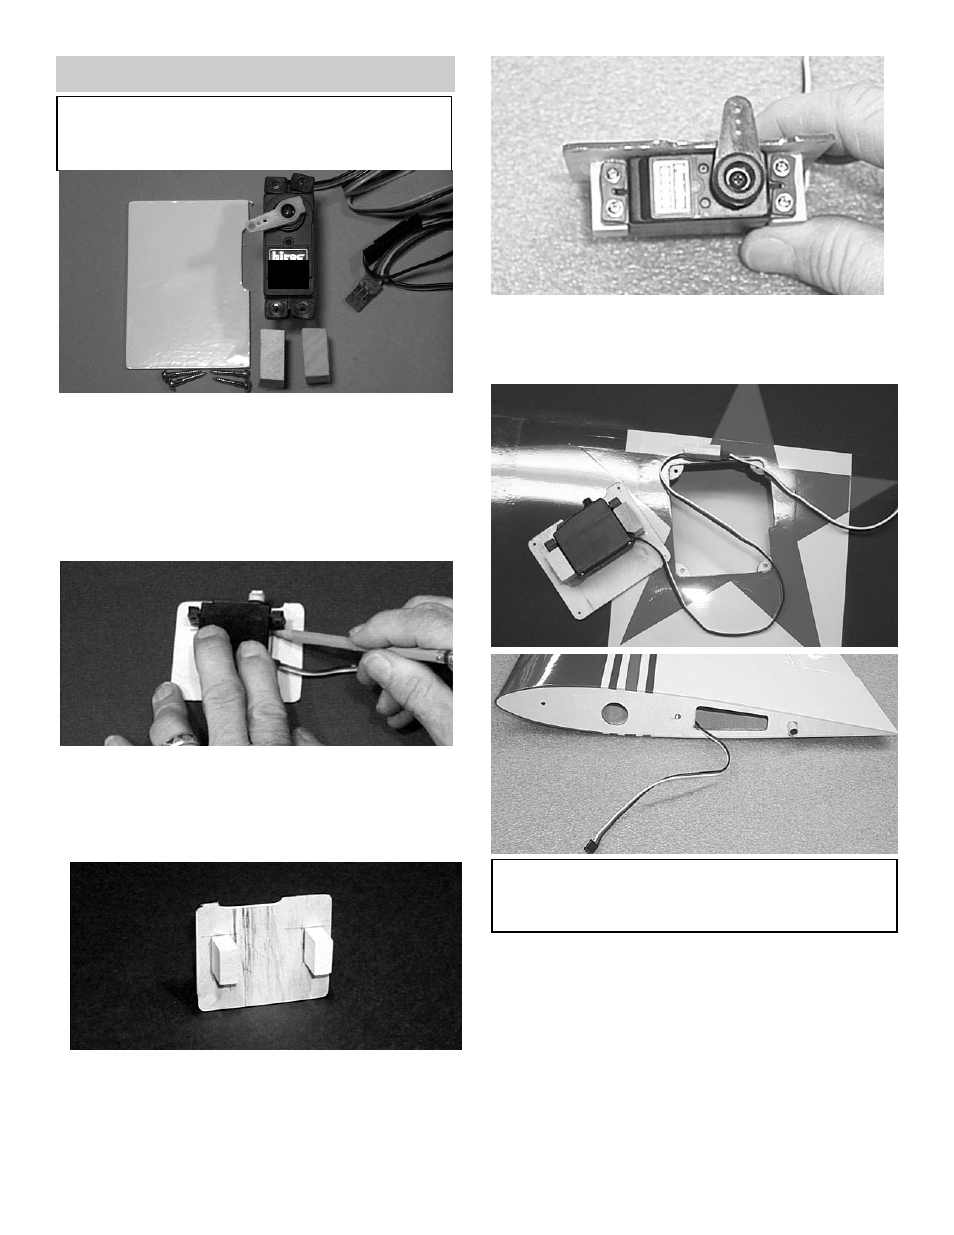
1.
Collect the following items:
(1) Aileron servo door
(2) 3/8 x 3/4" Servo mounting block
(4) Servo mounting screw (supplied with radio)
(4) #4 Washer
(4) #4 x 1/2" Screw
(1) Servo with rubber grommet (supplied with
radio)
2.
With the servo door upside down on the work
surface, place the servo on top of the door
with the servo arm post centered vertically
and horizontally with the servo door notch.
Mark the location of the servo, as shown.
3.
Remove the servo from the door.
Spread epoxy on the servo mounting blocks
and, making sure the wood grain on both
mounting blocks runs vertically, glue the
blocks in place along the marks just made.
IMPO
RTANT! To ensure that any connections locat-
ed inside the wing will not come loose, either when
the wires are pulled, or during flying, always tape
them securely together with electrical tape.
4.
Making sure to use the correct servo for the
opening, attach the servo wire to the12"
extension and securely tape the connection.
Push the extension wire into the wing until it
comes out the hole near the center of the
wing.
5.
Grasping the extension in the hole, SLOWLY
pull until the end of the 12" extension comes
out of the hole.
Tape the extension securely to the wing, so
that it will not slide back in while you are work-
ing.
When the epoxy is dry, drill 1/16" holes into
the servo blocks and, using the screws sup-
plied with the radio, mount the servo onto the
blocks.