Water rudder – Carl Goldberg GBGQ1296 User Manual
Page 8
8
1.
Install one nylon bearing and mounting pad at
front float hole locations.
Using four #4 x 1/2” socket head screws and
washers, mount pads and bearings to float.
Repeat for the other three blocks and pads.
MOUNTING FLOATS TO PLANE
Caution:
Always use thread lock on any type
of machine bolt and nut.
2.
Insert the 4-40 x 1/8” set screw in to each of
the brass collars.
Install floats on struts using the brass collars
in the center of the nylon bearing.
Make sure that you keep the floats parallel to
the fuselage center line. (See page 5 “ Top
view float installation)
Once the floats are aligned, tighten all the set
screws in the brass collars.
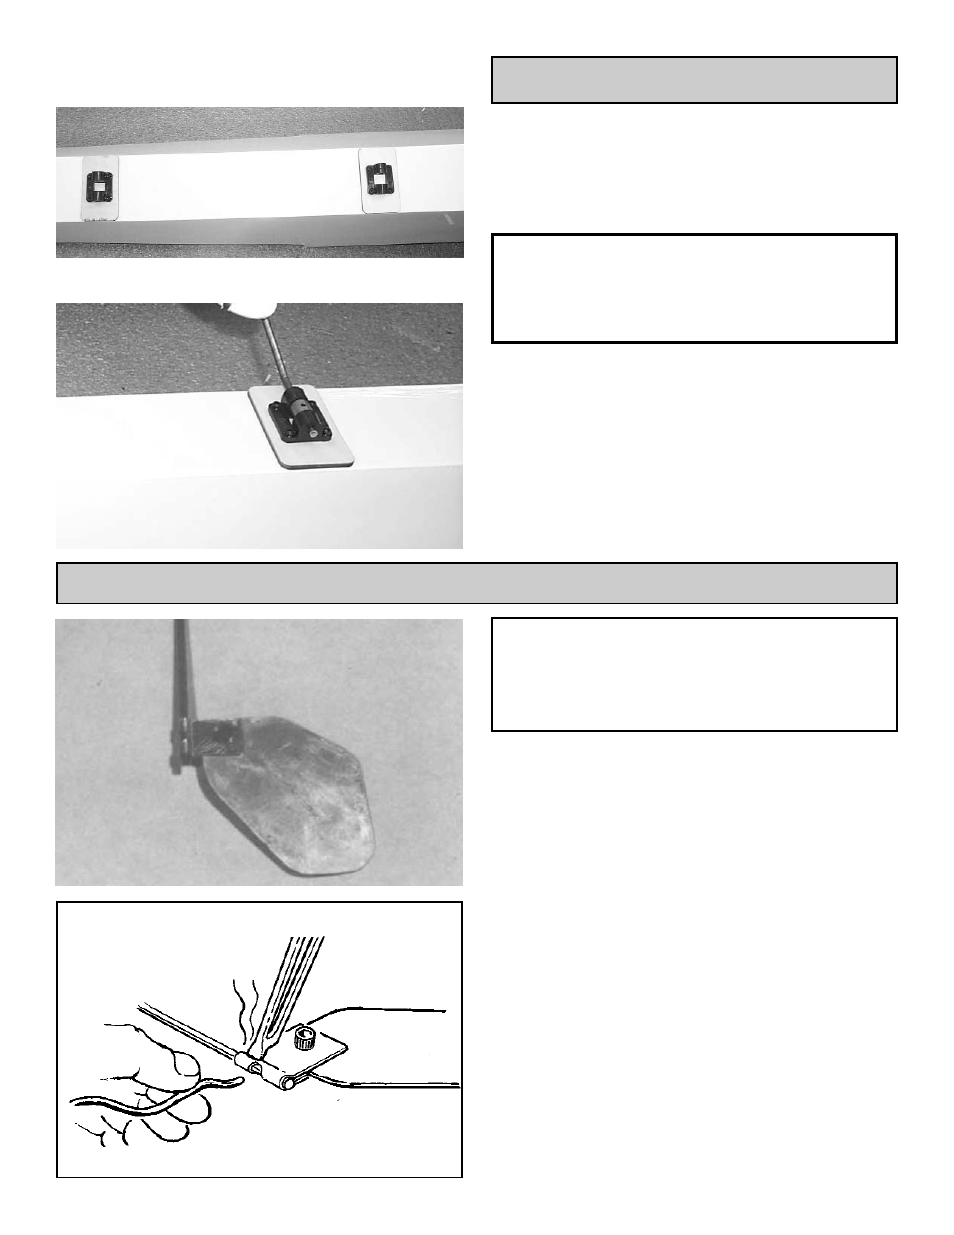
WATER RUDDER
1.
slide the brass rudder pivot on to the end of
the 1/8” x 2” rudder shaft.
insert the rudder into the rudder pivot.
mount the rudder to the pivot using a 4-40 x
1/4” socket head screw and a 4-40 locking
nut.
Note: Pivot screw should be snug, not loose. It
should be tight enough to allow the rudder
to rotate if it strikes an object at speed.
2.
Solder pivot to rudder shaft through hole in
pivot.
Important: Be careful not to get solder in rudder
area - as it must swing free.
This is a single rudder system if you
would perfer a dual rudder system
then you can call us at 678-450-0085
ot order one.