Carl Goldberg GBGQ1296 User Manual
Page 7
7
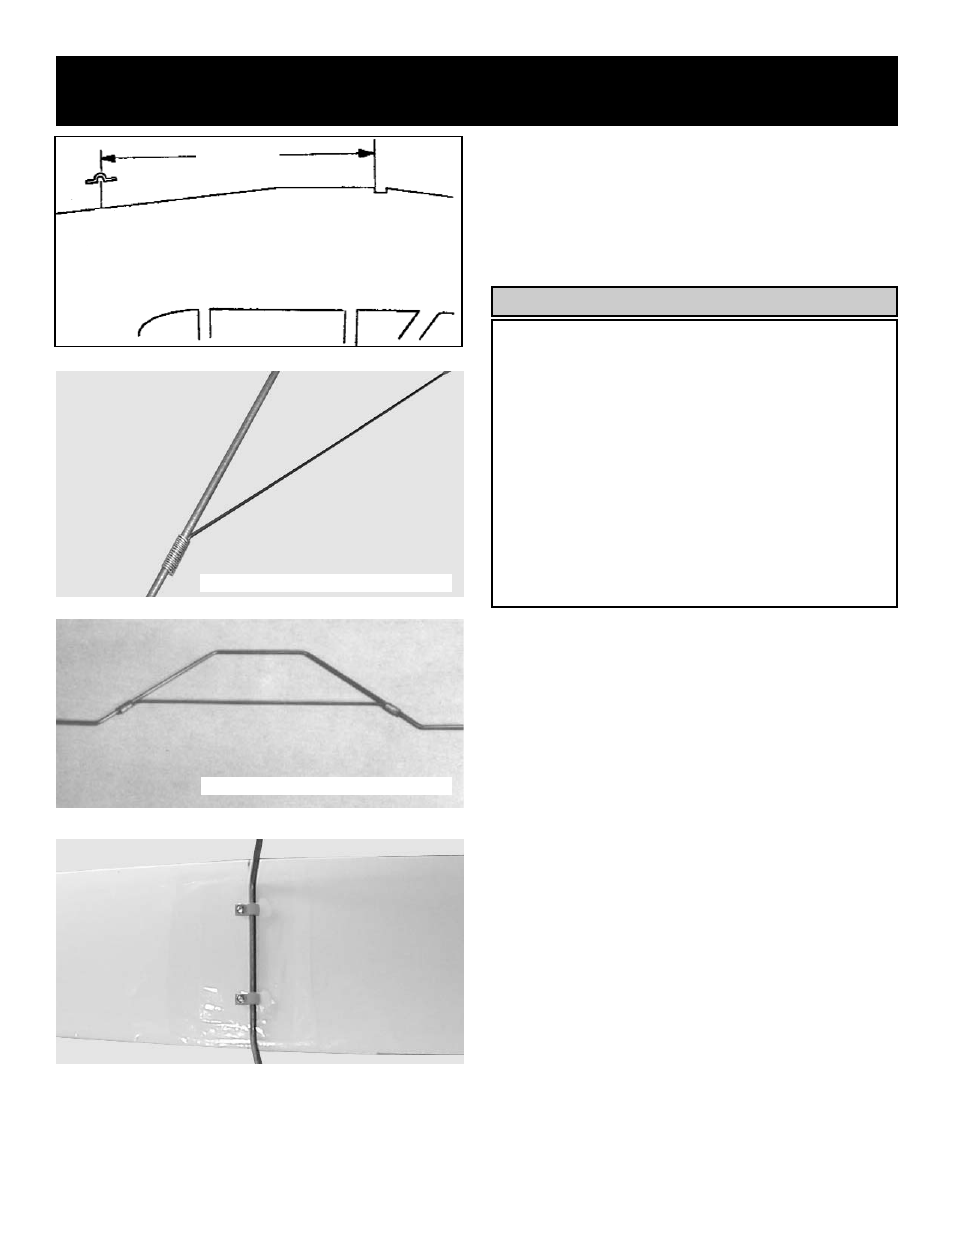
11-1/4”
The following instructions are for installation of the floats on
the CGP Cub.
1.
Remove present landing gear struts and save
them for “wheel” operation.
Measure back 11-1/4” from the landing gear
groove on both sides of the fuselage
Install new wider front struts in fuselage using
the straps and screws that exist on the plane.
Soldering
If you are not familiar with soldering, the basic
procedure is described here.
A. Prepare by wiping areas to be soldered with steel
wool or fine sandpaper so metal is clean and
bright.
B. Position parts to be joined and bind them with
tightly together with wire.
C. When satisfied with fit between parts,apply heat
directly to joint and get it very hot - This is
important.
D. When thoroughly heated, touch the solder to the
area and the solder should melt into and fill
the joint, producing a good strong bond.
2.
Position 3/32” diameter cross brace wire
behind front struts and adjust for best match
of brace bends with struts.
When satisfied with fit, bind together with wire
and solder.
Caution: Don’t let any solder drip onto the plane.
3.
Solder second cross brace on to rear strut.
4.
Place brass landing gear clamps on flat cen-
ter area of rear strut wire, near each bend.
Align rear strut wire over marked locations
from previous step.
Mark clamp hole locations on bottom of fuse-
lage.
Drill two 1/16” holes and using the #2 x 5/16”
screws, attach rear strut to fuselage.
Option: after installing screws, remove them and add
a drop of thin CA to stiffen threads in wood.
FRONT STRUT WITH CROSS BRACE
REAR STRUT WITH CROSS BRACE