C&D Technologies RS-937 RDB Rack User Manual
Page 4
5
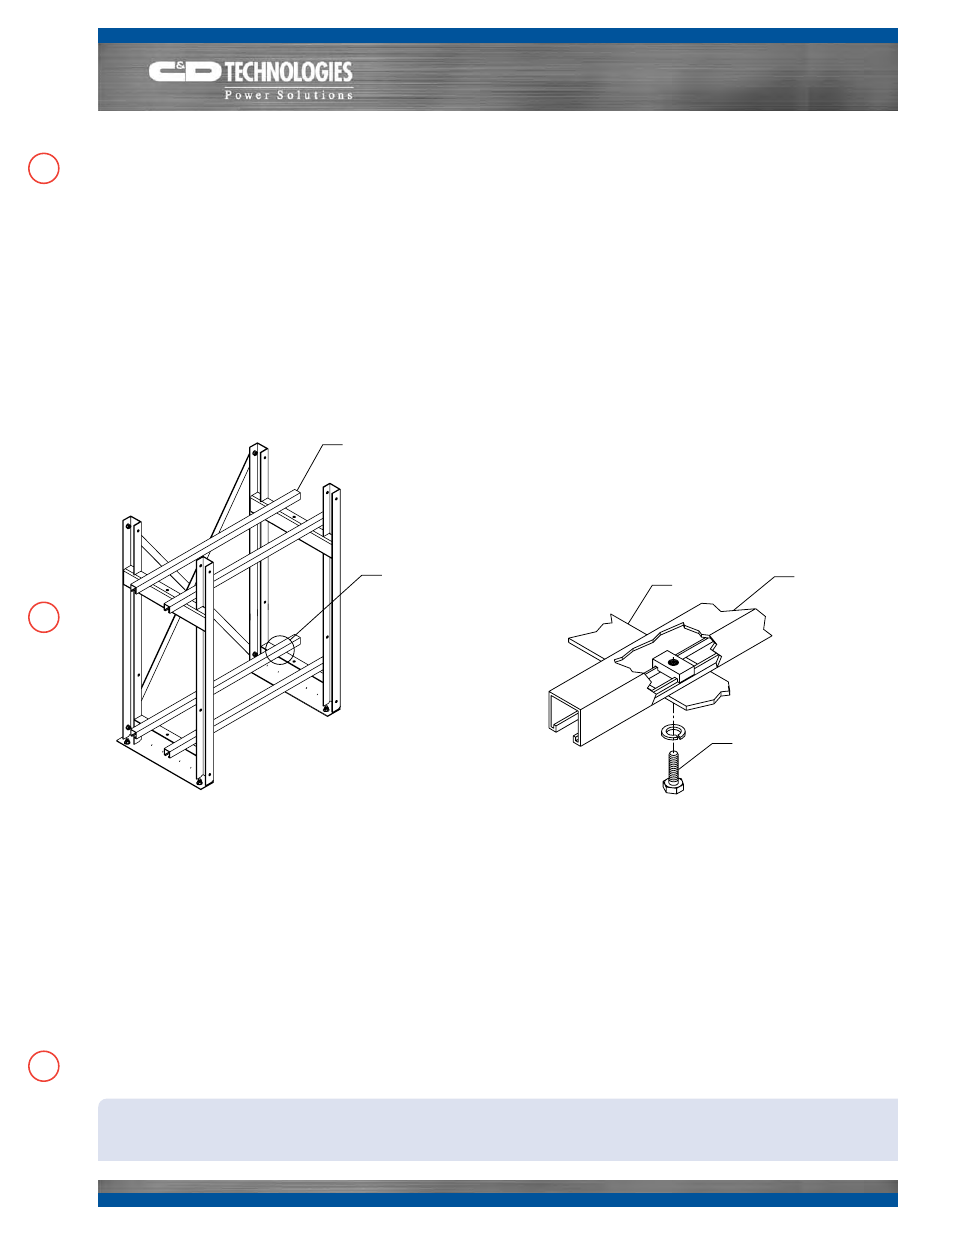
Installing Support Rail(s): Place support rail(s) in
location using supplied 3/8” bolt, washer, serrated strut nut,
finger tight. Align support rails with “A” dimension from rack
assembly drawing. Install rail covers. See figure 5.
Note: An internal/external “star” washer is used in place of
lock washer on bottom tier or step, for grounding connection.
Optional third rail should be installed at this time (L-Series only).
Assembly InstructIons for
stAndArd And eP rAcks (contInued)
At this point, you have installed a
C&D Standard Rack, please proceed to step 8 for cell installation or if you have
an
EP Rack, continue on in this procedure.
Rail to Frame
Connection.
See Detail 2.
Support Rail
and Cover
Figure 5. Support Rail Installation
6
Leveling: Check that the rack is level and square. Torque
down all bolts. First torque the cross brace bolts to 55-65 ft.-lb.,
then torque the rail to frame bolts to 15-20 ft.-lbs. Torque anchor
bolts to manufacturer’s recommended value.
Detail 2. Frame and Support Rail Connection
3/8-16 Hex Bolt,
Washer (Lock or star)
and Serrated Nut
Support Rail
and Cover
Frame