American Diagnostic Corporation (ADC) Prosphyg 790 User Manual
Page 4
pressure. Index and range markings ensure use of
the correct cuff size. The artery mark indicates
proper cuff positioning.
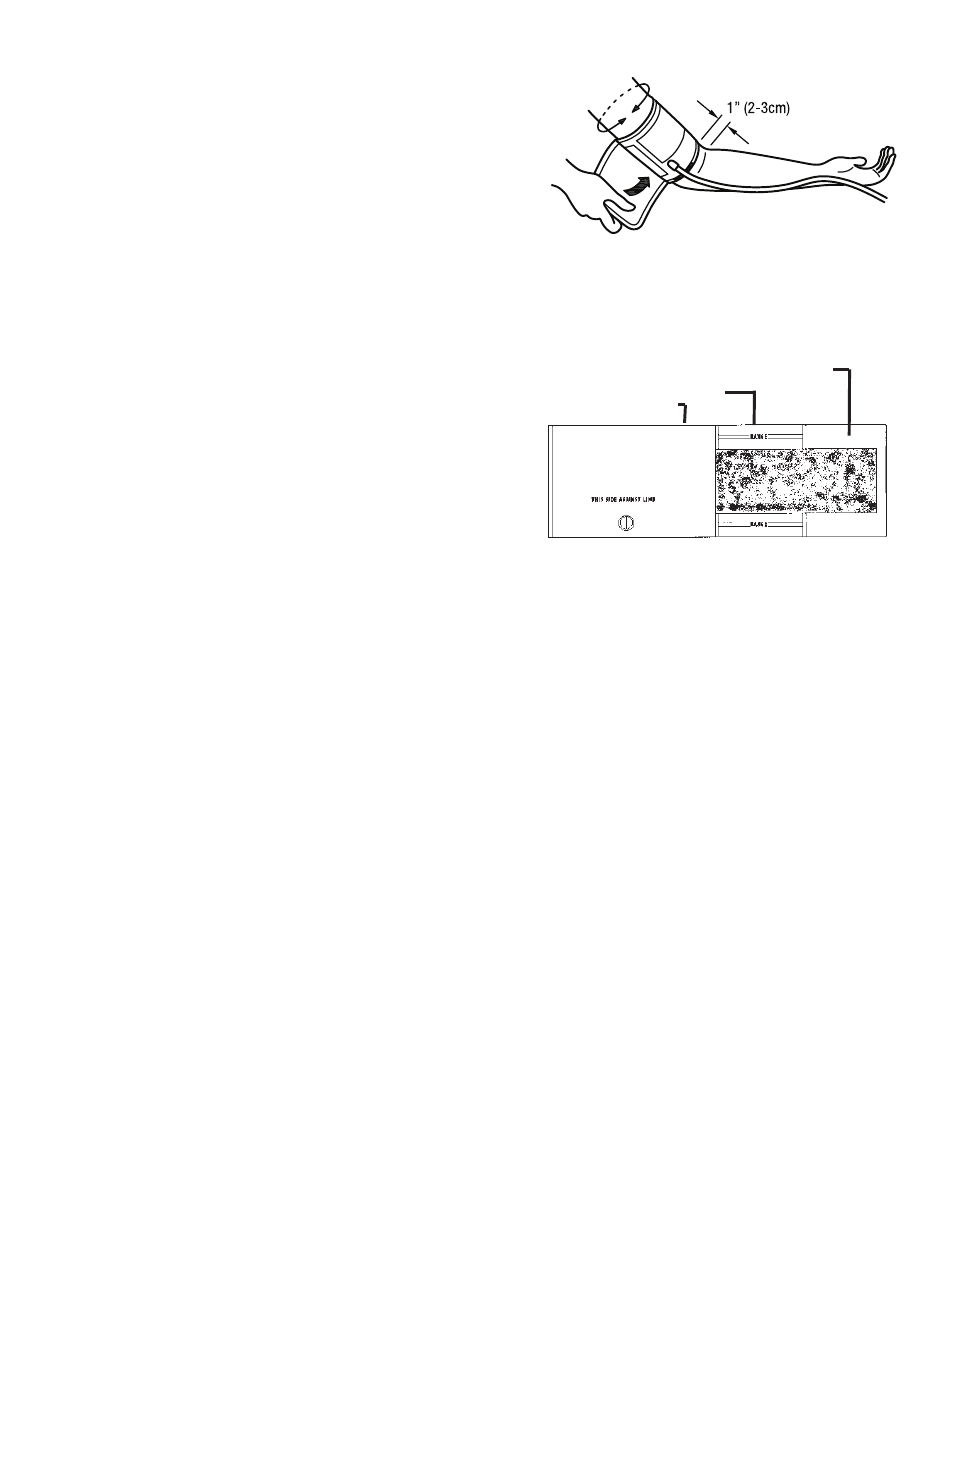
Place the cuff over the bare upper arm with the ar-
tery mark positioned directly over the brachial ar-
tery. The bottom edge of the cuff should be
positioned approximately (1”) one inch (2-3cm)
above the antecubital fold. Wrap the end of the cuff not containing the bladder around the
arm snugly and smoothly and engage adhesive strips (Figure 1).
NOTE: If the unit is equipped with a calibrated
nylon cuff, featuring Index and Range markings, a
correct fit may be verified by checking that the
Index Line falls between the two Range Lines.
(Figure 2).
3. Inflate the cuff
Close the valve by turning thumbscrew clockwise.
Palpate the radial artery while inflating the cuff. Be sure to inflate cuff quickly by squeezing
bulb rapidly.
Inflate cuff 20-30 mmHg above the point at which the radial pulse disappears.
NOTE: Cuff pressure range is 0 mmHg to 300 mmHg.
4. Position the Stethoscope
Position the chestpiece in the antecubital space below the cuff, distal to the brachium. Do
not place chestpiece underneath the cuff, as this impedes accurate measurement. Use the
bell side of a combination stethoscope for clearest detection of the low pitched Korotkoff
(pulse) sounds.
5. Deflate the cuff
Open the valve to deflate the cuff gradually at a rate of 2-3 mmHg per second.
6. Measurement
Record the onset of Korotkoff sounds as the systolic pressure, and the disappearance of
these sounds as diastolic pressure. (Some healthcare professionals recommend recording
diastolic 1 and diastolic 2. Diastolic one occurs at phase 4).
NOTE: It is recommended that K4 be used in children aged 3 to 12, and K5 should be used
for pregnant female patients unless sounds are audible with the cuff deflated, in which case
K4 should be used. K5 should be used for all other adult patients.
After measurement is completed, open valve fully to release any remaining air in the cuff.
Remove cuff.
Left Arm
Tube
(Figure 1)
Select Smaller Cuff
▲
CORRECT
▲
Select Larger Cuff
▲