5) reassemble thermostatic valve & diverter, Figure 5 – Jaclo Thermostatic Valve, Rough - J-TH34 User Manual
Page 10
jaclo
industries | 129 Dermody Street Cranford, NJ 07016
p 908.653.4433 | 800.852.3906 f 908.653.1717 | 800.852.4133
JACLO.COM | PG 10
CREATED 5.2014
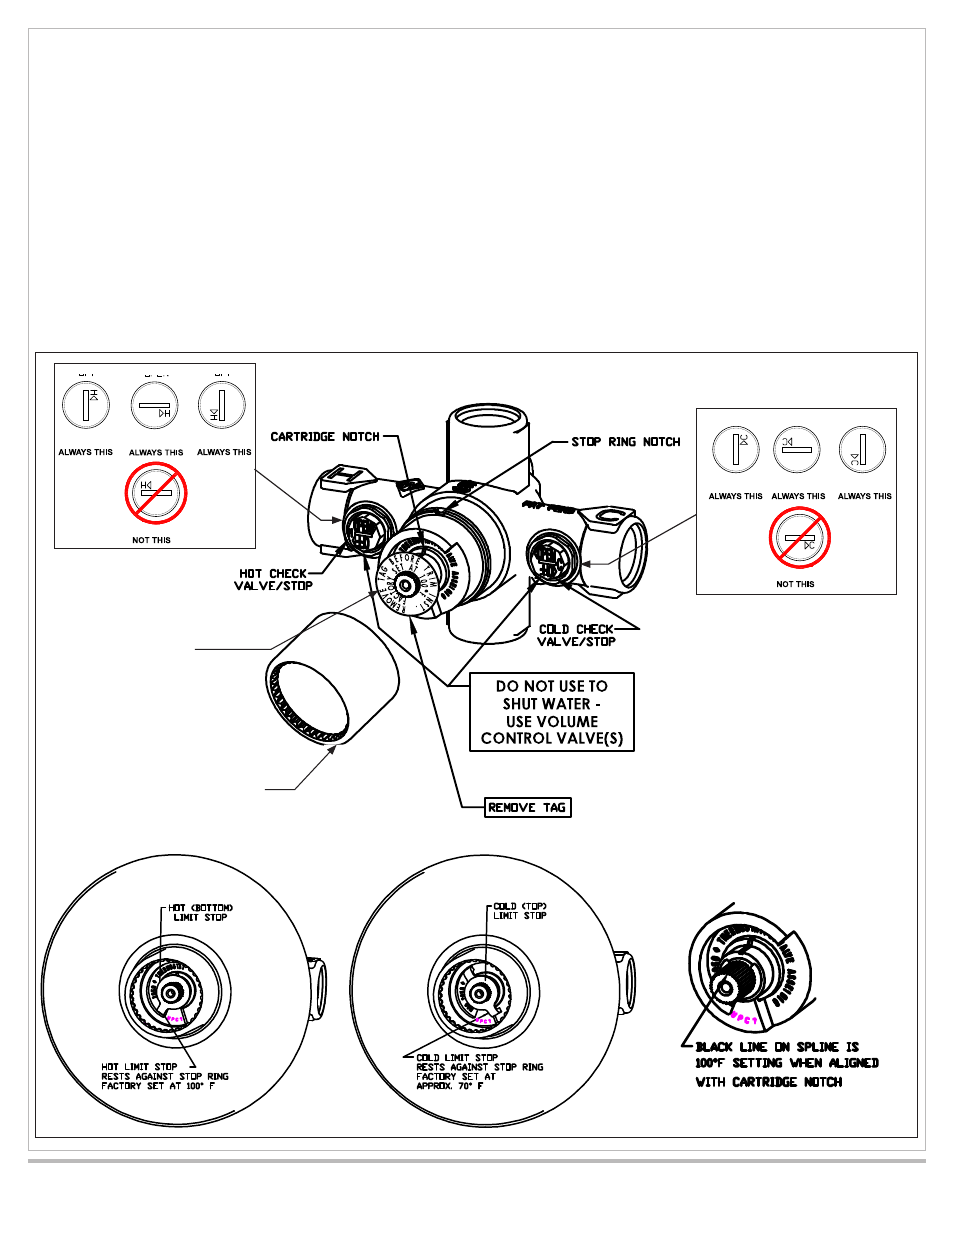
(5) Reassemble Thermostatic Valve & Diverter
A. Reassemble in reverse order of steps in Fig. 2
i. Inspect and remove any debris in diverter body.
ii. Insert diverter cartridge into body so protrusion on cartridge fits into holes in body located in the
6 o’clock position. See Fig. 2a
iii. Install diverter lock nut using 1" wrench, tighten nut.
iv. Inspect and remove any debris in the thermostatic valve body cartridge and check stop cavities.
v. Apply silicone grease to the o-rings on the thermostatic cartridge, insert cartridge into valve body
rotating back and forth slightly. Orient cartridge with the notch up in the 12 o’clock position. See Fig. 5.
vi. Install thermostatic cartridge lock nut using 1¼" wrench, tighten nut.
vii. Reinstall hot and cold check stops, rotating back and forth lightly until seated.
viii. Install hot and cold check stop nuts using 13/16" wrench, tighten nuts.
SLEEVE
SPINDLE
OPEN
OPEN
CLOSED
CLOSED
CLOSED
CLOSED
Figure 5