Input power wiring, Ac input power wiring (-ac), Dc power input (-dc) – Hardy HI 4050CW Check Weighing Bundle User Manual
Page 3: Starting the hi 4050, Fig. 9 summary display, Fig. 10 configuration display
INPUT POWER WIRING
WARNING: D
O
NOT
PLUG
THE
POWER
CONNECTOR
INTO
THE
HEADER
WITH
LIVE
POWER
. T
O
DO
SO
WILL
RESULT
IN
PROPERTY
DAMAGE
AND
/
OR
PERSONAL
INJURY
.
WARNING:
IF
A
LITHIUM
BATTERY
IS
REPLACED
WITH
AN
INCORRECT
TYPE
IT
MAY
CAUSE
AN
EXPLOSION
WHICH
WILL
CAUSE
PROPERTY
DAMAGE
OR
PERSONAL
INJURY
.
AC Input Power Wiring (-AC)
WARNING:
DO
NOT
OPERATE
WITH
INCORRECT
LINE
VOLT
-
AGE
.
TO
DO
SO
WILL
RESULT
IN
PROPERTY
DAMAGE
AND
/
OR
PERSONAL
INJURY
. M
AKE
SURE
THAT
THE
POWER
SOURCE
DOES
NOT
EXCEED
240 VAC.
WARNING: I
F
AN
AUTOMATIC
DISCONNECT
DEVICE
IS
USED
ON
THE
AC
INPUT
WIRES
,
THE
DISCONNECT
MUST
ACT
ON
BOTH
THE
LINE
AND
NEUTRAL
WIRES
IN
A
DOUBLE
POLE
,
DOU
-
BLE
THROW
ARRANGEMENT
I
.
E
. DPDT R
ELAY
. U
SING
OTHER
AUTOMATIC
DISCONNECT
ARRANGEMENTS
MAY
CAUSE
PER
-
SONAL
INJURY
AND
/
OR
PROPERTY
DAMAGE
.
•
The AC power should be supplied by a “clean” primary line,
directly from the power panel. This line should not supply any
other equipment, including the feeding unit, and should be
supplied with a minimum 10 amp breaker.
•
AC Power Input (See Fig. 7)
Neu (Low)
Line (HI)
Earth Ground
Step 1.
The HI 4050 is configured with a universal power supply rated
from 110 to 240 VAC.
Step 2.
Make sure the VAC power is shut off before installing the
wires to the connector.
Step 3.
Install a 3-wire, minimum 14 AWG power line to the 3-pin ter-
minal block connector. Make sure that the shield is connected
to the local Earth Ground connection.
DC Power Input (-DC)
WARNING:
DO
NOT
OPERATE
WITH
INCORRECT
LINE
VOLT
-
AGE
.
TO
DO
SO
WILL
RESULT
IN
PROPERTY
DAMAGE
AND
/
OR
PERSONAL
INJURY
. M
AKE
SURE
THAT
THE
POWER
SOURCE
DOES
NOT
EXCEED
24 VDC.
CAUTION: Y
OU
MUST
USE
A
POWER
LIMITED
DC
POWER
SUPPLY
(C
LASS
2)
ON
THE
DC
INPUT
WIRING
.
•
The DC power should be supplied by a “clean” primary line,
directly from the DC power source.
Step 1.
Make sure the VDC power is shut off before installing the
wires to the connector.
Step 2.
Connect the 24 VDC Voltage wire, Ground wire and Shield
wire to the connector that plugs into the DC voltage header at
the rear panel. Make sure that the shield is connected to the
local Earth Ground connection.
Step 3.
Plug the connector into the header at the rear panel. (See
Fig. 7)
STARTING THE HI 4050
Step 1.
Connect the power connector (AC or DC) to the HI 4050.
Step 2.
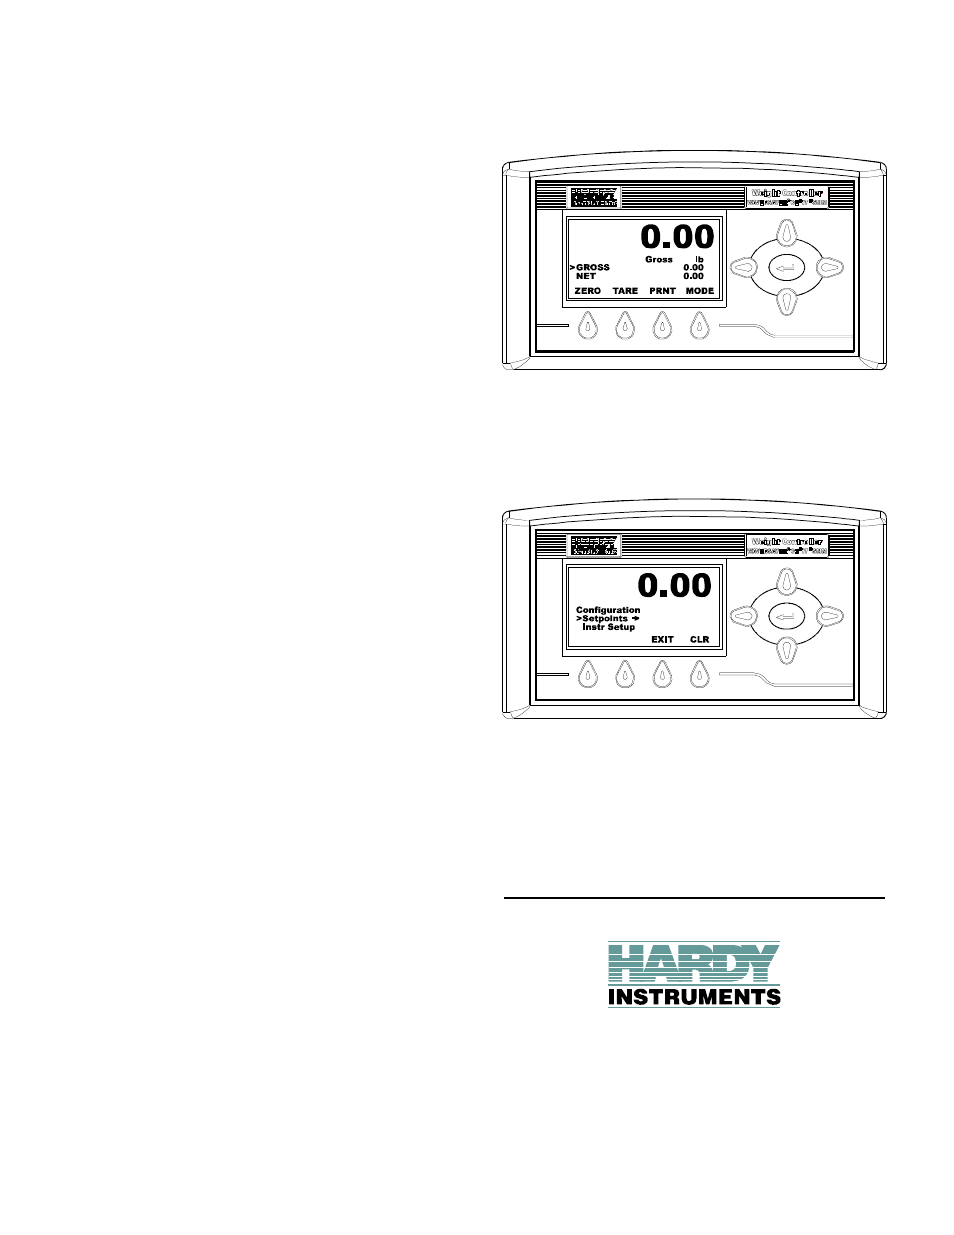
The Instrument boots up to the Summary Display. (See Fig. 9)
FIG. 9 SUMMARY DISPLAY
Step 3.
Press the Enter button to go to the Configuration menus. (See
Fig. 10)
FIG. 10 CONFIGURATION DISPLAY
Step 4.
Use the HI 4050 Weight Controller User Guide for Configura-
tion, Operation and Troubleshooting instructions.
9440 Carroll Park Drive, Suite 150
San Diego, CA 92121
Telephone: 1-800-821-5831 FAX: (858) 278-6700
Web Address: http://www.hardyinstruments.com
Hardy Instruments Document Number: 0596-0304-01 Rev. C
Copyright September 2006, Dynamic Instruments, All Rights Reserved.
Printed in the U.S.A.