Hangar 9 33% Pawnee 80cc ARF (3 Boxes) User Manual
Page 9
9
Hangar 9 33% Pawnee 80cc ARF
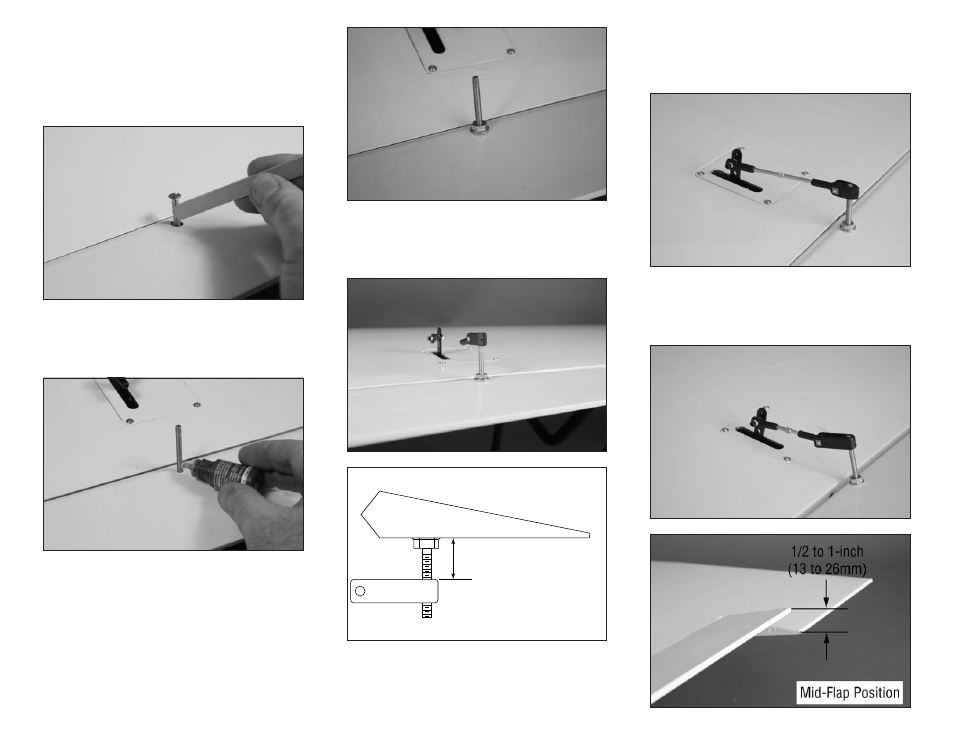
20. Slide the 8-32 x 2
1
/
4
-inch countersunk
machine screw into the hole in the aileron. Mix a small
amount of 30-minute epoxy and apply it to the last 1/2-
inch (13mm) of the screw. Once the screw is in position,
Use isopropyl alcohol and a paper towel to remove any
excess epoxy.
21. Apply a drop of threadlock on the screw near
the aileron surface. Use an 11/32-inch open-end wrench to
tighten the 8-32 flanged nut against the wing to secure the
position of the screw.
22. Thread the short control horn on the screw
for the aileron until it is 1
1
/
8
-inch (29mm) from the control
surface as shown. Use the short control horn for the aileron,
and the long control horn for the flaps.
*Drawing not to scale
1
1
/
8
-inch (28.5mm)
23. Repeat Steps 2 through 22 to install the
remaining aileron servos, as well as the flap servos.
24. Install the 4-40 x 3-inch adjustable link between the
control horn and ball end. With the servo centered, adjust
the link so the aileron is centered as well. Install the linkage
for both ailerons at this time.
25. Use a 4-40 x 2-inch adjustable link for the flap
servo installation. Adjust the linkage to achieve the mid-flap
position as shown. The servo horn can be angled toward the
leading edge to achieve mechanical differential.