Hangar 9 33% Pawnee 80cc ARF (3 Boxes) User Manual
Page 17
17
Hangar 9 33% Pawnee 80cc ARF
Note
: Always use threadlock on metal-to-metal
fasteners to prevent them from vibrating loose.
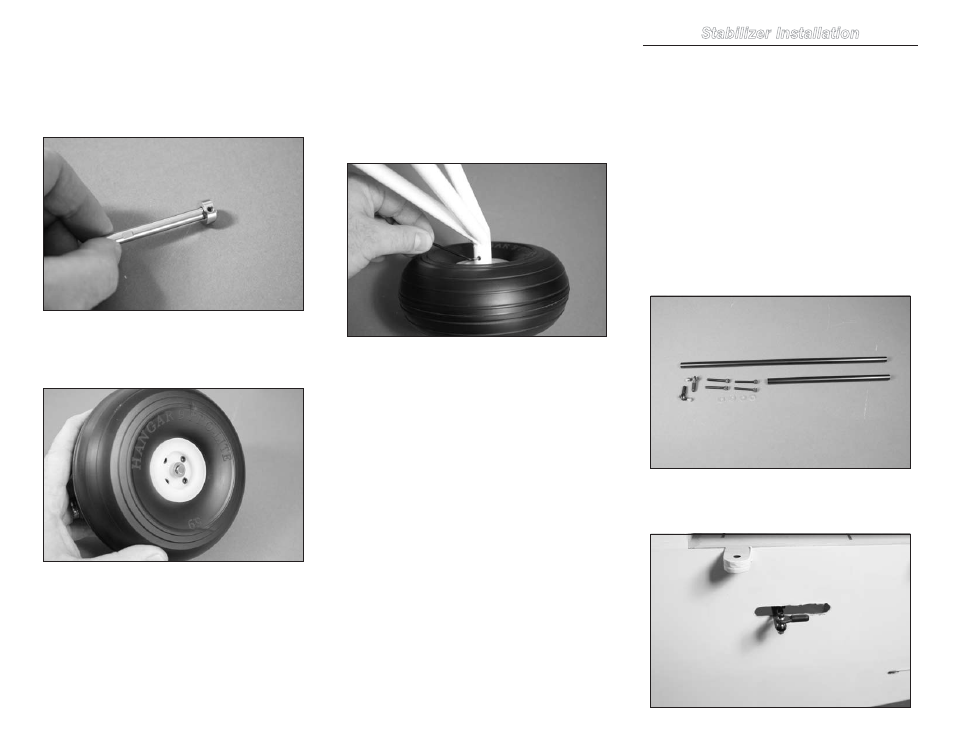
9. Slide the wheel collar on the axle. The flat on the
axle will be the one closest to the end of the axle. Use a
1.5mm hex wrench to tighten the setscrew in the wheel
collar on the flat of the axle.
10. Remove the hub cap from the wheel using a small
flat blade screwdriver. Place a drop of light machine oil on
the axle, then slide the axle through the wheel from the side
with the hub cap as shown.
Note
: Always use threadlock on metal-to-metal
fasteners to prevent them from vibrating loose.
11. Slide the axle into the gear. Use a 6/32 x 1/4-inch
setscrew and 5/64-inch hex wrench to secure the axle in
position. Make sure to tighten the setscrew on the flat of
the axle, and that the wheel can rotate freely on the axle.
Once the axle is secure, place the hub cap back in position
on the wheel.
hint
: Place a drop of silicone adhesive
on the inside edge of the hub cap if you
find it is not secure when in position.
12. Repeat steps 3 through 11 to install the remaining
landing gear and wheel.
Stabilizer Installation
Required Parts
Fuselage assembly
Ball end with hardware (2)
#8 washer (4)
Stabilizer assembly (right and left)
8-32 x 1
1
/
4
-inch socket head cap screw (4)
Aluminum stabilizer tube, short
Aluminum stabilizer tube, long
Required Tools and Adhesives
Hex wrench: 3/32-inch, 1/8-inch
Threadlock
Open-end wrench: 1/4-inch
1. Locate the items to attach the stabilizer halves to the
fuselage. You will also need the fuselage, as well as the left
and right stabilizers for this section of the manual.
2. Use a 3/32-inch hex wrench and 1/4-inch open-end
wrench to attach the ball end to the top side of the servo
horn. Install both ball ends at this time.