Checkline HPSA-R User Manual
Page 4
-4-
3.0 V
ERIFYING
F
UNCTIONALITY
The HPSA-R Durometer is calibrated against industry standards as specified
in ASTM, DIN and JIS Test Procedures. Calibrated Test Samples CAN NOT
BE USED for verification of the calibration, as these test samples are subject
to change due to temperature, sunlight and other ambient conditions.
Certification of the calibration is normally done at test facilities that can
independent test the internal spring forces of the Durometer and check the
travel/reading accuracy of the dial indicator.
You can, however, test that the gauge is functional and undamaged using the
optional Zero Test Block which can be ordered under item numbers
HP-TB-R20, HP-TB-R35, HP-TB-R55.
1. Press the Durometer
down on the test block.
Do not move the spring-
loaded outer ring.
2. The scale pointer should
make one full turn on the
scale, from zero to zero,
when you press down on
the instrument. If it does
not, contact Electromatic
for assistance.
NOTE:
Do not loosen the holding screws of the movement under any
circumstances. Loosening these screws may alter the calibration of the
instrument.
-5-
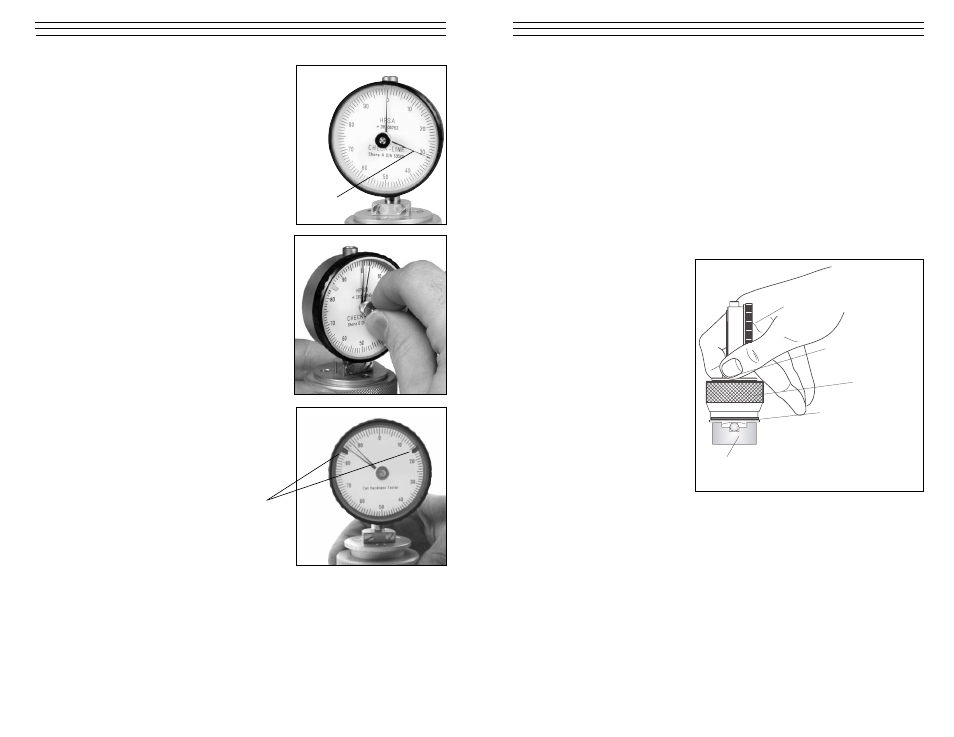
Scale
Spring-loaded
outer ring
Color marking
Holding screws
Test block
Part #’s: HP-TB-R20, HP-TB-R35, HP-TB-R55
Fig. 1
2.1 Memory
Pointer
The Memory Pointer moves with the
measurement pointer when a measure-
ment is taken. However, when pressure
on the outer shell is released, and the
measurement pointer returns to zero, the
Memory Pointer remains in position,
marking the last measurement.
To return the Memory Pointer to the
zero position prior to taking another
measurement, rotate the knurled knob
on the face of the instument counter-
clockwise until the pointer has been
reset. See figure at right.
2.2 Upper and Lower Limit Markers
Two movable markers can be rotated
around the faceplate to mark the upper
and lower measurement limits.
Memory
Pointer
Upper and Lower Limit Markers