0 measuring rpm 6.1 contact operation - rpm, 0 using optional-sized surface speed wheels, 1 setting wheel size – Checkline CDT-2000HD User Manual
Page 7
7
6.0 MEASURING RPM
6.1 Contact Operation - RPM
1. Install the Slide-on Contact Adapter.
Push on securely
2. Slide the Cone Tip adapter over the shaft of
the instrument. Be sure to align the pin on
the side of the shaft with the slot in the
adapter. Push on securely.
3. Select the Contact RPM mode by pressing
the MODE key until the rpm symbol appears
in the top left corner of the LCD display
4. Position the adapter carefully so that it contacts the center of
the rotating shaft. Apply enough pressure to eliminate any slip.
5. Press and hold the MEASURE key to take measurements.
6. Release the MEASURE key prior to removing the instrument from
the rotating element. The LAST reading will be retained on the
display.
M
O
D
E
M
E
M
m
ax
m
in
m
em
rp
m
m
/m
in
ft/m
in
in
/m
in
8.8.8.8.8
SLOT
PIN
RPM
10
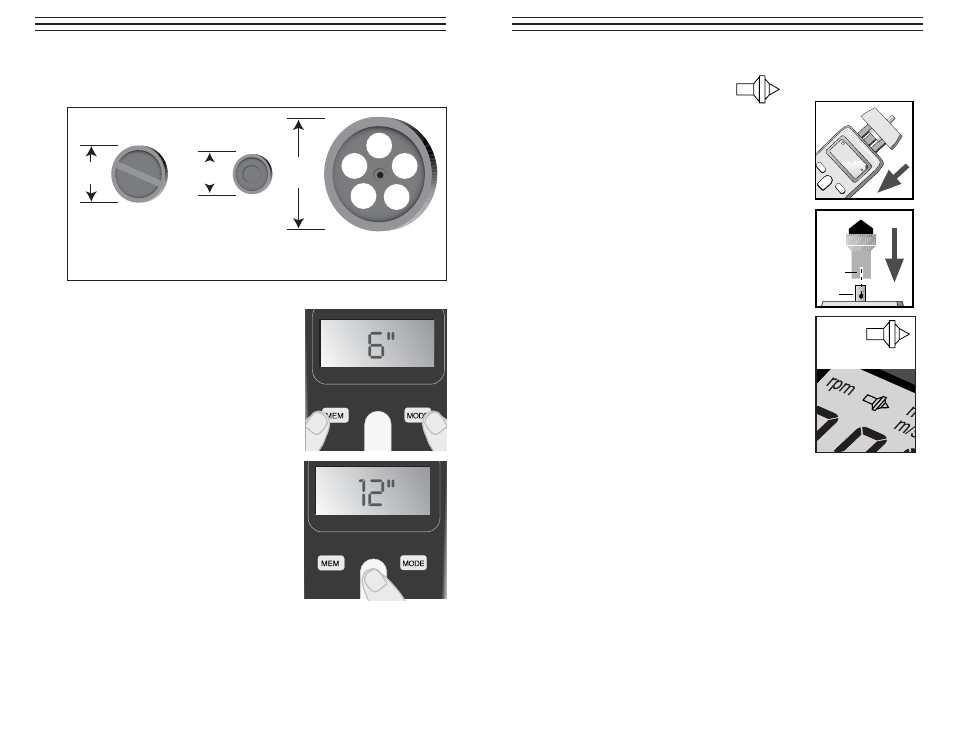
8.0 USING OPTIONAL-SIZED SURFACE SPEED WHEELS
The following wheels can be used with the CDT-2000HD
8.1 Setting Wheel Size
1. Press MEM and MODE keys
simultaneously & release. The
currently selected wheel size will
show in the display
2. Change this setting to match the wheel
being used by pressing the MODE key.
Each time the MODE key is pressed,
the wheel type will change as follows:
6"
➔ 0.1 ➔ 12" and repeat
3. When the correct size is shown on the
display, press the MEASURE key to
select.
NOTE: Factory default setting for wheel
type is 6". If wheel type is changed, the
new setting is retained in memory. When
batteries are changed, wheel type setting
will revert to factory default.
Optional
12" Wheel
Optional
0.1 Meter Wheel
Standard
6" Wheel
1.9"
(49mm)
1.2"
(32mm)
3.8"
(97mm)