For series 22 – California Faucets Builder Series Roman Tub Sets User Manual
Page 2
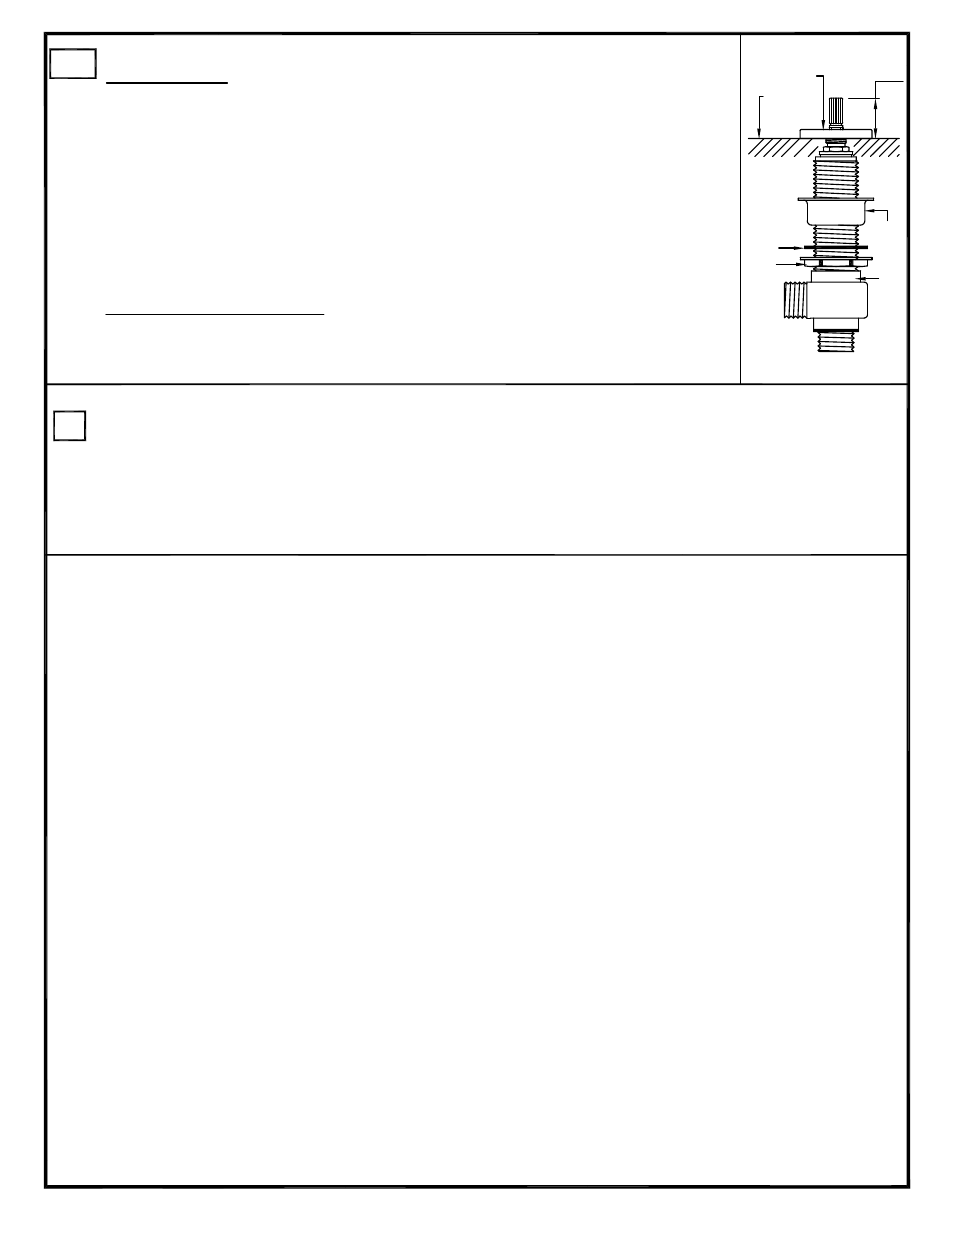
Fig. 3B
Ref. RTBLD2-INSTL
P2
NOTE: Hot & cold valves are labeled: cold=blue & hot=red.
-Loosen handle set screws with Allen key provided. Remove handle, escutcheon, and spacer
cup. Turn bottom nut with fiber washer down the valve until stops and place spacer cup with
flange up back onto the valve body, (repeat for other valve).
-Insert valve through hole from below and install the escutcheon and adjust to proper height,
(See Fig. 3B). Then place handle onto valve broach to verify correct clearance between handle
and escutcheon, (repeat for other valve).
-Align handle in desired position and tighten the bottom nut to secure the valve,
(repeat for other valve).
-Install handles and tighen handle set screws with Allen key provided.
Reminder: Please retain Allen key as handles may require re-tightening with normal use.
Installation Note for series: #22
The trims to these products do not require a top nut & a fiber washer to be installed on the valve,
the escutcheon takes the place of the top nut, (See Fig. 3B)
2B
1 1/8"
Sink/
Countertop
Fiber
Washer
Bottom
Nut
Valve
Escutcheon
Spacer
Cup
Install valve bodies:
For series 22
-Install piping (not provided) to connect hot & cold valves to connector tee (See Fig. 1).
Piping:
3
-It is also recommended that an access panel be provided for all Roman Tub installations.
NOTE:
-The manufacturer recommends the use of hard piping (not flex connections) for all connections.