Adaptive Technologies 4X2-X462-4X-FS User Manual
Page 2
© 2012 Adaptive Technologies Group, Signal Hill, CA 90755 USA (562) 424-1100 Rev.00-01/12
Figure 2
Figure 1
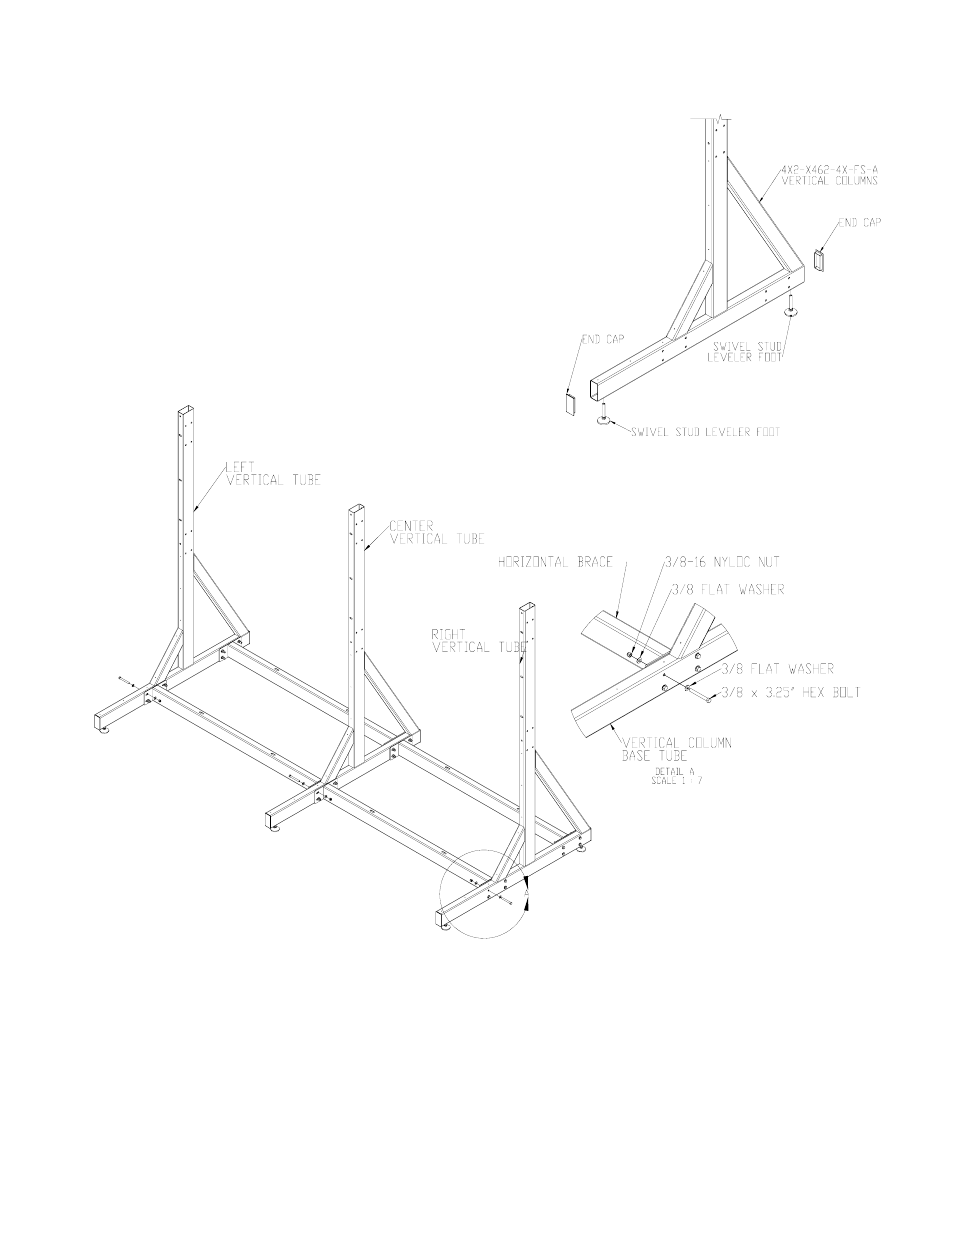
Step 5:
Attach the other end of the horizontal brace’s plate to the center vertical
column side. Insert bolts through the horizontal brace’s plate and into the
side holes of the vertical column’s base. Position another horizontal brace
on the other side of the center verticals column then secure three pieces
together using the provided bolts, washers and nuts. Snugly tighten bolts
(Figure 2)
Step 4:
Attach the left vertical column to the end of the horizontal brace’s plate and
the secure with the included bolts, washer and nuts (Figure 2).
Step 5:
Attach a horizontal brace to the middle and top of the vertical columns
(Figure 3). Snugly tighten bolts.
Step 6:
Adjust the horizontal braces so they will line up with each other. The slots on the middle horizontal brace must line up with the holes on
the vertical columns (Figure 4). Use a Level to horizontally level the horizontal braces.
Step 7:
Line up the fronts of the three vertical columns. You can stretch the string from the left vertical column to the right vertical column and
they should be straight and evenly touches the fronts of the tubes. Once they are line up tighten bolts permanently.