Adaptive Technologies 2X2-X551-VWD User Manual
Page 3
© 2011 Adaptive Technologies Group, Signal Hill, CA 90755 USA (562) 424-1100 Rev.01-08/11
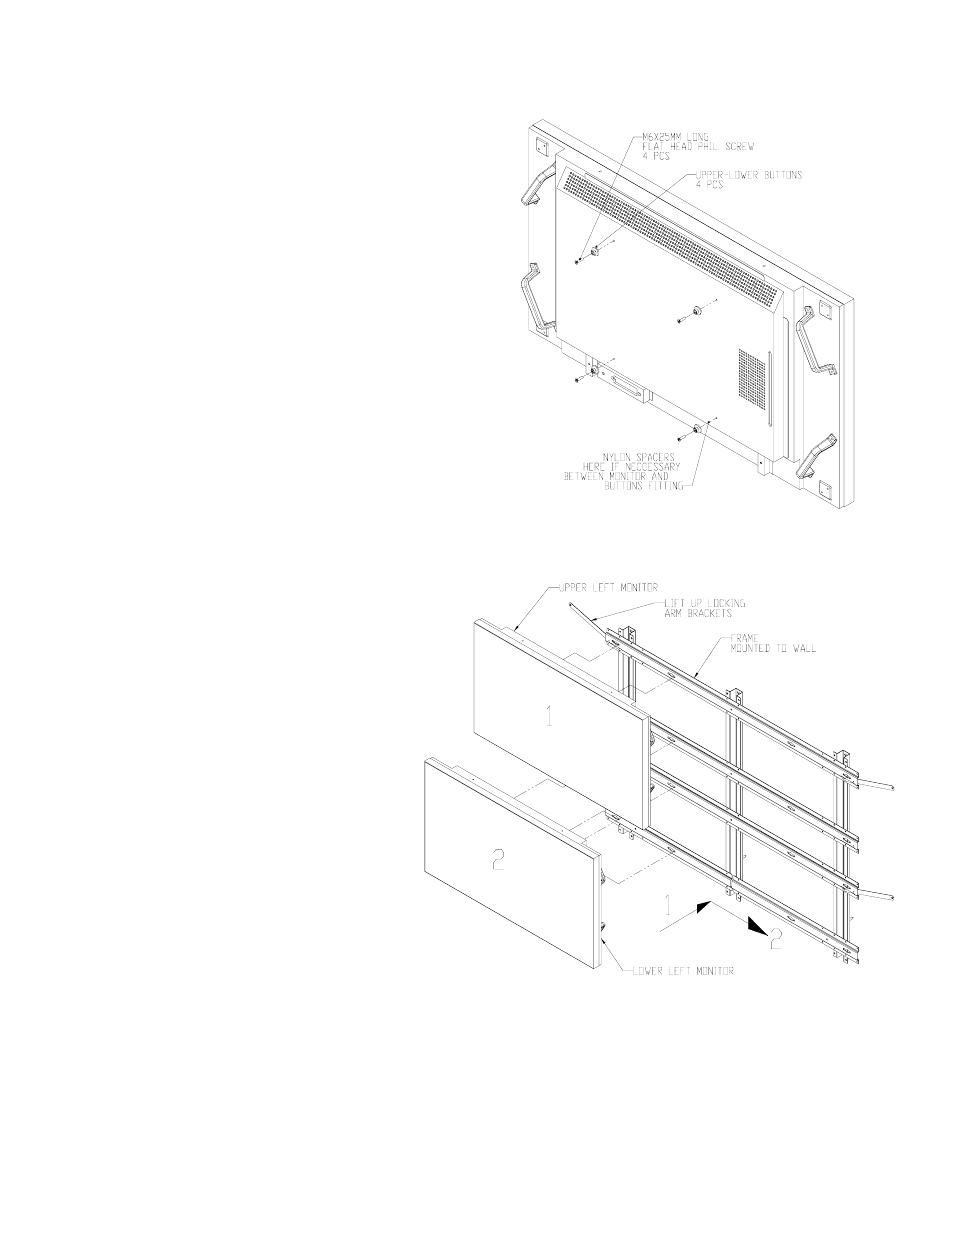
Figure 5
Step 3: Install upper stand-off buttons to monitors
Thread two standoff-buttons (black) into the top VESA mounting
holes in the back of each monitor using the included M6 flat head
screws (Figure 4).
Step 4: Install lower stand-off buttons to monitors
Thread two standoff-buttons (black) into the bottom mounting holes
in the back of each monitor .Tighten permanently (Figure 4).
Important: If the pitch of the monitor needs to be adjusted, add
nylon spacers between the top (or bottom) stand-off buttons and the
monitor.
Step 5: Install Left Column Monitors
Starting with the upper left monitor, connect power and signal wires
to each monitor then align its four stand-off buttons with the four
large holes of the slots in the horizontal channels. Lift up locking
arms then slide the monitor from left to right until it stops then pull
down the locking arm to lock into place (Figure 5). Repeat step 5 for
the lower monitors.
Note on alignment:
While installing monitors, check for front and side alignment of the
monitors. The surfaces of all monitors must be aligned and flush to
each other. If one or more screens are tilted more
than others, remove the screen(s) and, depending
whether the monitor needs to be tilted forward or
backward, apply additional nylon washers as
necessary between the monitor and its machined
fittings buttons (Figure 5). Reinstall and recheck
surface alignments. Repeat where necessary.
Step 6: Install Right Column Monitors
Starting with the upper right monitor, connect power
and signal wires to each monitor then align its four
stand-off buttons with the four large slots in the
horizontal channels. Lift up locking arms then slide
the monitor from right to left until it stops then pull
down the locking arm to lock into place (Figure 7).
Repeat step 6 for the lower monitors. Check for front
and side alignments.
Figure 4