C.R.Plastic Products C34 User Manual
Page 3
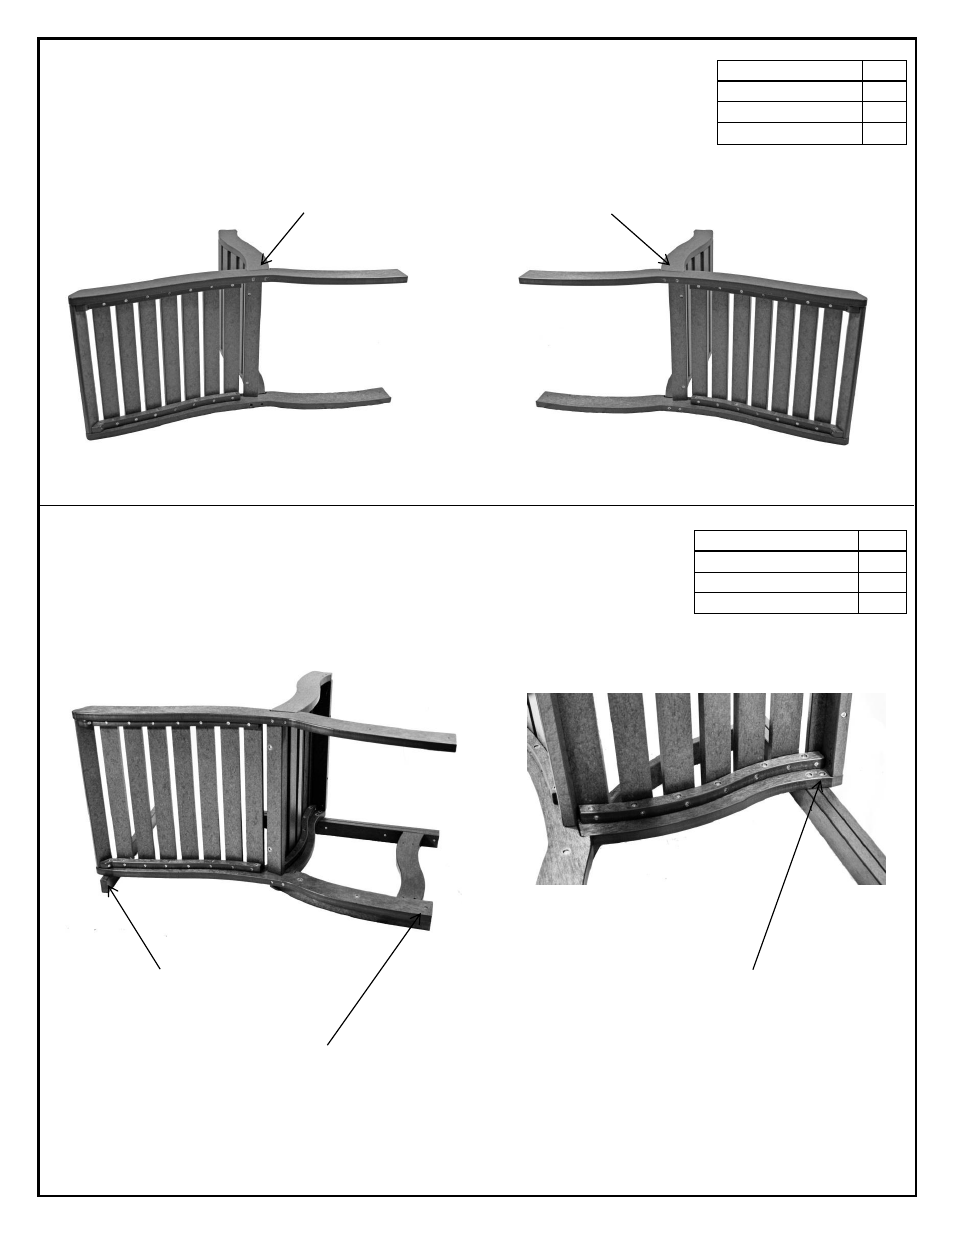
Step 1: Attach seat (A) to Back (B) on one side using 2 - 2
½
” screws.
Step 2: Flip chair over and insert 2 more 2
½
” screws on other side.
Figure 1
Step 3: Attach Left Leg (C) to back leg using 1 - 1
½
” screw
Step 4: Attach front of leg (C) to seat using 1 - 1
½
” screw.
Step 5: Install the remaining 3 - 1
½
” screws.
Step 6: Flip chair over and repeat for Right Leg (D).
Figure 2
Required
Qty
Seat (A)
1
Back (B)
1
2
½
” Screws
4
Required
Qty
Left Leg (C)
1
Right Leg (D)
1
1½” Screws
10
Step 1
Use 2
½
” Screws
Step 3
Place curved leg in center of back
leg, flush bottom and install this
screw first.
Use Stringer (E) to
keep chair level.
Step 2
Use 2
½
” Screws
Use Stringer (E) to
keep chair level.
Step 4
Use scribe line on leg for alignment and
install this screw second.