C.R.Plastic Products C30 User Manual
Page 3
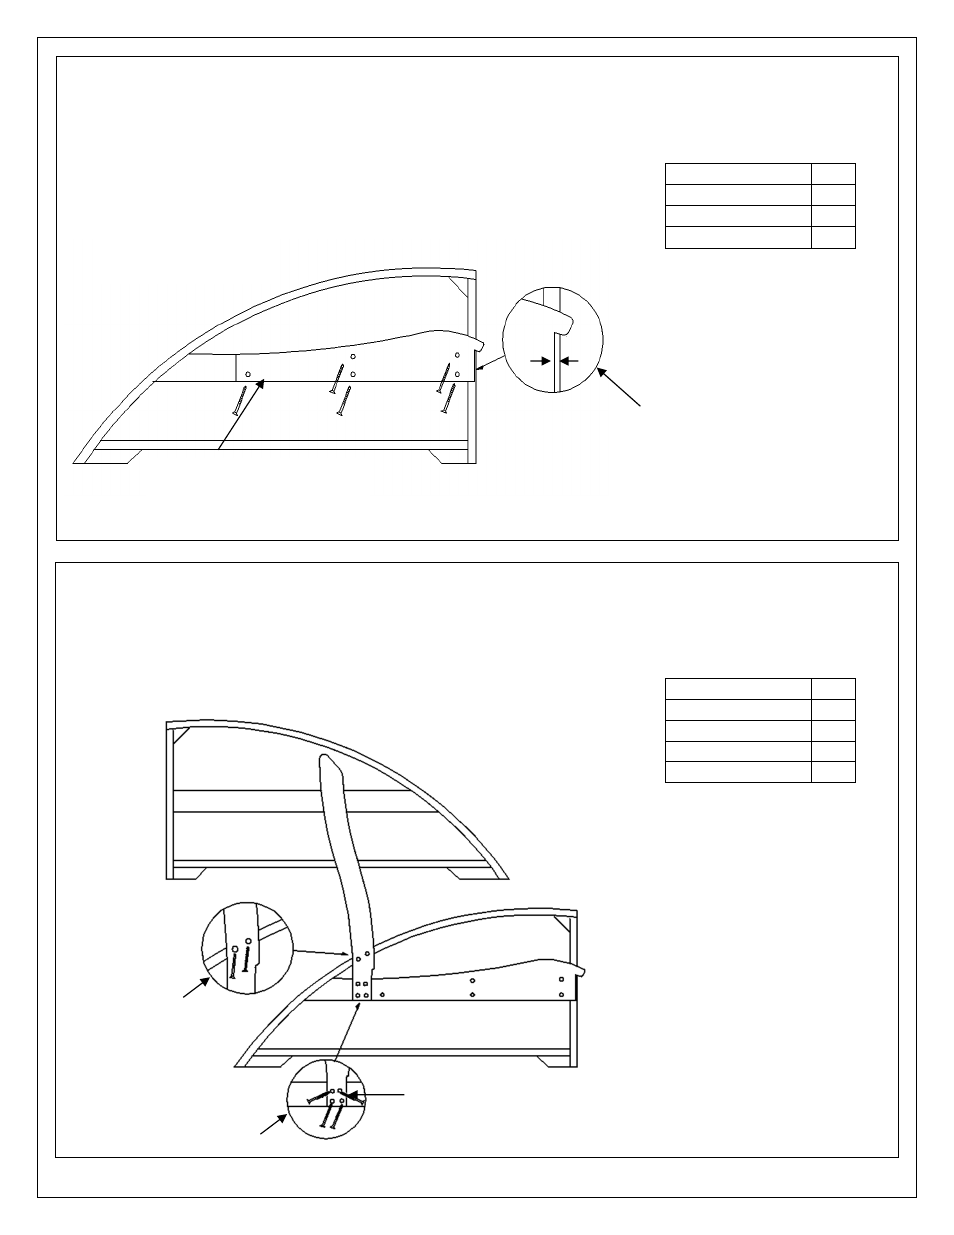
Step 1: Set the Left Arm (B) flat on the floor Fig. 1. Line up seat (A) keeping bottom edge of seat flush with
bottom edge of center rail of arm. Keep front edge of seat back 1/8” from front of leg, (detail X) and
attach with 6 - 1½” screws.
Figure 1
Step 2: Using right arm (C) to balance back Fig. 2. Line up back, (detail Y and Z). Insert 2 - 2” screws to
attach the back to the curved arm rest keeping screw holes centered on arm.
Step 3: Insert 4 - 1½” screws (detail Y).
Figure 2
Required
Qty
Seat (A)
1
Left Arm (B)
1
1½” Screws
6
Required
Qty
Back (D)
1
Right Arm (C)
1
1½” Screws
4
2” Screws
2
Keep bottom edge of seat
flush with center rail of
arm.
Use 2” Screws
keeping screw
holes centered
on arm.
Use 1½” Screws
Use 1½” Screws
only in this step.
1/8”
Keep front edge of seat
back 1/8” from the
front of leg.
X
Z
Y
Keep tight to seat.