C.R.Plastic Products C08 User Manual
Page 4
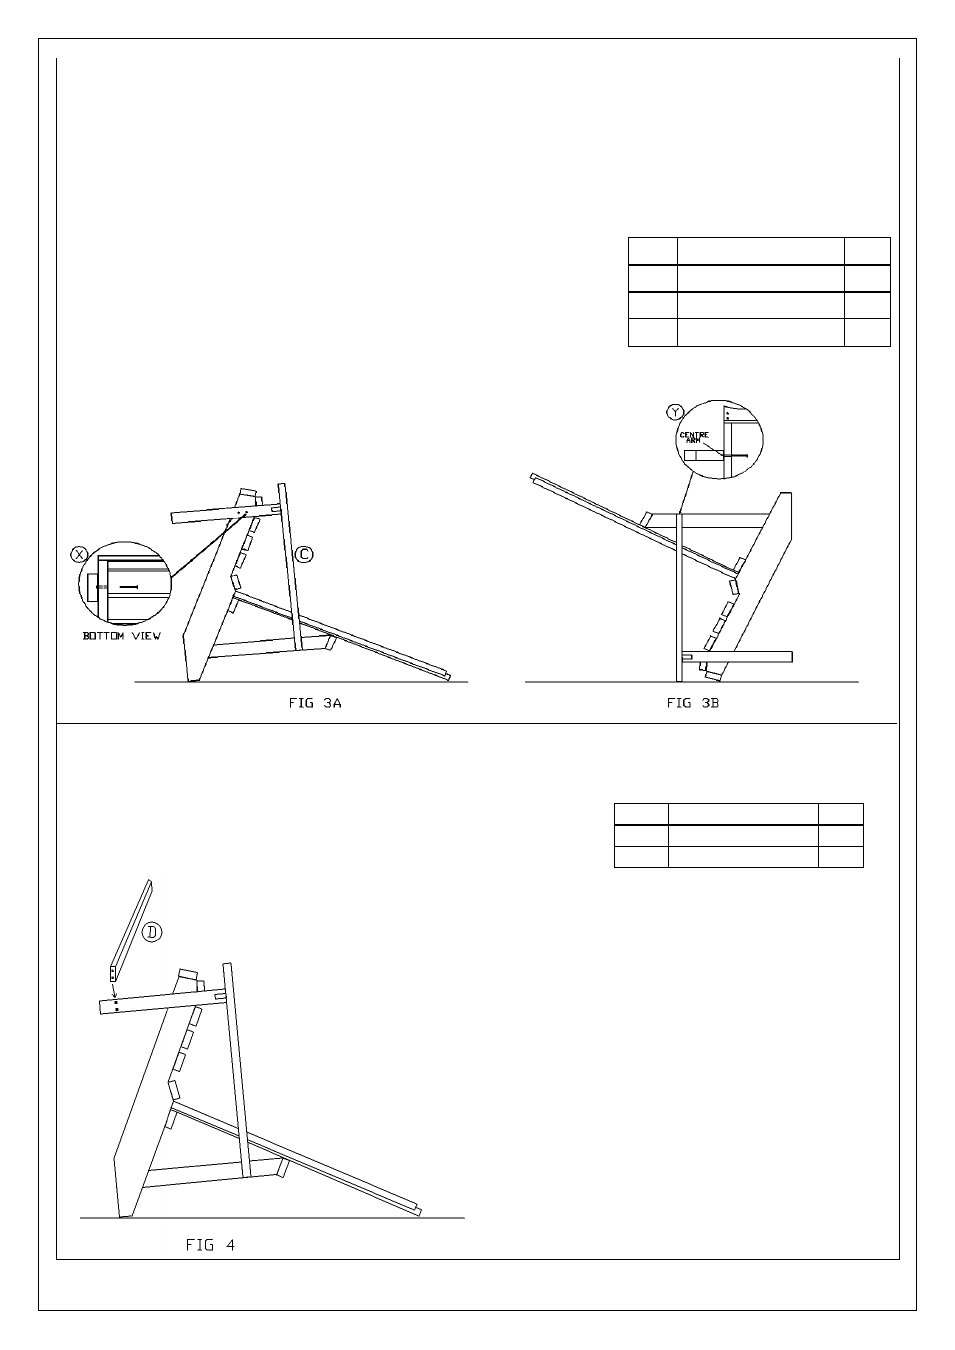
Step 3: Place the assembled Seat and Back on a flat surface as shown in Fig. 3A. Take Left Arm (C) and
attach with a screw as shown in Fig. 3A bottom view X using peck mark for alignment Make sure you
use the top hole as shown. Repeat using Right Arm (B).
Step 4 Stand partially assembled chair on front of seat and arms as shown in Fig. 3B. Fasten back end of
Left Arm to back leg centering as shown in view Y. Repeat for Right Arm.
Step 5 Flip chair back as shown in Fig. 3A and place the final two screws in the front legs adjacent to the
first two screws you put in shown in view X.
Step 6: Place chair on its back as shown and attach Stringer (D) with four screws.
Item
Drawing
Qty
1
Right Arm Assy. (B)
1
2
Left Arm Assy. (C)
1
3
Screws
6
Item
Drawing
Qty
1
Stringer. (E)
1
2
Screws
4