C.R.Plastic Products C03 User Manual
Page 4
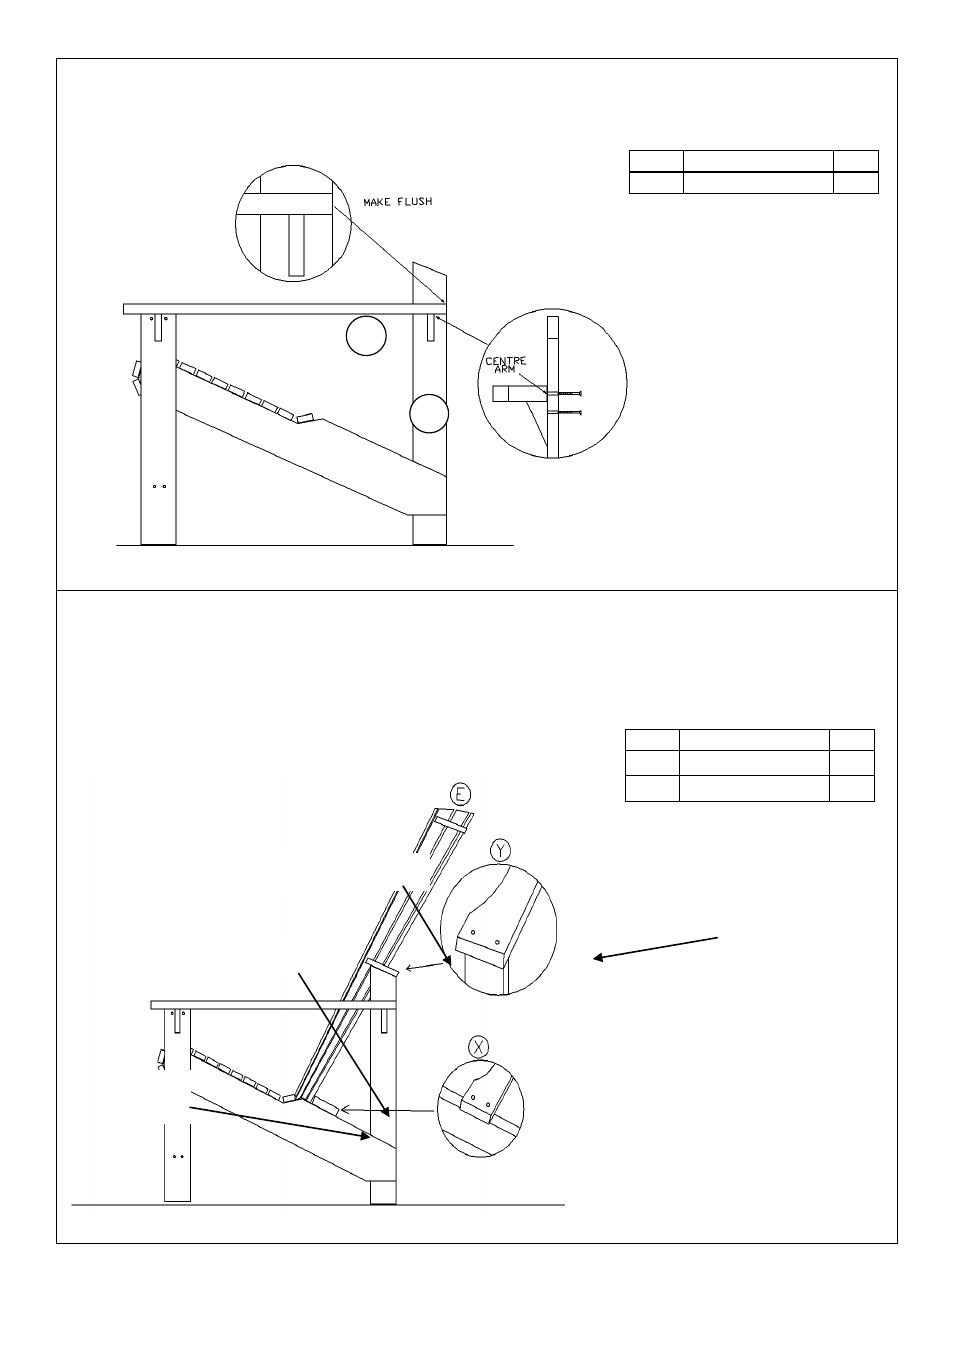
Step 4: Stand the assembly on its legs and secure the Arm (C) to the Back Leg (A) using the upper 2 holes on the
Back Leg (the back edge of the arm should be flush with the edge of the Back Leg). Use a screw into the third hole
on the Back Leg (A) to secure the small triangular block to the Back Leg (A). Repeat for Right Arm B.
Step 5: Note: there are four locations to attach the Back (E). Begin with only one screw at each location, then
adjust the chair so the pieces are square, and insert the second screw at each of the four locations. Place the Back
(E) on the Seat (A) and back legs. Place one screw through the Back lower brace into the indentation in the Seat side
rail (see Fig. X). Repeat on the other side.
Make the back edge of the Back upper brace flush with the back edge of the back leg (see Fig. Y). Secure with one
screw. Repeat for other side of the Back upper brace.
Be sure chair is square, and insert second Screws at each location.
Item
Description
Qty
1
Screws
6
A
C
Item
Description
Qty
E
Back
1
2
Screws
8
Back lower brace
Back upper brace
make these
edges flush
Seat
side rail