C.R.Plastic Products C01 User Manual
Page 4
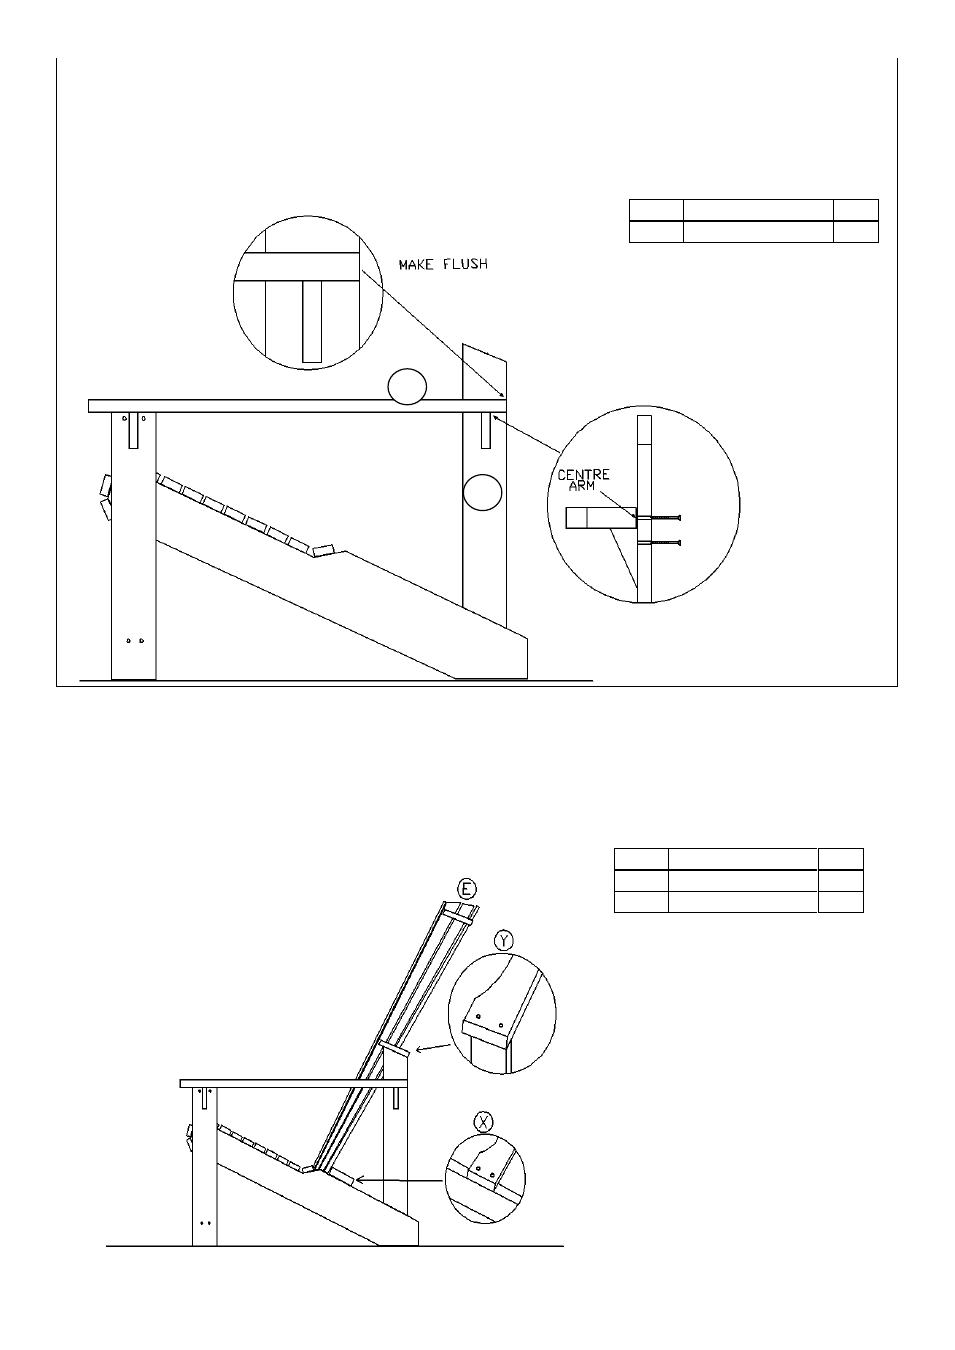
Step 4: Stand the assembled Seat on its legs and secure the Arm (C) to the Back Leg (A) using the upper
2 holes on the Back Leg (the back edge of the arm should be flush with the edge of the Back Leg and
centered on the Arm). Now place a screw into the third hole on the Back Leg (A) to fasten the small block
on the back of Arm (C) to the Back Leg (A). Repeat for Right Arm B
Figure 3
Step 5: Place Back (E) onto the back of the Seat assembly, resting it on top of the Back Legs (A) Place
a screw through the bottom Seat Back Support into the side rail of the Seat (line up the screw with the
peck hole in the rail fig. X). Repeat for other side then fasten final 2 screws. Line up the back edge of
the Top Brace with the back edge of the back leg fig. Y. Place a screw in the pilot hole; center and keep
the back edge flush with the leg and fasten. Repeat for other side then fasten final 2 screws.
Figure 4
Item
Drawing
Qty
1
Screws
6
Item
Drawing
Qty
1
Back Assy. (E)
1
2
Screws
8
A
C