C.R.Plastic Products C01 User Manual
Page 3
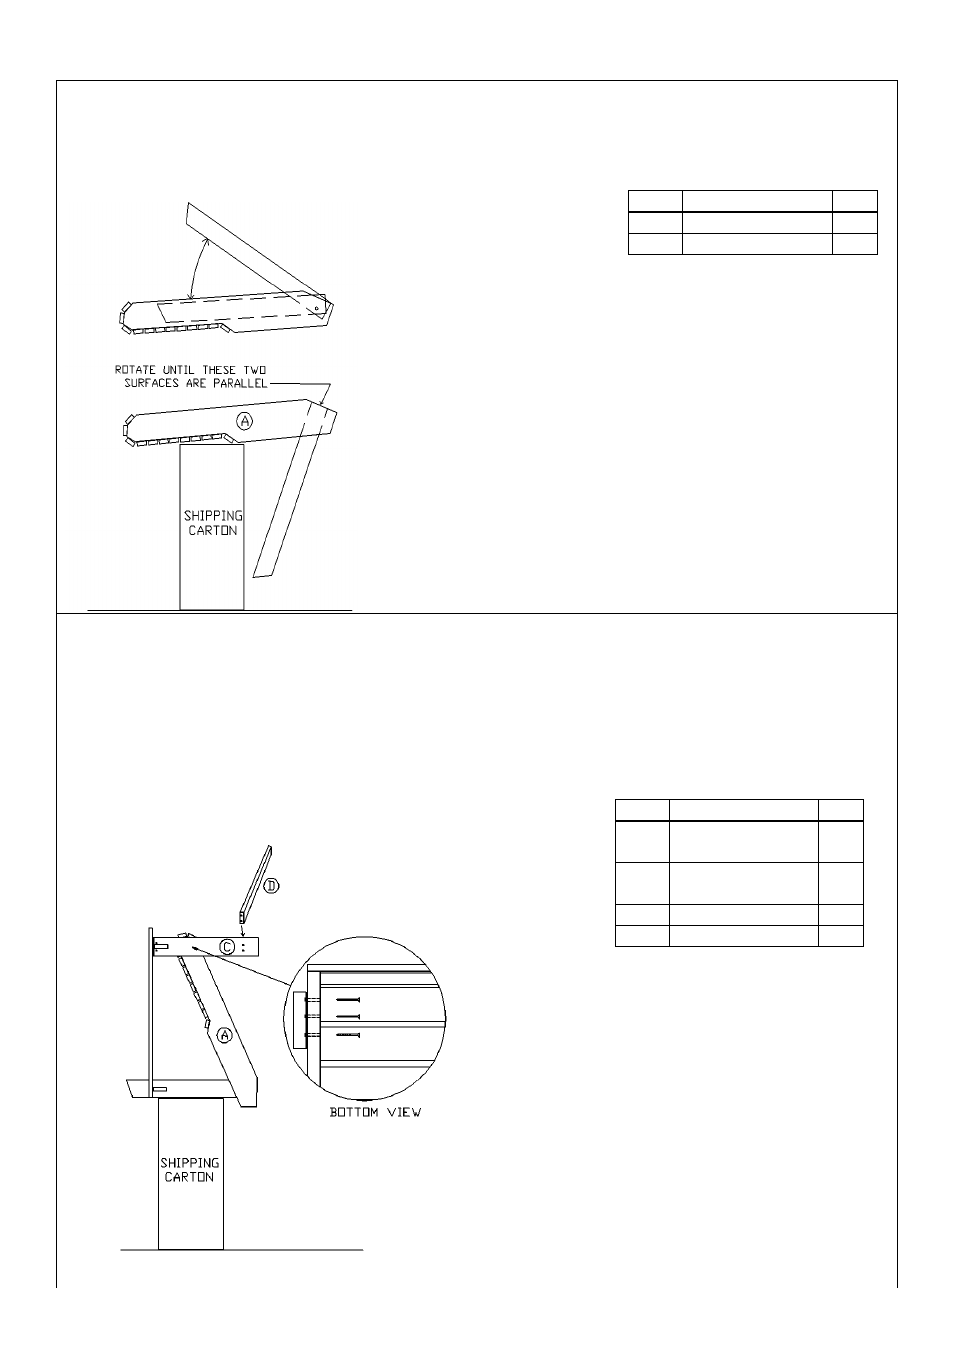
Step 1: Set the Seat and Back legs (A) on the shipping carton with the seat facing down. Using factory
installed screw as a pivot spin the back legs out and downwards until the bottom edges are flush or
parallel to the long angled cut. Put 2 screws in each leg using the counter sunk holes provided. (Ignore the
peck marks in the back legs).
Figure 1
Step 2: Set the Seat (A) on the shipping carton as shown. Take the Right Arm (C), and line up the peck
marks on the inside of the front legs to the 2 pilots in the Seat (A) side that are the closest to the front of
the chair and to the seat of the chair (see Bottom View). Use 2 screws placed under the seat facing
outwards. Secure Arm (C) to the Seat (A) with the 2 screws that you placed under the Seat (the third hole
does not line up to a peck mark, secure a screw through the third hole last). Repeat for Left Arm (C).
Step 3: Attach the Stringer (D) between the two front legs with 4 screws using the peck holes for
alignment.
Figure 2
Item
Drawing
Qty
1
Seat Assy. (A)
1
2
Screws
4
Item
Drawing
Qty
1
Right Arm Assy.
(B)
1
2
Left Arm Assy.
(C)
1
3
Stringer (D)
1
4
Screws
10