Operation instructions – Wilbur Curtis EXPR User Manual
Page 2
2
Fill Canisters Daily
1. Open the front door to access canisters.
2. Rotate the powder delivery elbows upward.
3. The canisters must be removed from the unit for filling. To remove, lift canister slightly while pulling back off the canister tray.
4. Refill all canisters with product, then reposition them on the machine, aligning the gear socket with the gear on the motor shaft.
5. Rotate the powder delivery elbows downward and close the front door.
CAUTION -
Do not use cleansers, liquid bleach, powders or any other substance containing chlorine. These products
promote corrosion and will pit the stainless steel. THE USE OF THESE PRODUCTS WILL VOID YOUR WARRANTY.
Cleaning the Curtis Multi-flavor Beverage Dispenser
Operation Instructions
1. Place your cup under the spout.
2. Decide on a flavor and press the dispensing button for this flavor. Hot cappuccino drink will flow
from the dispensing spout into the cup.
3. Be sure to release the button when the cup is about ¾ full. Hot liquid continues to flow for about
four seconds after releasing. This is to clear the whipper chamber of remaining product.
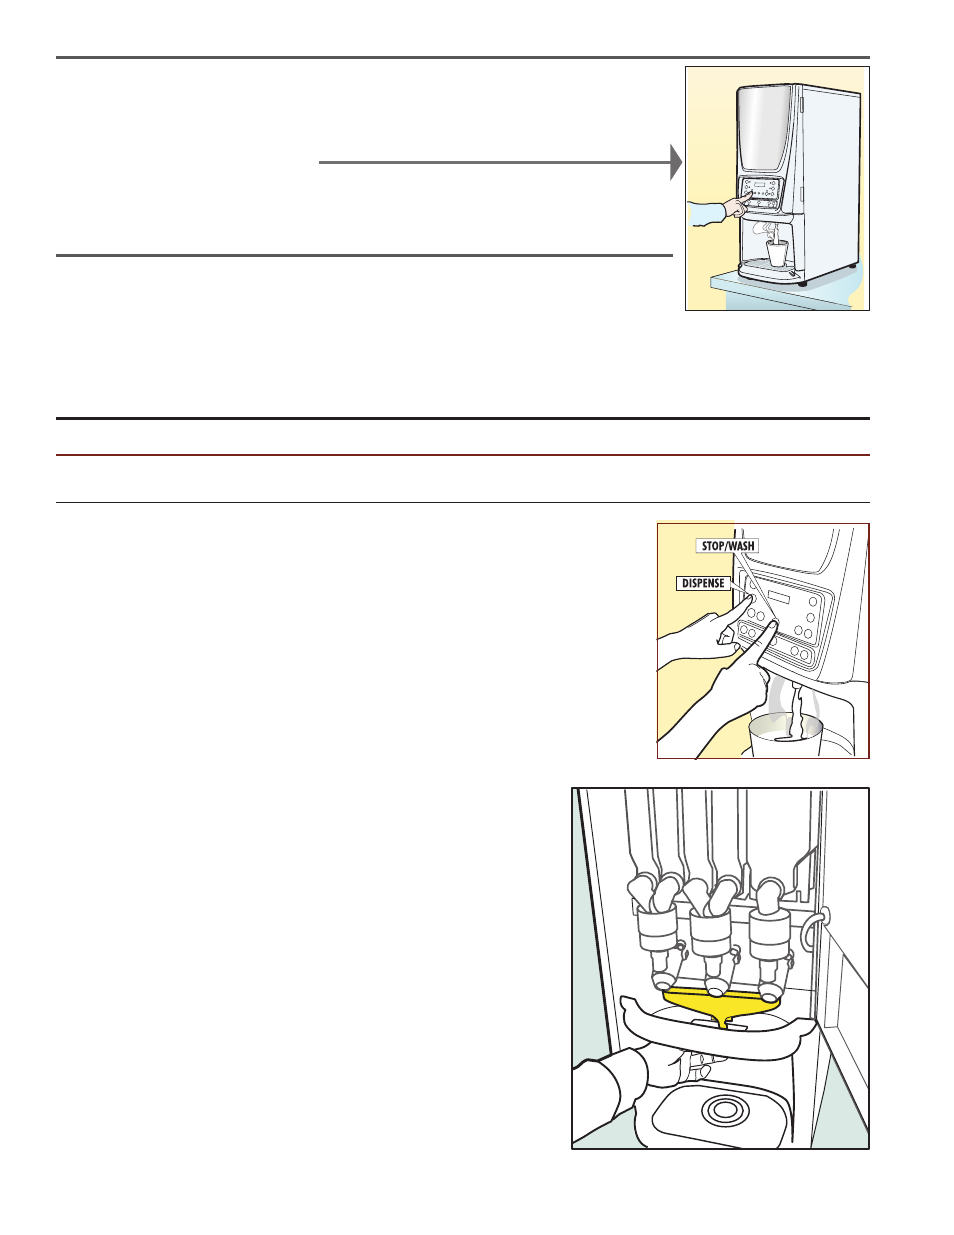
I. EVERY 3 - 4 HOURS OR MORE OFTEN IF NECESSARY
A. Make sure power is ON.
B. Catch rinse water. Place a container on top of the drip tray, below the dispensing spout.
C. Locate the WASH button on the front control panel. Rinse each flavor by pressing and
holding the WASH button, at the same time pressing one of the PUSH dispensing
buttons on the control panel. Continue holding WASH until the rinse water runs clear.
D Dispose of rinse water container and it’s contents.
II. DAILY Refer to the daily cleaning instructions on the inside of the front door, see il-
lustration below.
A. Switch OFF the unit at the power toggle switch, located behind the unit.
B. Wipe all exterior surfaces with a dampened cloth, removing any spills, residue or dust
from the unit.
C. Remove the drip drawer and louvered screen; then wash out its contents. For hard to
clean deposits, use a mild, non-abrasive detergent. Rinse with water.
D. Wipe and clean the dispensing area with a mild detergent cleaner.
E. Switch ON the unit at the toggle switch.
III. WEEKLY OR MORE OFTEN IF NECESSARY
A. Open the front door to locate the whipper assembly. Disassemble and clean
the whipper chamber parts with warm water and a mild detergent.
1. One at a time, lift each canister slightly and rotate the delivery elbow to
point upward.
2. Remove the manifold, pulling back on the spout to release it from the
alcove, (illustration right).
3. Remove the upper mixing cup. Pull cup forward, twist to the left and lift it
to separate the upper mixing cup from the lower mixing cup.
4. To remove the lower mixing cup, pull mixing cup up and forward to free it
from the hot water inlet fitting.
5. Remove the dispensing nozzle from the whipper chamber. Clean the
inside using a narrow brush.
6. Remove the whipper chamber.