Troubleshooting – Wilbur Curtis TCC1N User Manual
Page 7
7
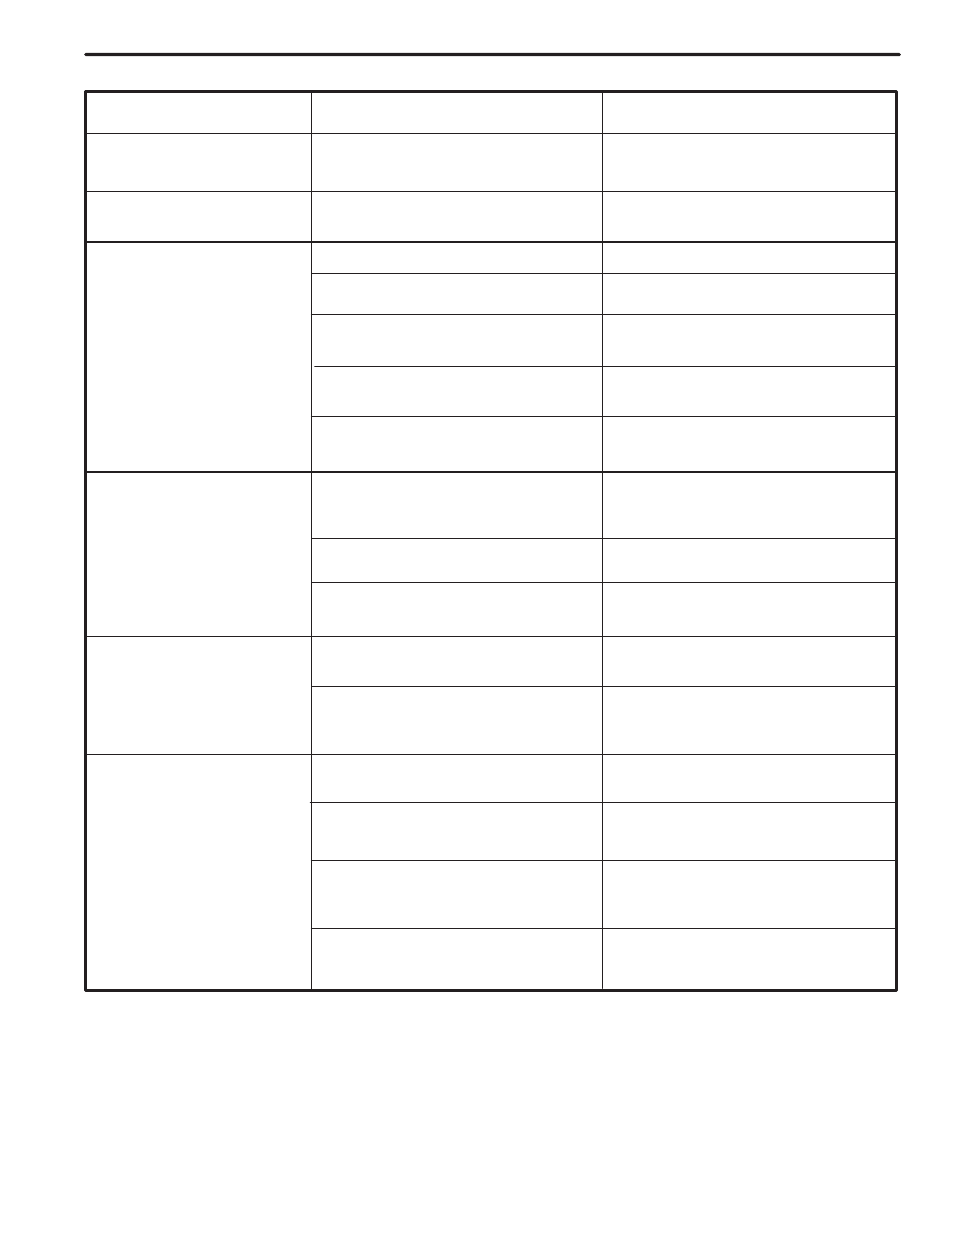
TROUBLESHOOTING
SYMPTOM
POSSIBLE CAUSE
SOLUTION
Difficulty priming the TCC tea
dispenser.
Adjusting rod on mixing valve is turned
in too far.
Open up the valve 1/4 turn counter
clockwise.
Tea does not dispense from
faucet.
Water line is turned off.
Turn on water line valve.
Only water flowing from fau-
cet, no tea.
1. Tea concentrate BIB is out of product.
2. The tea BIB line is kinked.
3. The tea BIB line is clogged.
4. The check valve in the tea concen-
trate line may be stuck closed.
5. The adjustment screw may be turned
in or closed.
1. Replace the tea concentrate BIB.
2. Trace the tea line and straighten out
kinked hose.
3. Blow out hose to clean blockage or
replace with a new hose.
4. Loosen the clamps and remove the
check valve. Clean or replace it.
5. Open the mixing valve to resume
product flow.
Faucet is dripping constantly.
1. The faucet seat cup may have hard-
ened particles keeping the faucet
from sealing.
2. There may be a tear or cut in the
seat cup.
3. Water pressure may be too high.
1. Disassemble and clean the seat cup
(see cleaning section).
2. Replace the seat cup.
3. Call CURTIS CARE for instructions
on adjusting the water regulator.
Finished tea is weak.
1. The mixing valve is out of adjust-
ment.
2. The product check valve may be
stuck.
1. Open the mixing valve to increase tea
concentrate flow.
2. Remove and clean the check valve.
Make sure check valve is installed
with correct flow direction.
Product flowing from the fau-
cet is too foamy or bubbly.
1. The clamps at the check valve may
not be tight.
2. The clamp on the QCD connector
may be loose.
3. Tea concentrate product may have
air in the BIB.
4. The O-ring on the QCD is worn out.
1. Reconnect tubing and tighten clamps.
2. Make sure the barbed end of the
QCD fitting is pushed in on the hose
and the clamp is tight.
3. Turn the BIB so the fitting faces up-
ward and open the faucet until all the
bubbles are released.
4. Replace the worn O-ring or install a
new QCD.