Coffee brewing instructions – Wilbur Curtis G4GEMTIF User Manual
Page 2
2
Your Curtis G4/Gold Cup Series is Factory Pre-Set for Optimum Performance.
After connection to water and power; turn on the brewer at the rear toggle switch. You will hear a beep and the status lights will come on for a moment.
The screen will display
. Next
is displayed. Water will fill the tank (2-3 minutes depending on water flow rate).
When the proper level is reached
will appear on the screen. It takes approximately 30 minutes to reach the set point temperature.
Control will display
when temperature reaches the set point. The unit is now ready to brew.
MODEL NUMBER
CONTROL BD NUMBER
READY TO BREW
HEATING
FILLING
1. Brewer should be ON. Confirm this at the toggle switch on the back of the brewer. The touch screen should read Ready to Brew.
2. Place a clean, empty satellite on the warmer deck.
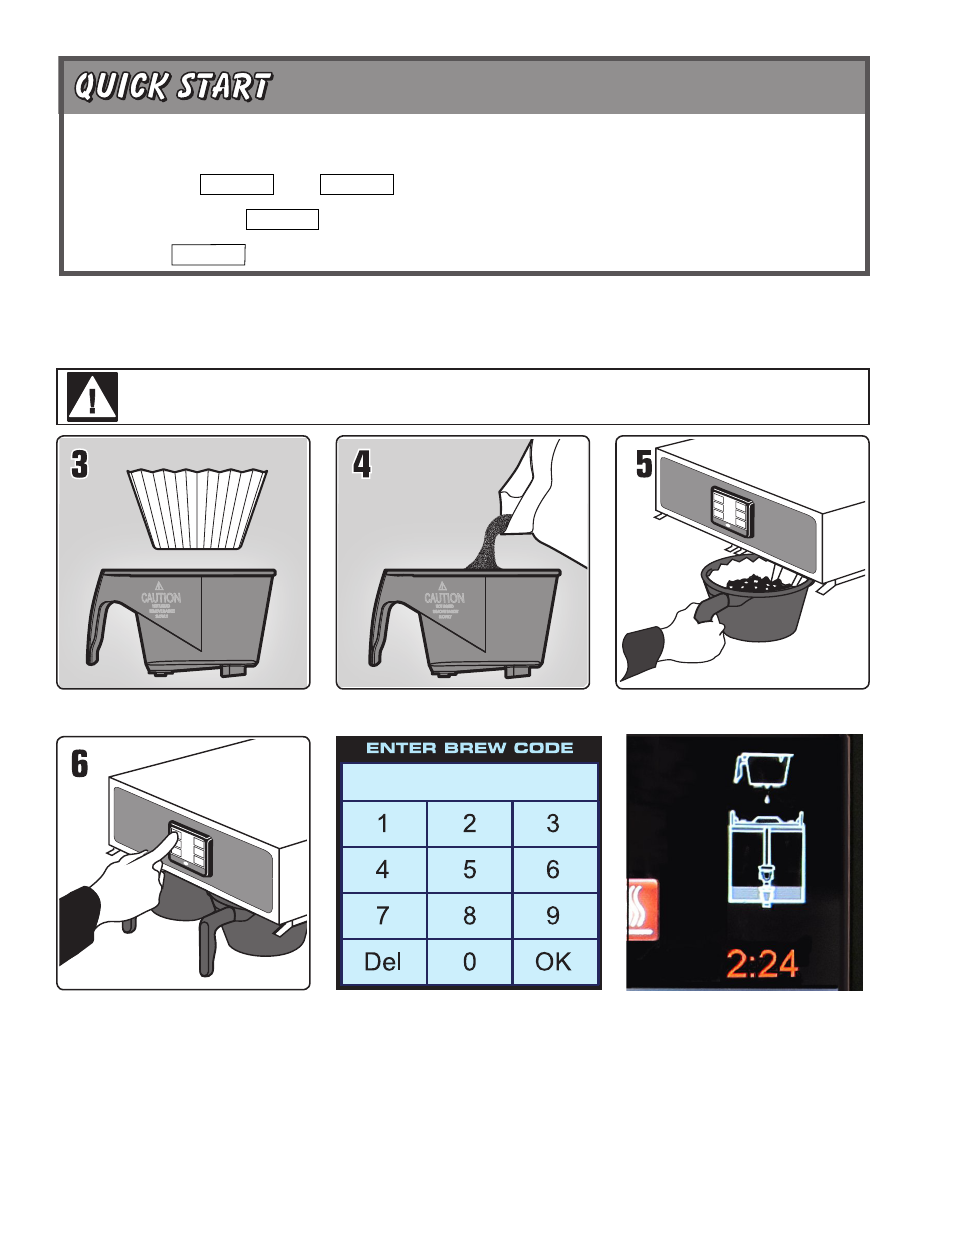
6. Start the brew cycle by hold your finger
on the desired brew icon. As soon as
you hear the click of the brew valve, the
brew cycle has started and you can lift
your finger.
Brew Code: You may find that when a brew
button is pressed, a key pad appears on the
5. Transfer the filled brew cone to the
brewer.
3. Place a new paper filter into the brew
cone.
4. Fill the brew cone with the proper
amount of ground coffee.
COFFEE BREWING INSTRUCTIONS
WARNING – AVOID SCALDING: The brew cone may be filled with hot coffee grounds.
The coffee vessel is heavy when full. Take precautions to avoid dropping when moving.
screen. This is a brew lock-out feature that
requires a code to be entered before a brew
will start. The default is OFF.
CAUTION: When enabled, as soon as you
enter the brew code a brew cycle starts.
Refer to page 8 for information about setting
the Brew Code.
During the brew cycle, an animated 1½
gallon satellite server icon will appear on the
screen and a brew timer will count down the
time remaining on the brew cycle.