Cleaning the satellite server, Cleaning the coffee brewer, Liquid level probe – Wilbur Curtis G4GEMTIF User Manual
Page 15
15
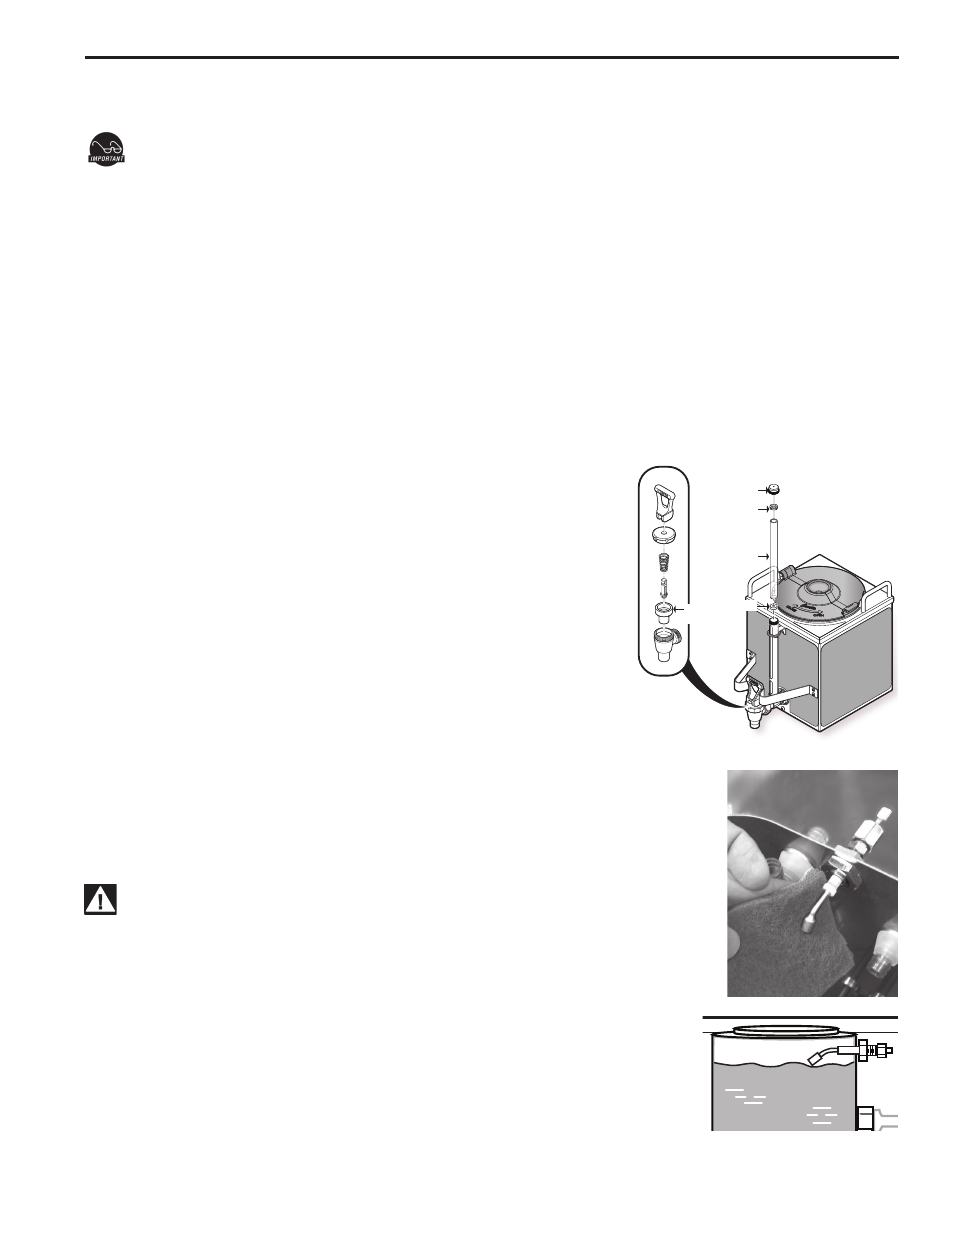
CAP
WASHER
GLASS TUBE
WASHER
SEAT
CUP
Cleaning the Satellite Server
To clean the Satellite components, prepare a mild solution of detergent and warm water..
DO NOT immerse the Satellite in water or any other liquid.
1. Remove lid from Satellite. Clean the lid at the funnel area with a spiral brush and detergent solution.
2. Rinse the lid, removing all traces of cleaning solution.
3. Clean inside of the Satellite. Remove coffee residue with the detergent
solution.
4. Thoroughly rinse out the Satellite with clean warm water.
5. Unscrew the handle/bonnet assembly and remove it from the dispens-
ing faucet.
6. Inspect the silicone seat cup for wear, cracks, or hardening. If okay,
then leave the seat cup attached on the handle/bonnet assembly. Soak
then wipe clean. Replace the seat cup if damaged.
7. Remove the gauge glass tube by unscrewing the gauge glass cap.
8. Clean the gauge glass tube with a gauge brush soaked with detergent
solution. Soak and wipe the two washers. Rinse with clean water. Dry
the parts and assemble them onto the Satellite. Hand tighten the cap.
9. Clean all parts. Thoroughly rinse with clean warm water.
10. Dry and assemble the parts. Hand-tighten when assembling.
Cleaning the Coffee Brewer
Regular cleaning and preventive maintenance is essential in keeping your coffee brewer looking and working like new.
CAUTION – Do not use cleansers, bleach liquids, powders or any other substance containing chlorine. These
products promote corrosion and will pit the stainless steel. USE OF THESE PRODUCTS WILL VOID THE
WARRANTY.
1. Wipe exterior surfaces with a moist cloth, removing spills and debris.
2. Slide the brewcone out and clean it. Clean the sprayhead area with a moist clean cloth.
3. Rinse and dry the brewcone.
4. Drain drip tray of coffee. Wash out the drip tray. Dry the tray.
5. Rub a stainless steel polish on the outside surfaces to protect the brewer.
Liquid Level Probe
Cleaning intervals for the probe are to be determined by the user or the service tech, based
on water conditions. The use of water filters, or the type of water filter that is being used
can impact the service interval. Intervals can be from one month to several years, however,
replacing rather than cleaning the probe is preferable.
WARNING: Disconnect electrical power before removing access panels!
This procedure involves working with hot water and hot surfaces!
1. Unplug the power cord and shut off the water line.
2. Remove the top cover of the unit. Locate the top of the tank and remove the cover.
3. Drain the tank to a level about 3” below the tip of the probe.
4. Allow some time for the probe to cool before working on the brewer.
5. Clean the tip of the probe using a Scotch-BriteTM scuff pad.
6. If scale is still visible, remove the probe and soak it in vinegar or a scale removing
chemical.
7. When assembling the probe back onto the tank, make sure the tip of the probe is
pointing downward as illustrated.